Finally we have arrived!
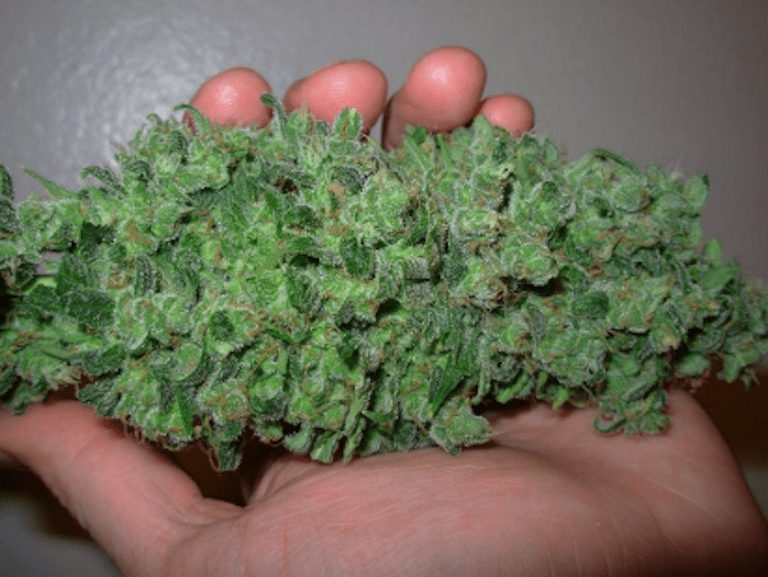
A bountiful harvest is the payoff for all the hard work, research, risk, and investment you put into your garden (not to mention the long, patient wait). A properly executed harvest is essential to ensure the highest quality cannabis.
To help you out, here are the best american seed banks that work in any country.
When To Harvest
Harvesting your plants at the precise time will allow for maximum bud growth and THC production (potency). After a certain point, THC will begin to break down losing quality and potency.
There are several important points to consider when choosing the optimum time to harvest your marijuana crop. There are different factors to consider between indoor and outdoor marijuana plants. There is the difference between Sativas and Indicas in bloom duration and final effect. There is the difference between early and late harvest to encourage head to body high. There is also the issue of chemistry because what we are really considering in terms of the ripeness relates directly to the chemical nature and state of the plant at harvest.
Some growers feel that harvest timing is a matter of personal preference. When the glandular trichomes are clear with very little, if any coloration, THC levels are at their peak with CBD and CBN both at levels that will not overly influence the THC with their sedative effects. Some prefer more overwhelming narcotic type effects, allowing the resin glands to cloud and begin to amber or darken to increase overall cannabinoid content. The resin glands appear and therefore will mature at different times. A compromise is made when determining the desired overall maturity level to harvest. It depends on the growers preference in effect and palate.


The “Window” For Marijuana Harvest
This term indicates the period during which the plant is at its optimum state of ripeness. The window opens when the plant is first ripe. Somewhere along the line the plant becomes over-ripe which signifies the closing of the window of harvest. For most Indicas grown indoors, the window of harvest is about two weeks long give or take a couple of days for various strains. Indoors, if going directly from an 18/6 hour vegetative light cycle to a 12/12 hour bud cycle, most Indicas take about eight weeks to fully mature. As to outdoors at the 45th parallel and the bloom times there. At the 45th parallel most Indicas to be at peak harvest starting at the beginning of October, sometimes very late September, and running until the end of October, sometimes running into November during mild years or in a greenhouse. Many outdoor growers like to harvest Indica outdoors in the second to third week of October. For Sativa grown either indoors or outdoors, the window may be open much longer. Some Sativas take up to thirteen weeks to mature indoors. Outdoors many will go well into November and even December, if conditions are right (again, this is near or at the 45th parallel).
Type of High
An important consideration has to do with one’s preference for a head high or more of a body high. A good head high can positively influence one’s mental state much like a psychedelic; whereas a good body high is more similar to a narcotic “couch potato” effect. Generally, head highs tend to be more up and body highs tend to be more down. A good healthy mix of the two is a fine goal to achieve. Sativas and early window harvests tend to be more of a head high, whereas Indicas and late window harvests tend to be more of a body high. Given this rule of thumb you can pretty much come up with what you want. If you prefer a very psychedelic head high then an early harvested Sativa will probably be best. If a very narcotic body high is desired, then a late harvest Indicas would probably do best. For that best-of-both worlds high, experimentation with late harvested Sativas and early-to-mid harvested Indicas would be ideal.
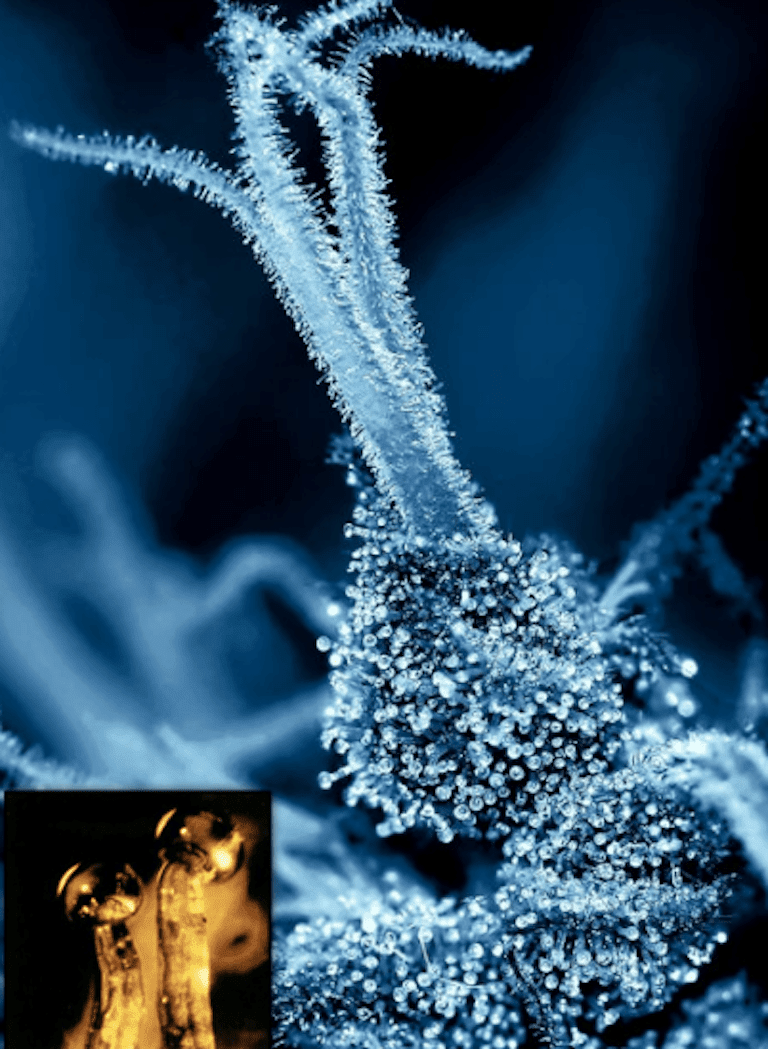
Trichomes
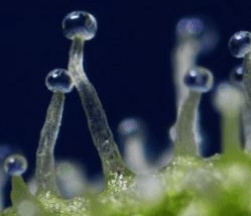
 When we speak of various highs experienced by different products, we are noting variations in plant chemistry. The chemicals we enjoy are produced within the glandular stalked trichomes, along the surfaces of the bud flowers (calyxes), bracts, leaves and stems, starting in or around the fourth week of the bud cycle. More and more of these trichomes develop as the plant matures. As far as trichomes are concerned, the tall ones with swollen, clear, bulbous heads are what to shoot for. The denser the concentration, the greater the potency.
The best way to determine when to harvest is to examine the maturity of the trichomes – their level of maturity gives you an idea of both how mature the plant is and the effects you can expect from the plant if harvested at a given stage.
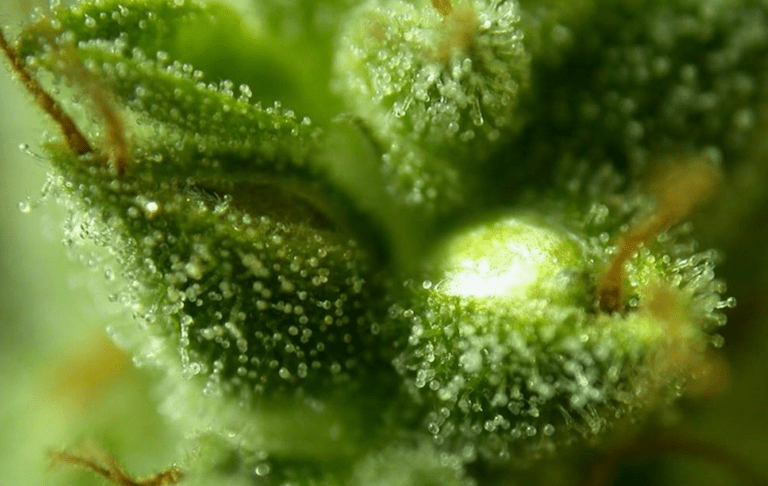
Trichomes are stalks with a head at the tip, it is the tips that you will look at. You will want to look at the trichomes in a couple areas over the plant to get a good idea of the plant’s overall maturity. The tips start out clear, then later they will begin to cloud, finally the tips will turn amber. Clear trichomess aren’t very potent; the ratio of cloudy to amber is really what you want to look for. The more amber the trichomes the more of body physical stone the pot will deliver.
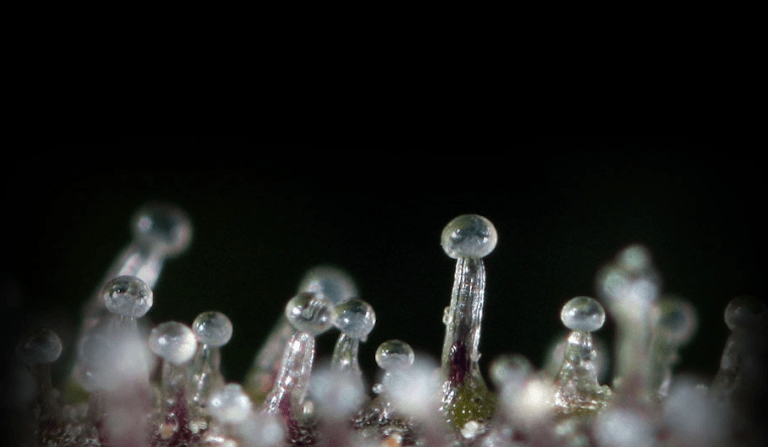
A heavier ratio of cloudy will deliver more of a soaring mental high. All of this is of course relative to the general effects provided by the strain. Most harvest at 30-50% amber, professional growers recommended to never go beyond 75% amber.

Trichomes start out clear, turn a milky color, then turn amber (light brown). This is the “red hair” you see on fully matured bud. As the THC builds up in the gland, which holds the head, swells and strains the membrane. The gland begins to look like a mushroom.
On your first harvest, if you are having a hard time judging when to cut the plants down, a good rough guide as to when to harvest a plant is to wait until 50%-80% of the white pistils (hairs) have turned dark (usually brown or red) and about 50% of the trichomes start to turn amber.
WARNING: Almost all marijuana strains will have trichomes that will turn color, but some people who grow marijuana have come across strains that don’t.
After Flowering For…
- A few weeks – trichomes start to turn a milky color.
- A couple more weeks – trichomes will be totally milky in color.
- The later stages of flowering – trichomes will turn a light brown color.
Note: The amount of time required to get to this point depends on the marijuana strain and the growing conditions.
Other Factors:
- Your plant stops producing crystals.
- Your plant stops producing resin.
- The fan leaves and lower leaves have turned yellow and are starting to drop off.
- The smell has reached its peak.
- Bud mass has not increased at all in the past few days.
When grown indoors most marijuana strains will be ready to harvest within 7-12 weeks after starting a flowering light cycle (12 hours on and 12 hours off). Most mainly Indica strains will be ready to harvest in 7-9 weeks. Mainly Sativa strains can take up to 12 weeks to reach maturity.
If you are at the third stage of floral maturity with fully-formed trichomes, you can assume most strains have packed on all their final weight.
Use the guidelines spelled out below to help gauge the best harvest window for your plants based on the trichomes:
- Fully-formed but still clear will provide a cleaner ‘up’ high with less sedative effect; this is the best window for heavy Indicas.
- Fully-formed and turning slightly cloudy or milky; this is probably the best time to pick most hybrids available today.
- Fully formed completely cloudy or milky with at least 30% of the heads turning amber; this is usually best window for the late maturing Sativa’s such as Haze. This is also a good window when using the plant primarily for Hash production.
Viewing Trichomes
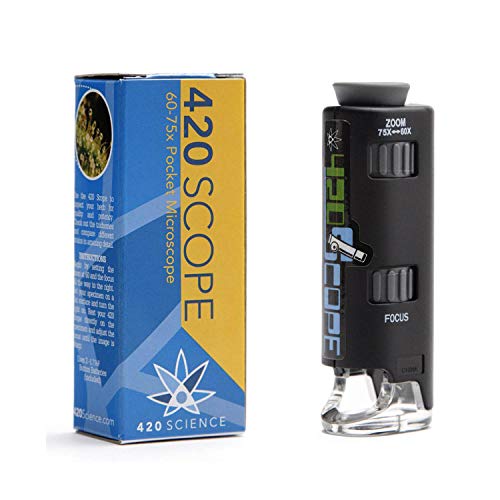
In order to properly examine trichomes you will need a pocket microscope or similar tool. 60x is perfect. I highly recommend that the serious cannabis student acquire a 60X power, handheld illuminated magnifier. Cheap ones can be found at most local electronics stores. With the aid of the magnifier one can learn more about the detail of trichome development and ripeness. The view of your buds is awesome!!
A 60-100X lighted magnifier is a tool any grower serious about harvest timing should have. They make it extremely easy to monitor the resin development process. A 100X magnifier will offer you an incredible view of your plant’s trichomes – providing an enhanced perspective of resin gland condition and development.
 One very popular, high-quality, handheld magnification device used amongst elite growers today is 420 Science’s 420 Scope. The 420 Scope is a powerful hand-held microscope specifically designed for the entire 420 community. Medicinal patients, growers and midnight tokers alike can use the 420 Scope to look for bugs, molds, mildews, ripeness, potency or simply just to admire the beauty of Cannabis. Bright, ultra-white LED light, 60-100X magnification, & long-lasting battery life. And it’s only 24.95!
A 60-100x pocket microscope allows for a much closer inspection of the clarity, color and condition of the resin glands, which should be swollen and unbroken while remaining transparent and slightly amber, if at all, at the peak of ripeness. Some prefer harvesting earlier, as THC degrades to more sedative cannabinoids as the glands ripen. This is key.
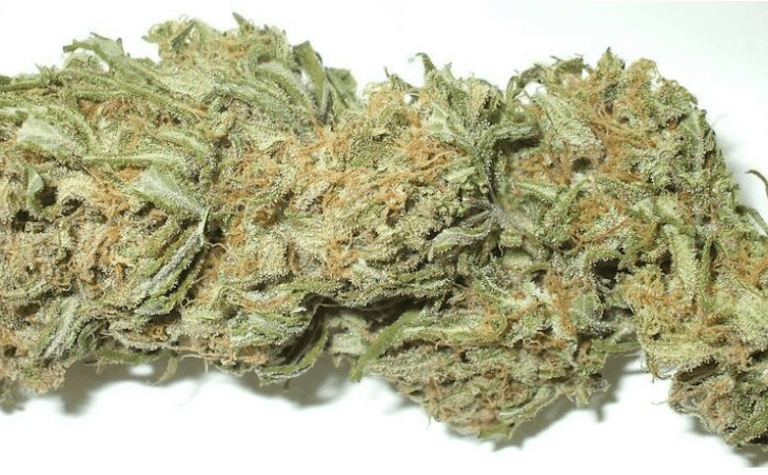
Many agree the ideal time to harvest the plant is when 3/4 of the white pistils hairs have turned brown. They should appear amber right before you cut the plants. If they are clear the resin has not reached full potency. If they are brown then the resin has already peaked and potency is declining rapidly. Be sure to look for the white hairs to turn red, orange or brown, and the false seed pods to swell with resins. When most of the pistils have turned color (~80%), th flowers are ripe and that is a good indication to harvest.
Warning: Don’t touch those buds! Touch only the large fan leaves if you want to inspect the buds, as the THC will come off on your fingers and reduce the overall yield if mishandled.
Plant Maturity for Frosty Buds
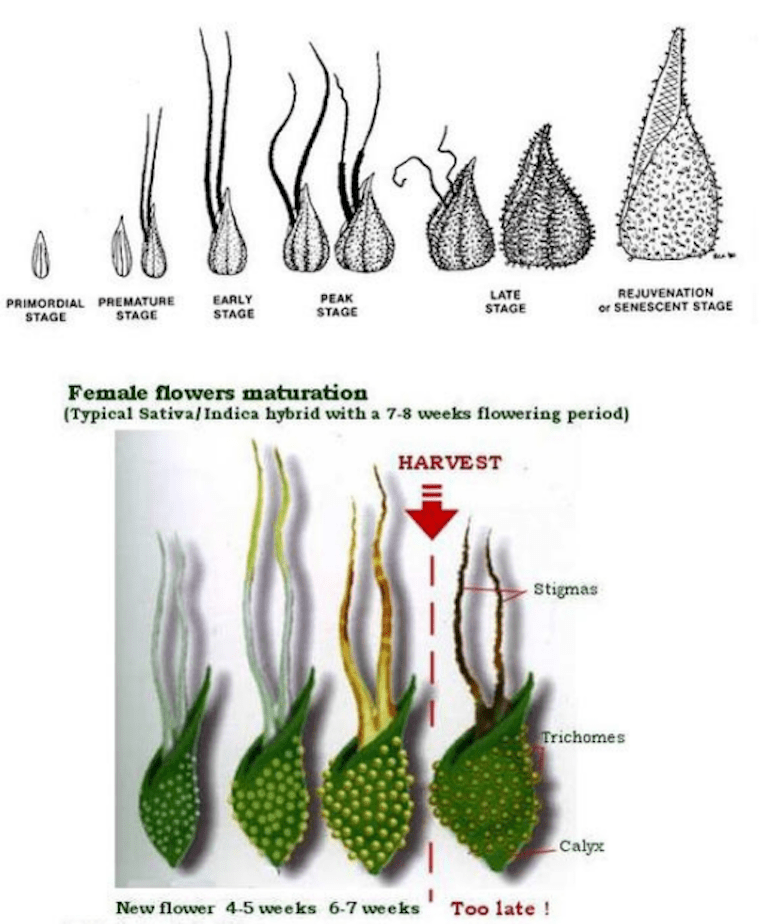
Starting in the third or fourth week of the flowering light cycle, glandular stalked trichomes will begin to form along the surfaces of leaves, flowers, bracts and stems. At the same time, more and more flowers (also called calyxes) develop into densely-packed floral clusters. The pistils of the young flowers are bright white and turn reddish brown with age. Typically, the pistils and flowers develop from the bottom of the bud to the top. The older, lower pistils are the first to turn reddish brown. For most basic Indicas this usually happens by the sixth week in the flowering cycle. It is about this time that the calyxes begin to swell.
Calyx swelling is a major indicator of peak maturity. The lowest, oldest calyxes swell first and the swelling works its way up to the highest, youngest flowers on each bud. At peak maturity about 90% of the calyxes will almost look seeded they are so fat. Three quarters to 90% of the pistils will have turned reddish brown as well. For a basic Indica, this happens well into the seventh week of the flowering cycle.
By the end of the eighth week most of the calyxes will have swollen and a surge of trichome development has coated most of the buds. Patience is key during these delicate stages. The ripening signs for most Sativas are highly similar, except extended over a longer period of time. Occasionally, some Sativas have windows of peak harvest that actually open and close. That is, for a week or so the plant may exhibit signs of peak ripeness. However, a week later the plant may have a growth spurt, which lowers the trichome-to-fibre ratio and overall potency for a little while. Usually a fibrous growth spurt is accompanied by a trichome increase. Again, time and experience are the key elements in determining the perfect harvest time.
Changes In Chemistry
As the plant matures through its “window” of harvest its chemistry changes. As the window closes, the more desirable compounds begin breaking down into less desirable ones. Primarily it is THC breaking down in CBNs and CBDs. Which particular combination of chemicals is the most desirable is purely a matter of taste and choice, developed over time and with experience. Set and setting also play an important role in determining which type of product is best appreciated. Pleasant head highs are often desirable for social occasions, whereas a narcotic late-window Indica may work better as an evening medicinal herb. The main point is that these differences are chemical in nature and more research is needed to more fully understand this phenomenon. Another important point is that much can be done to further enhance the chemical process, especially in regard to bouquet, aroma and flavour (that is, as long as the proper curing process is followed).
The Best Time to Harvest
The question of when to harvest cannabis plants is a question that puzzles many new growers. Most farmer’s goal is to pluck the fruit at the exact moment when the potency of the bud is at is peak. Realistically, the skills needed to detect the specific day (or even hour) when a plant is at its peak can only be acquired through years of experience. However, even the novice grower should be able detect the window of time during which the harvest results in premier crop of outstanding dank bud.
Maturity and THC: Most growers consider the plant to be mature when the percentage of THC found in the plant reaches its maximum. It is not practical for the average grower to actually measure THC in a plant, as the chemistry is somewhat complex (not to mention measuring THC requires practically a full blown laboratory and is quite a daunting task indeed!). In a growing plant, each successive pair of leaves contains more THC than the previous pair. The budding tips of the plant contain the most THC of all. Both male and female plants contain THC. Some research has shown that in the early stages of growth the males actually contain more THC than the females. Many growers feel it is worth cutting and sampling shoots before the THC has reached its maximum.
Plant Size: The size of the plant has little to do with its maturity. Outdoors, a plant might reach a height of over eight feet (2.5m) and still not be ready for harvest. Indoors, mature, budding plants can be under 18″ (.5m) high.
Photoperiod: The age of a plant has little to do with its maturity level. How quickly a plant matures is mostly dependent on the amount of light the plant receives each day (photoperiod). Typically, a plant will transition from the growing (vegetative) stage to the budding stage when the light per day drops below 12 hours. This is not to say that a 3-week-old seedling will begin to bloom when the light is cut. As a general rule, a plant must be a minimum of 60 days old before it is mature enough to respond appropriately to decreased light. For indoor growers, the decision on when to cut the photoperiod depends on available growing space, as well as the need to harvest weed. Some growers report that clones (cuttings) can be forced to bloom prior to 60 days old, perhaps since the cutting itself is somewhat mature at the time it is rooted. Male Versus Female: Almost always, male flowers will show prior to female buds. Thus, once the males in the garden are detected, you can be sure that that the female budding process will start soon – usually within 1-2 weeks.
Different Varieties: Many gardeners report that certain cannabis strains take longer to mature than others. In particular, the narrow-leafed Sativas are said to take significantly longer to initiate and complete budding, as compared to the wide-leafed Indicas. Under some conditions Sativas will require an additional month or more to mature after the Indicas have been harvested.
Time of Year: Obviously, indoor growers cannot use the seasons as a guide to harvesting (though a cold winter-time grow room can significantly retard the growth of the plants). Outdoor growers on the other hand can use the seasons as a predictor of the ideal harvest time. In the Fall, once the length of day drops below 12 hours, the count-down to harvest will be begin. Weather conditions will affect the exact harvest day from year to year, but generally you can expect to harvest within the same two-week window each year. If you can avoid it, don’t harvest during or immediately after a rainy spell.
Monitoring Buds: The best way to tell if the plant is ready is to examine the bud. In the paragraphs below, the terms “pistil” and “stigma” refer to the white hairs in the center of the female bud. The term “calyx” refers to the pod that would surround the seed. Many growers like to pick each bud individually, as it reaches it prime. “Buds are at their peak potency about one week after flower formation slows…Harvest the plants when about half the stigmas in the buds have withered… When the plants are left in the ground, the resinous qualities of the plant may become more apparent. The bracts and tiny leaves may swell in size…The resin content of these buds may be higher, [but] the grass will smoke more harshly than if the buds were younger when picked.” Frank and Rosenthal “Marijuana Growers Guide” pg 289, pg 295. “In the primordial calyxes the pistils have turned brown; however, all but the oldest of the flowers are fertile and the floral clusters are white…Many cultivators prefer to pick some of their strains during this stage in order to produce marijuana with a clear cerebral, psychoactive effect.” Robert Connell Clarke “Marijuana Botany”, pg 140. “Eventually the pistils start to turn color from pale white to red or brown…When the glands have swelled and the pistil has receded into the false pod, the bud is ready to pick.” Ed Rosenthal, “The Closet Cultivator”, pg 100. “At the peak of florescence, all but the oldest of flowers have white pistil development…Another indicator is bouquet. When a plant is at the peak of florescence, it has a sweet and musky fragrance. Later, it loses the sweetness.” Kayo, “The Sinsemilla Technique”, pg 125. “The best way to harvest is to examine the resin glands on each bud. As they turn from clear to amber, that is the optimum time to pick. Buds usually mature from the top down, if grown under artificial light, and you will end up with more high-quality pot if you pick each bud when ready. However, the plant will not just continue to produces buds at the same rate. Like any other plant, the flowering cycle lasts a specific period of time. If you wanted a further harvest of buds, the plant would need a second cycle of vegetative growth. This can be achieved indoors by simply turning the lights back up to a 24 hour cycle for a few weeks. Outdoors though, you are dependent on the seasons. Frost and long nights will usually kill the plant. Of course, such a strategy is only variable if growing a few plants. If your operation runs on an industrial scale, just drive the combine harvester through the field.”
Conclusion: If you’re new at this don’t worry; as you gain more experience in growing particular strains you will have a good idea of when it will be ready to harvest. You can also check with who you get your seeds from who can tell you what the average harvest time is of your particular strain.
Harvesting Your Buds
Best Drying Rack for Cannabis: Herb Drying Rack Net Dryer
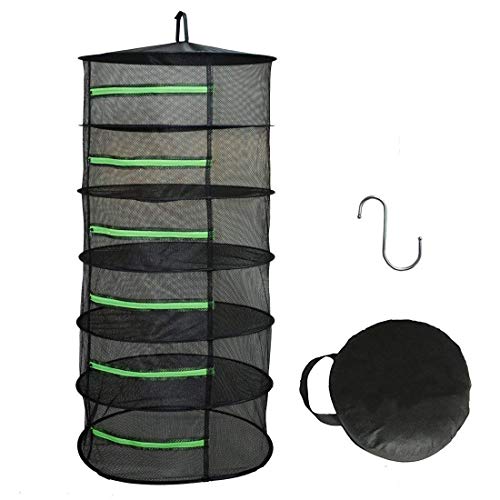
When you are at that all-important stage of harvesting your cannabis crop the care you need to take of your plants doesn’t stop there. You then need to make sure they are dried out – if this isn’t done properly they could get moldy which would be devastating after all of your hard work.
That’s why purchasing a quality drying rack, such as this one from Hydgooho, is a wise investment. Thanks to its 6 layers, this drying rack will allow you to dry a large amount of your harvest at one time and it won’t take up a lot of space in your home. You can also completely seal it from pesky bugs thanks to the zip, and it can be hung up – coming with a hook included. The one con is that you need to be careful when unfolding this for the first time as it is known to spring out!
#Dry rack #Drying_cannabis #Harvest #Dry_rack_for_grow_room #Mould
Best Trim Tray: TrimBin Harvest More Trim Bin, Black
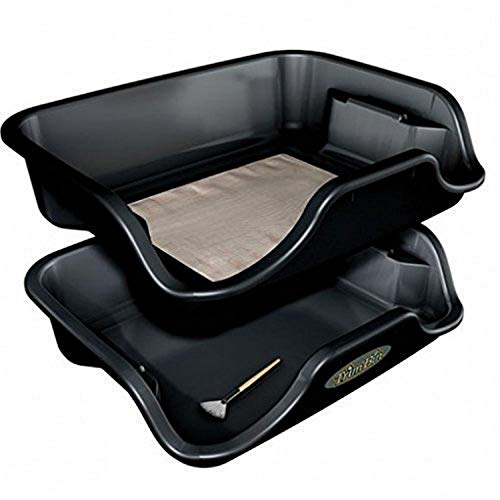
If you’ve been waiting months for your harvest and enjoyed watching the beautiful crystals glimmering on your carefully grown trichomes, the last thing you want to do is lose them all when it comes to trimming your buds. This excellent, ergonomically designed trim tray from TrimBin is lined with a 150-micron screen and comes complete with static brush and mirror finish collection tray to ensure you capture everything you want to.
The major pros of using this product rather than just a basic station are: its improved yield through prevention of spillage; its high micron screen; its ergonomic design that prevents strains and fatigue for bigger trimming sessions; and its excellent portability. It is also made out of 100% recycled plastic, keeping your ‘green’ green. A major downside is that this product is quite expensive, but since it will improve what you are able to trim and collect in a single session, this is not a terrible crime.
#Trimming_Tray #Trim_Tray #TrimBin #Trichomes #Pollen
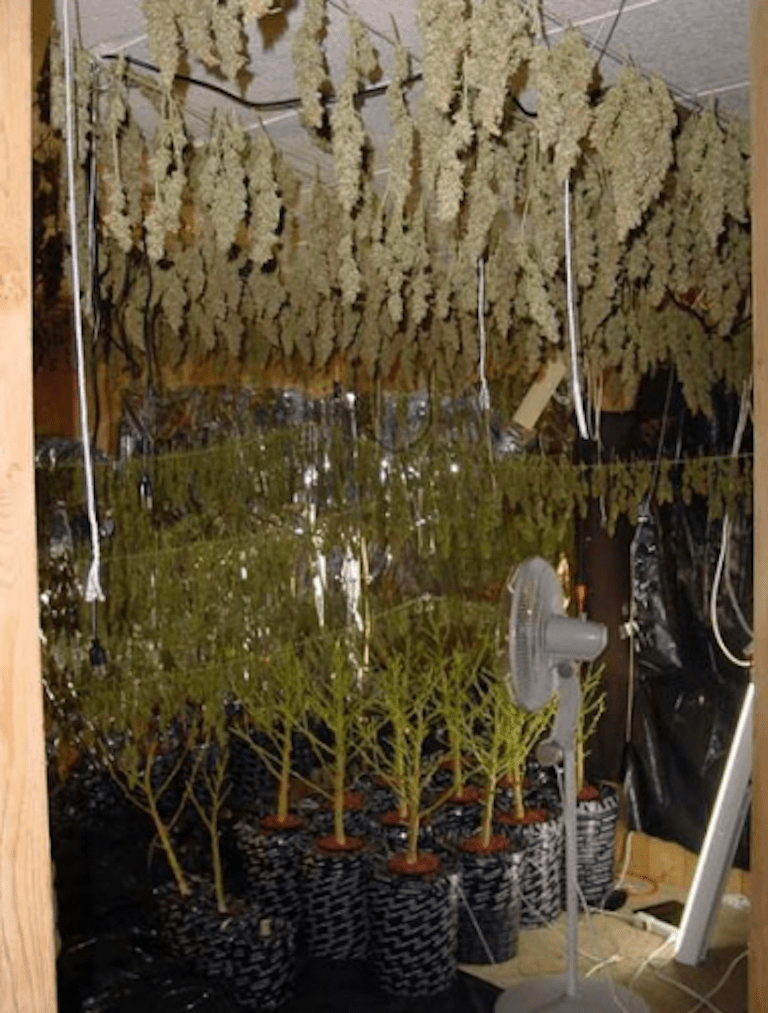
Welcome to the funnest part of growing marijuana, Harvesting! Harvesting is the exciting part of the process when you get to reap your hard-earned rewards. First and foremost, if being discreet is a problem and you have any smell concerns I would like to warn you that Harvesting really really smells. Harvesting will spread that potent marijuana odor into the air very quickly, so be warned if smell is a major concern for you.
There is way more to harvesting marijuana plants than simply cutting them down. Plants are cut down at the stems below the base(below the lower leaves) with a sharp clean knife or hack saw.
With a small indoor or outdoor garden (less than 15 plants) it can take a few hours to harvest, manicure, and hang the buds to dry. There’s really no way around it as the plants must be manicured and hung to dry immediately after they are cut down. This can be time consuming for sure.
Note: Make sure you set aside a steady 6 hours of time to work undisturbed the first time you harvest a small garden. If it’s a large garden (more than 50 plants), make sure you leave yourself a full day to work.
Flushing
Right before harvesting, the plants should be fed plain water only with absolutely no nutrients (or fertilizer if you’re using soil). This is to remove any fertilizer that has built up in the actual plants themselves, and the hydroponic media or soil they were grown in. After the plants are harvested they must be manicured and dried.
It’s important to know when the plants will be ready to harvest because prior to harvesting you will need to remove the fertilizer (nutrients) contained in the plants. The plants themselves and the hydroponic media or soil the plants were grown in will store some of the nutrients that have been fed to them.
Marijuana plants need fertilizer so they can grow and mature to produce THC. In order to remove the fertilizer from plants, you feed them plain water (with no nutrients) for one or more feedings just before they are harvested. This is called flushing.
Note: Tap water tends to have lots of chemicals (recent studies found traces of antibiotics, anti-convulsants, mood stabilizers and sex hormones in drinking water in the Southern California region), it is best to use distilled/purified water or water treated with reverse osmosis for this purpose.
Don’t be concerned where the plants are getting their food as they will use up the fertilizer they have stored in them (growth does not slow down). That is if you do it correctly. If you do not flush the nutrients from the plants, the resulting marijuana will taste bad and may be very hard to ignite.
If you have been growing the plant on organic nutrients then there is seldom a need to clear the plant since it has not taken up any foul tasting chemical nutrients. The extra N stored in the foliage will have been used up(translocated for budding fuel) as part of the natural process of final budding.
When growing hydroponic marijuana, start clearing about 7 days before harvest. This can by done easily by changing the solution and using only distilled water or water treated with reverse osmosis (NO NUTRIENTS!). Some growers even change the water two or more times before harvest because there’s a chance the media may still hold nutrients after the first flush.
With soil, same pure water rules apply above but instead of 7 days you need to change the water 14 days before harvest. Avoid slow-release fertilizers because they are hard to remove. If you have your heart set on using slow-release fertilizer, not to worry just replace it with regular nutrients for the last month. Oh and if you’re growing in soil here’s a trick to speed the drying process: you can stop watering the plants 2 days prior to harvest.
WARNING: DO NOT stop the flow of water to hydroponic plants. If you do they will WILT ad begin to DIE within a few minutes to a few hours!! Not cool dude.
It is best keeping as many leaves green on the plant until week 5 or 6. Then, metabolize the remaining minerals present in the plant during the final 2 or 3 weeks. Total dissolved solids in the final flushing solution is between 400- 500ppm. In hydroponics, it is important not to reduce the solution ppm much lower, as this will shock the plants by causing reverse osmotic pressure on the roots. The plant stores excess nutrients in the plant tissue, that are available for photosynthesis. If there is a lack of available nutrients to the roots, the plant will access these reserves and the final product will burn, smell and taste far better.
What To Cut
So its harvest time!!! But, you do not know where or what you should cut and how to go about it. Well the truth is that this is mostly personal preference.
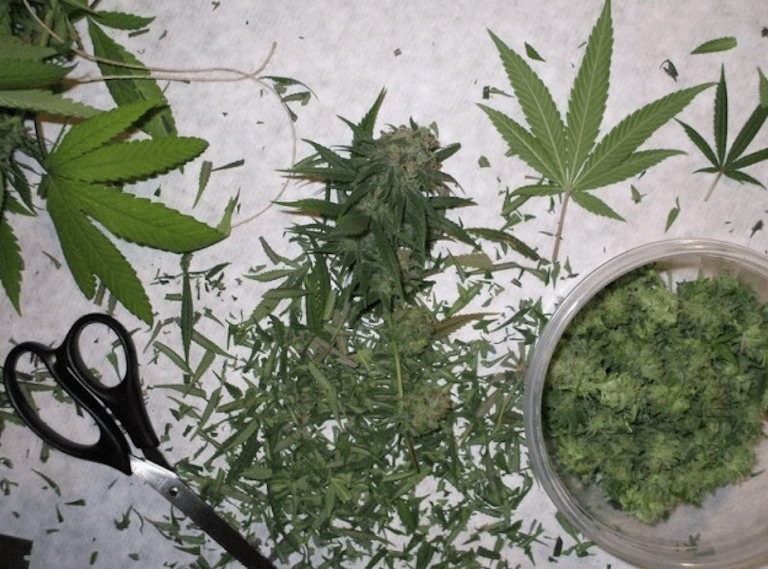
Regardless of how you cut and trim your plants touch the flowers as little as possible and avoid breaking up the buds. Damaging the delicate trichomes will reduce the potency of the marijuana a lot. One way to safely handle your plants is to leave the plants in their pots (more or less intact) and spread out a couple news papers. Toss large sun leaves on newspaper and do small bud trimming over the other.
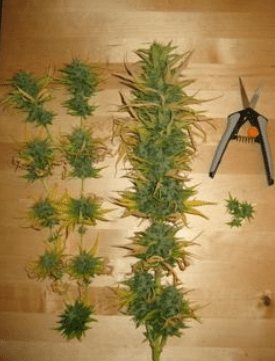
Start with the sun leaves and then trim progressively smaller. This way you will have less in your way. For now, leave the buds on your stems. For trimming thebuds, first take all the tiny popcorn lower buds and put them where you are going to put your trim.
Next trim the actual bud leaves, this trim will have lots of trichomes so should be saved to make hash oil, butter, or something else so they don’t go to waste. To trim the bud leaves, simply clip off the stem to remove it. Then begin to trim in a circular motion around the bud until you have cut back to the sugar coating. Trimming past this point is just wasteful. Don’t worry if they look fluffy or leafy, they will dry and cure into sticky potent buds if you’ve done everything right.
This should leave you with all the buds on a nice thick stem network that is suitable for any drying/curing process you want to use. Some drying processes will involve just clipping at the main stem and hanging upside down to dry; others will require you to further break down the plant into smaller bud pieces.
When you cut be sure to leave enough stem for you to handle and work with the flowers – you can (and likely will) trim down the stem later and a dried stem doesn’t weigh a significant amount compared with dried bud. Also, you will find that you can trim the large top buds into smaller buds one node at a time. It is better to leave as large of a single bud mass as possible.
WARNING: When plants finally mature, they are in their most vulnerable susceptible state to mold. Mold can be disastrous. Mold formation begins inside the bud and grows outward, making it invisible until it is too late. Molds can wipe out an entire crop overnight. Maintaining a low humidity during the final weeks of maturity will greatly reduce the chance of a mold attack!
Harvesting via Cutting
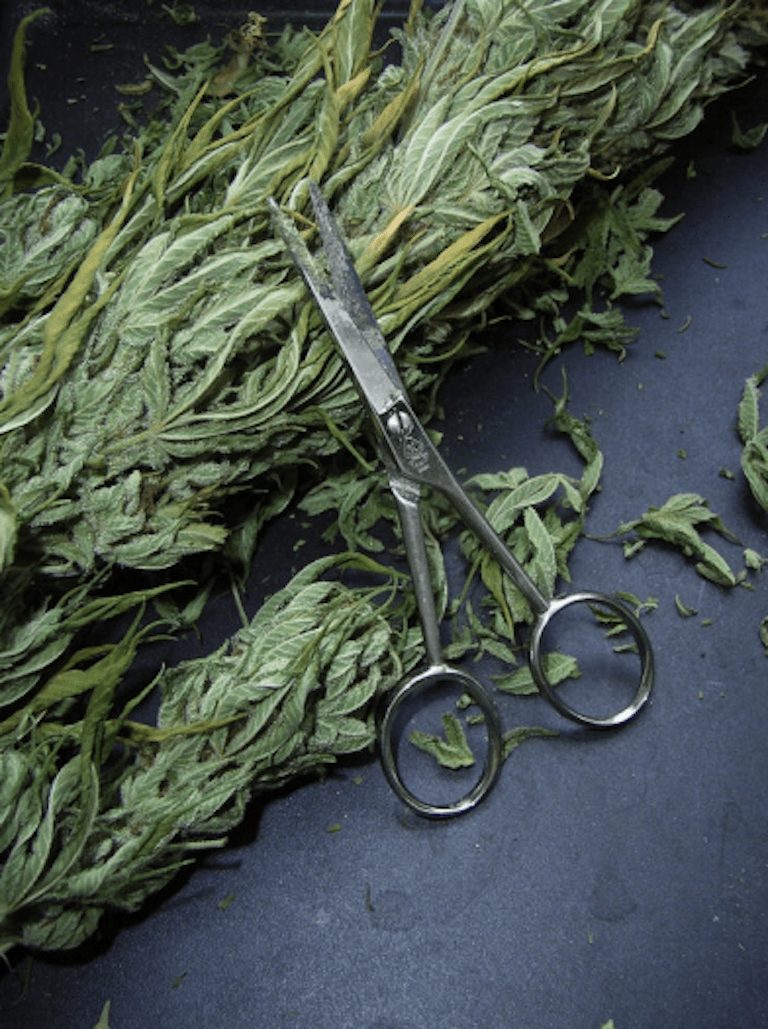 You’ll need some pruning shears, some real sharp sturdy scissors, some type of clothes line type of set-up that you can hang the plants on, a smell proof room that’s dry and cool and if possible a T-55 silkscreen to work over when your doing the manicuring.
You can harvest the plants by cutting them down at the base of the stem with a pair of scissors, sharp clean knife, hacksaw or some other cutting tool, just above where the plant meets the hydroponic media or soil. This allows you to harvest the entire plant at the same time. You can also wait for each individual branch to mature and cut it off separately. Try to leave a few inches of stem at the base of each bud. If you do, it will be easier to hang the buds to dry. If you’re a very spiritual person be sure to thank Mother Earth for the plant before cutting it!
If growing outdoors due to the constantly changing growing conditions, you can not assume a particular strain will be ready in the exact amount of time each time you grow it. Harvesting outdoor plants (that can grow up to 12 feet!) produce massive yields. These plants tend to be a challenge to harvest, as it is in no way easy. In order to harvest your outdoor marijuana plants you will need a canvas spread or some other material you can use to wrap up and properly carry the bud in. Begin by chopping the plant at it’s base and spread it out on the canvas. Next roll up your canvas or other material and tie it down tight to ensure a safe transport.
Harvesting via cutting procedures for sativa and indica are slightly different, we’ll go over the key differences and steps for harvesting these now.
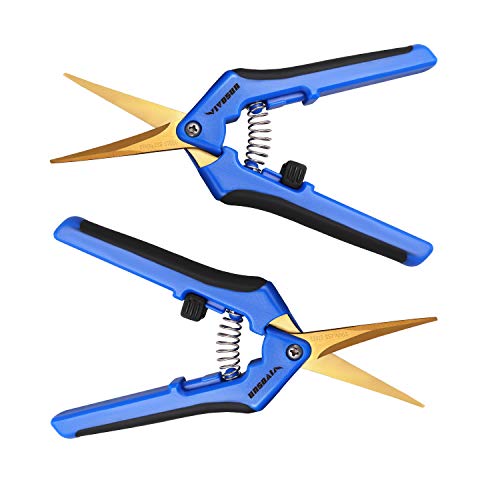
(Editor’s Choice) VIVOSUN Gardening Hand Pruner Pruning Shear
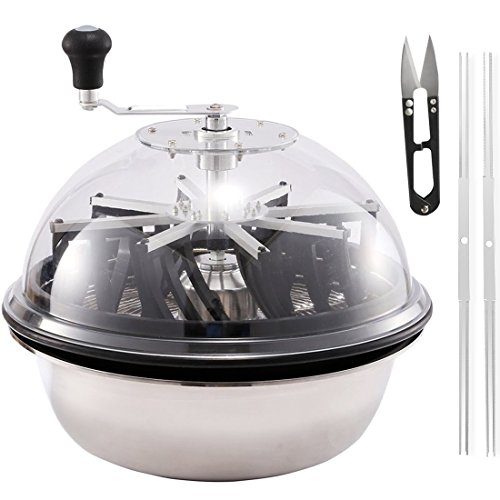
(Editor’s Choice) iPower 16-Inch Leaf Bowl Trimmer
Harvesting Indica Step-By-Step
Step 1. Your 1-4 foot plant should be cut at the base, turned upside-down, and hung in a cool room with no light and plenty of fresh air.
Step 2. Using a pair of clippers remove as many of the fan leaves as you possibly can (you can also remove the big leaves by hand).
Step 3. Next remove the secondary small leaves (around the tops) and place these in a separate pile.
Step 4. Next step is to gather the trim from the actual bud (“trim” is the tiny leaves surrounding the bud that are covered in resin).
That’s all there is to it!
Note: For precision cutting you can buy a machine. Even the smallest tops can be cut away without any problem using one!
Harvesting Sativa Step-by-Step
A Sativa harvest is slightly harder than an Indica harvest, and takes a little bit more work but is so so worth it. It is done in the same way as an indica harvest basically.
Step 1. Cut your plant at its base and hang it upside down in a cool room with no light and plenty of fresh air.
Step 2. Take your pair of clippers and remove leaves (you can also remove the bigger ones by hand) and trim as mentioned in the harvesting Indica section.
Note: Sativa plants tend to be very bushy. You may have to cut the branches and hang these up separately. Also be sure to keep your room dark as light will degrade your precious THC quantities. Try not to expose your harvest to any direct light as much as you can.
After the marijuana plants have been harvested it is now time for the next part in the cultivation process, we need to manicure them and then dry them. Leave the plant as it is until you can easily break a branch between your fingers, once you can do this, you are ready to cure the bud.
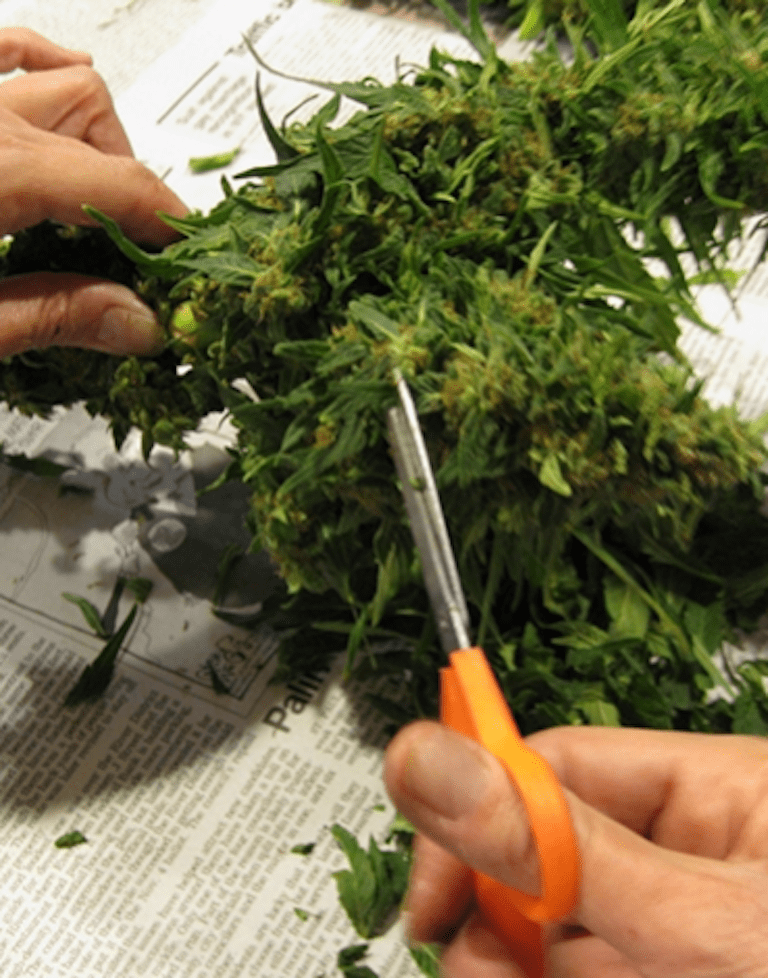
Manicuring
After all the plants have been harvested, it is now time to manicure them – it’s time to remove the buds from the branch and remove the rest of the leaf material as best as possible. This is what is referred to as “manicuring” of marijuana buds. Manicuring, simply put, is cutting off the leaves that were growing from the buds. Cut off all the leaves surrounding the bud, so that just the bud remains. Manicure immediately after harvest when plant leaves are still soft and supple.
Trimming immediately also increases drying times. Simply put this is the process when we remove the non resin-covered fan leaves around the buds before hanging. These do not contain high concentrations of THC. This is a very time consuming process, but you will find if done properly and with care it produces more potent, less leafy, better looking buds. This can be done before or after drying, but you will find it is much easier to do it before.
WARNING: Remove the entire leaf stem! If not it can attract moisture and attract mold.
Tear fan leaves away from the stock while handling buds as little as possible. (In fact, do not touch them at all for a great selling point “ buds never touched by human hands!”) Continue to trim protruding leaf tips from the buds. The degree to which you trim your buds is a matter that is entirely personal choice.
(Editor’s Choice) TrimBin Harvest More Trim Bin
A good time to begin manicuring is when your plants are nearly dry. When they are too dry, many of the glands will fall off with handling. When there is moisture most of the glands will remain intact.
Work over a smooth surface such as a glass table. This will make it easy to be able to see and collect all the material that has been cut away from the buds. It is lower in THC than the buds, but rather than throw it away you can make hash oil.
(Fore more information please see the Hashish section.)
 When manicuring your buds, be sure to use a pair of scissors with small blades (to reach the hard to get leaves) that is comfortable. If you have a small crop, you can handle the plants with your bare hands. For the larger crops, be sure to wear powder free latex gloves.
If you want to consume the resin, be sure to place the latex gloves in a bag and then place it in the freezer for 2-3 hours. The trichome resin can easily then be peeled from the latex gloves and consumed the way you would use hashish.
If it is absolutely necessary, you can postpone manicuring the buds. However, the job will take even more time if you choose to wait. Manicuring right after the plants are harvested will also speed up the drying process tremendously.
Note: At this point the buds should be a little moist, including the inside of them. Some can be smoke-able at this point, you can get even better smelling andtasting buds instead of smoking marijuana directly after it is harvested and manicured – it’s best to dry and cure it. Most newbie growers are in such a rush to try the marijuana that they don’t want to dry the crop, or they might even be tempted to put it in the microwave – BAD IDEA. Why? Read on.
Drying
(Editor’s Choice) Herb Drying Rack Net Dryer 6 Layer 2ft
After trimming it is now time to dry out buds. Drying and curing marijuana is a critical step in the growth process. During this stage you can lose, preserve, or cultivate odor, flavor, and potency. Odor and flavor must be carefully cultivated. The drying and curing process allow the plant to purge sugar and if desired to purge chlorophyll (although some have developed a taste for the chlorophyll in the plant). Improperly dried and cured marijuana can lose almost all of its original potency and lower potency marijuana can be concentrated to slightly higher potency if handled properly. Four things reduce the potency of marijuana those things are exposure to light, heat, damage to the plant tissue, and air. Additionally, marijuana that is not dried and stored properly can contain too much moisture and grow mold. It is important to remember that many rapid drying techniques will dry only the outside of a compact flower and that slow techniques like curing may be needed to draw that moisture to the surface. The virtue in drying and curing as with all stages of growing is patience. Initially drying can be preformed free hanging or enclosed in cardboard boxes or paper bags, both of which will act as a desiccant.
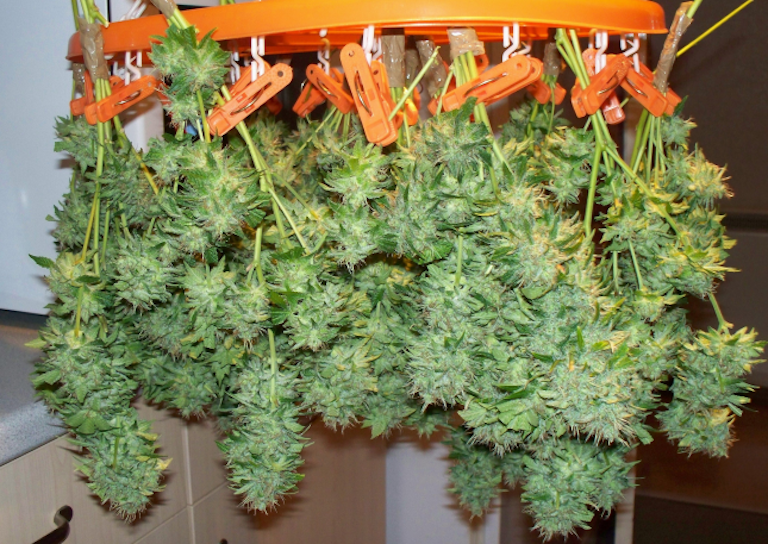
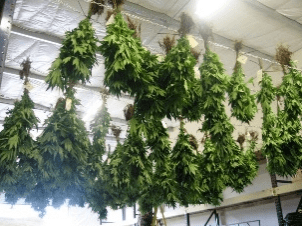 Drying can be performed by taking the branches and hanging them up side down so the fan leaves droop and cover the buds. During this step you need to put the branches in a cool dark place (not humid) with enough good ventilation. You probably don’t want to smoke marijuana that is harsh and tastes bad. If you don’t take the time to dry the bud, you will not get the best possible smell and taste your crop is capable of producing. If you dryyour buds too fast it will make your buds smell like pine needles, hay, and taste very bad. Proper drying and curing also ensures the maximum potency of the marijuana you have grown. Hanging your marijuana upside down in a cool dry place of total darkness is essential for potent buds. This way all the leftover THC is forced down into the buds. Marijuana is typically not potent just after harvest – some of the THC is in a non-psychoactive acidic form. Drying marijuana the right way will also convert the non-psychoactive acidic compounds into psychoactive potent THC.
The area where drying is done should be completely dark. Light and high temperatures(anything higher than 80°F (26.6°C)) will cause the THC to break down and lower the potency of your finished product.
We’re going for making the dankest buds we can here, so this step is CRUCIAL.
Air Drying
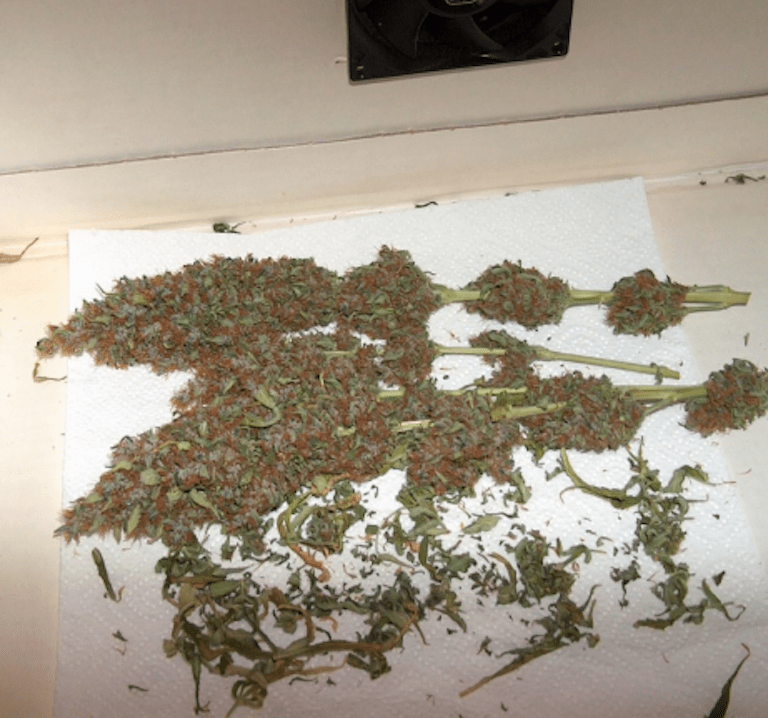
 Air Drying is probably the most popular method of drying marijuana today (and for good reason!). It can be very well controlled – by controlling the amount of airflow, you control the speed of drying. The most common technique of air drying is to suspend the plants upside down in a room with a circulating fan blowing (but not actually blowing on the plants themselves) to keep air moving. Another technique to put the buds on a half open drawer or tray in a place with moving air.
The further along in the drying process the more you close the drawer to reduce airflow. A simpler way to dry the marijuana is to put the buds in a layer in a brown paper bag. This is simpler but faster and therefore the output is less desirable. The speed in this process is a trade off. If you dry too fast then it will take longer to cure the marijuana properly. If you dry too slowly you will be exposing the marijuana to more air therefore reducing potency. Many growers shoot for about seven days drying time. If you are not going to cure the marijuana the plants should be dried until the stems snap easily rather than bend. If you are going to cure then you can begin with slightly more damp (but still mostly dry) marijuana.
How To Dry Buds
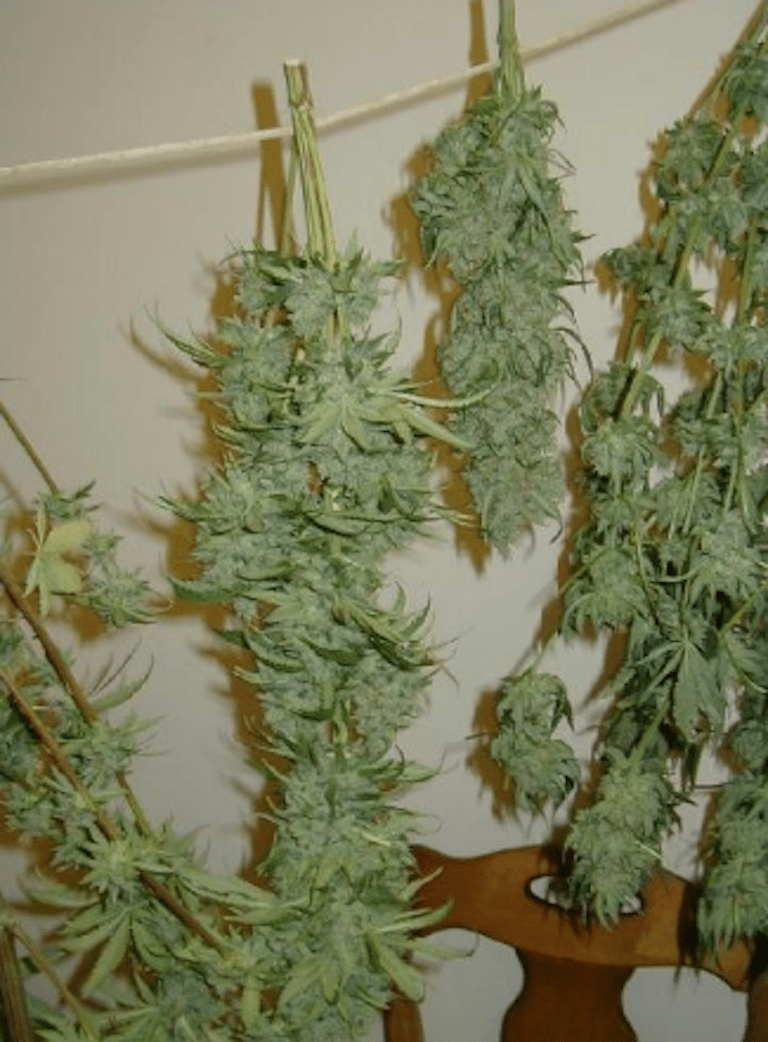
In order to dry the crop is to hang the buds upside-down from their stem, from a string or wire that has been secured to a wall or any other stationary object. You can use nails, screws, thumbtacks etc to attach the string or wire to whatever it will be held to. Make sure your setup is secure enough to be able to hold the weight of the marijuana that is going to be hung drying on it. Nails or screws in wood is typically very sturdy and recommended. Make sure you leave enough room between the plants for air to properly circulate.
It is good idea to check up on the buds every day to watch for signs of mold and mildew and correct the problem if it happens. After the fan leaves droop down over the flowers and turn crisp or break off easily, you would want to start trimming off the fan leaves only.
The drying marijuana must have some circulation blowing over it at all times. Proper ventilation is CRUCIAL. A gentle breeze that circulates all over the plants is necessary. A fan or two will circulate the air within the drying room perfectly. Fans aid in drying the plants evenly and reducing the chances of mold forming on your buds. If mold is prone to grow due to your drying environmental conditions, it can ruin all of your crop. Mold looks like white fuzz or white spots and has a distinct unpleasant odor.
WARNING: NEVER ever smoke moldy buds, as this can make you very very sick and might even kill you!
Optimal Drying Environment
A dark cool drying environment is critical. ANY light that touches your buds will at once begin to degrade it’s THC content.
In order to ensure optimum drying results, you are going to have to keep the temperature and humidity within a certain range for optimal results. Conditions should remain somewhere between the following ideal ranges;
Temperature: between 65-76°F (18.3 to 24.4°C).
Humidity: between 45%-55%.
If the temperatures lower more than 65°F (18.3°C) the drying time will be lengthened. At temperatures higher than 75°F (23.8°C), the heat will cause the other portion of the bud to dry quicker than the inner part and as a result the taste will suffer.
At a humidity lower than 45% the marijuana will dry way too fast and the taste will suffer. If the humidity rises higher than 55%, the marijuana will take a long time to dry and will be prone to mold.
To measure these levels, be sure to keep a hygrometer and a thermometer in the the drying area very close to the plants. A hygrometer allows you to keep tabs on the relative humidity level in the room and a thermometer will display the temperature. Some hygrometers have built in thermometers so you can measure both temperature and humidity at the same time. Depending on the time of year and your current location, a heater or an air conditioner might be necessary to adjust the temperature.
To control the humidity levels a dehumidifier can lower the humidity and a humidifier can be used to raise it. There are two types of humidifiers – warm mist and cool mist.
A warm mist humidifier raised the temperature while a cool mist humidifier doesn’t affect the temperature at all. There are also humidifiers that allow you to switch between a warm or cool mist. If you’re going to purchase a humidifier, be sure to take your climate into consideration and then go ahead and buy an appropriate humidifier to suit your individual needs. Warm mist actually heats up the water and releases warm humidity. Cool mist water isn’t cooled, it just means that water is not heated. In most cases a cool mist works best. If you’re not sure and want to be safe then go ahead and grab a humidifier that lets you switch between warm and cool mist.
Typically the ideal time it takes is two weeks to dry the crop between temperatures of 65-75°F (18.3-23.8°C) and relative humidity between 45%- 55%. Never rush the drying of your buds (that is, if you want to make sensational bud!) A bud is completely dry, cured, and ready for consumption when the stem in the middle of the bud snaps (rather than fold) easily with the fingers. The snap is easy to detect with practice. You can test a little bit(about a half a gram or less) in a joint if you want to be absolutely sure it is dry enough. The surface of buds should be dry to the touch.
Note: Good ventilation in the room will allow buds to grow faster, but any air that is directed at buds will cause them too dry out too quickly. Make sure you don’t dry it too much (hard crisp stems will snap way too easily) this can lead to a harsh smoke. In time you will get a feel for the perfect drying methodology, no worries.
WARNING: Light will rapidly decompose THC! So ALWAYS keep harvested marijuana in darkness as much as possible.
And remember, you can use all sorts of little tricks and methods to increase drying time, but ultimately – the longer and slower your buds dry, the smoother the smoke will be in the end.
The bud will smoke smoother if it takes around a week or more for the moisture to evaporate; quicker drying will harshen the taste and degrade the burning properties. So please, for the sake of your smoke (and your buds!) take your sweet time. It will pay off in the end, I promise.
Peeling Stems For a Faster Dry
If you MUST dry your buds faster then peeling stems is a much quicker way to dry the product. The first day of drying you would normally cut all fan leaves off and score the main stem with a sharp knife. Peeling the stem exposes the inside of the stem to air, cutting drying time by up to ~33%. You can do this scoring ritual everyday for 5 days until all is dry.
Re-moisturizing Dry Buds Step-By-Step
Should a sample of bud become over-dried before proper curing is complete, many different techniques may be used to slightly re-hydrate the bud and continue curing as normal. Fresh buds, orange or lemon peels, lettuce, apple or many other fresh fruits and vegetables can be added to a sealed jar of pot to allow more moisture to diffuse into it. Plain water either sprayed directly on or applied via towel to the buds is also a good way to re-moisten them.
Be very careful when re-moisturizing buds though, because sometimes the remoisturizing material can carry pathogenic fungi and bacteria, which if not monitored carefully, can destroy your crop. Venting, checking, turning, and even re-moistening of buds is necessary so that the proper moisture content to promote curing is present, slow even drying is the optimum process for curing cannabis.
Adding moisture to a smoking bag of over-dried, crispy buds is easy! All you need is a sealed container (A Ziploc bag or a glass jar works just fine), fresh fan leaves and about a days time.
Step 1. Put your over dried buds into a Ziploc bag or a 1 quart mason jar (a jar being the better choice).
Step 2. Add a few freshly cut fan leaves (fresh shoots work great too) to your jar or baggie. Use about 3-5 leaves to half a mason jar. Start with a few leaves; add more leaves as necessary. Fan leaves will become dry and shriveled when they give up their moisture.
If fresh leaf is unavailable, a small piece of lettuce, or apple/orange/potato peel can be used as well. A paper towel with a few drops of water on it also does the trick.
Step 3. The final step is to wait about a day. How long it takes depends on how much is in the container and how dry the buds were. It can work as fast as 5 hrs.
Check the container at least once a day. The buds will have a nice, soft texture will not feel crispy or brittle when they are ready. They will smell better too!
Note: To re-moisten larger amounts of dry bud, simply scale everything up. You may want to separate large and smaller buds into separate containers. Once a day, turn the pile of buds over to expose the bottom buds. Check for any signs of rot. The process may take 1-3 days.
Recycling Cannabis
It is possible to harvest plants and then rejuvenate them vegetatively for a 2nd and even 3rd harvest. A second harvest can be realized in as little as 6- 8 weeks. Since the plant’s stalk and roots are already formed, the plant can produce a second, even third harvest of buds in a little more than half the time of the original harvest. When harvesting, take off the top 1/3rd of the plant. Leave most healthy fan leaves in the middle of the plant, cutting buds off branches carefully. On the lower 1/3rd of the plant, take off end flowers, but leave several small flowers on each branch. These will be the part of the plant that is regenerated. The more buds you leave on the plant, the faster it will regenerate. Feed the plant some high nitrogen plant food immediately after harvest. When you intend to regenerate a plant, make sure it never gets too starved for nitrogen as it is maturing, or all the sun leaves will fall off, and your plant will not have enough leaves to live after being harvested.
Harvested plants can come inside for rejuvenation under continuous light or are left outside in Summer to rejuvenate in the natural long days. It will take 7-14 days to see signs of new growth when regenerating a plant. As stated before, and in contrast to normal growth patterns, lower branches will be the first to sprout new vegetative growth. Allow the plant to grow a little vegetatively, then take outside again to re-flower. Or keep inside for vegetative cuttings. You now have two or three generations of marijuana growing and will need more space outside. But you will now be harvesting twice as often. As often as every 30 days, since you have new clones or seedlings growing, vegetative plants ready to flower, and regenerated plants flowering too.
Regenerating indoors can create problems if your plants are infected with pests. It may be best to have a separate area indoors that will not allow your plants to infect the main indoor area. An alternative to regenerating indoors is to regenerate outdoors in the Summer. Just take a harvest in June, then allow the plant to regenerate by leaving some lower buds on the plant, and leaving the middle 1/3rd of the plant’s leaves at harvest. Feed it nitrogen, and make sure it gets lots of sun. It will regenerate all Summer and be quite large by Fall, when it will start to flower again naturally.
Curing
Curing is essential in order to smoke marijuana without damaging your lungs and for getting the best taste possible out of your buds. A fan leaf will be an okay smoke, the middle leaves a little bit better, the trim is very good, and the bud is obviously the PRIME that will give you the best quality euphoric high.
The last critical step is to create a way to bring out the full flavor and best smoke possible from your marijuana buds. This is the final step in which moisture is redistributed throughout the bud. If left dry bud will dry from the outside-in. The problem with this is that by the time the buds center becomes dry, the outside will become overly dry – it is crisp and crumbly. In order to dry the center without over-drying the outsides, your buds will need to be cured. To cure the marijuana crop, you’re going to need to get your hands on an airtight glass jar container or plastic bags. These will distribute them moisture evenly throughout the bud. Glass is recommended because most plastics will impart a gross taste to the marijuana. Containers that have a rubber seal work best, but any tight fitting lid will do. One quart canning jars work great if you’re curing a few pounds or less. They have a rubber seal and hold about 2 or more ounces of marijuana per jar. Cool beans. When the buds feel firm and crisp, it is time to seal them in an airtight light proof container and stored in a cool dark place.
The sweet spot is when marijuana is dry enough to be stored in roomtemperature airtight containers without growing mold, and being moist enough (wont break down and crumble when handled) to ensure a sensational smoke.
Curing and Potency
Curing can seemingly affect potency because often the first time the buds feel “dry”, they really aren’t. Once they start to cure and sweat, you will see how much moisture is left. Curing is mostly for aroma and taste, but the first week after “drying” will still have some effect on the potency as the bud fully dries.
Drying bud converts crude acidic THC from its nonactive form into a neutral pH psychoactive substance. Each THC molecule has to lose it’s moisture content in order to become fully psychoactive. When the water exits the bud, the THC becomes slightly different in molecular structure. Heating can make THC readily active by immediately vaporizing the bud’s moisture content away. However, aging is equally as important too. First the bud is “dried”, but can still contain some moisture within. By using the “cure”, the THC slowly becomes psychoactive. Curing builds a more uniformly dried bud with a better burn and taste.
Almost all the THC converts to the usable psychoactive cannabinoid over the allotted time without the degradation gotten from heat drying the bud quickly. The bud that has equalized “cured” moisture content throughout will give the bud a nice firey glow when burned. Cured buds pack in bowls easier and break down into blunts and joints without difficulty. Hash that has been cured forms a beautiful rhine around the outside with a rich creamy inside. Cured bud and hash is great and worth the trouble. The taste is awesome as all the excess chlorophyll has been broken down. A smoother smoke is created. Curing bud makes it more tasty and much more enjoyable to use than it already is.
How To Tell When Buds Are Dry Enough To be Cured
There are many variables to consider when it comes to drying-time: humidity, temperature, air-circulation, bud-density, bud-size, manicure/trim, and the method of drying are all major factors. Establishing an environment that promotes slow and uniform drying is key. Whatever drying method you prefer, maintaining cool temperatures and low humidity is essential for preserving flavour/aroma.
- Using a fan assists in keeping temp/humidity levels constant.
- Evaluating the “crunch” of the stem is a good technique when assessing whether or not buds are ready to be cured. When the stems snap, instead of bending, they are ready to be jarred and stored in a cool, dry, dark place. Another method of judging dryness is to bite the stems and evaluate the crunch this way; your jaw is more sensitive than even your fingers.
- You can also grind/cut/break up a bract from the center of a larger bud, and roll a joint with it; if it is smooth-smoking, with even-burning properties, then the rest of the buds should be ready for curing.
- Once the correct dryness is attained, place the buds into an air-tight container/jar, filling it as much as possible to expel as much air as possible, and cure to your favorite vintage!
The Best Way to Dry & Preserve The Cure For Smooth, Sweet Buds
Commercial growers take the colas from the plant and manicure them before drying. They usually dry them on a line, upside-down, which is fine. However, usually airflow is forced, temperatures too high, and humidity too low. As soon as the buds are considered dry (usually within a few days), it is sold. The reason for this behavior is the fact they are “commercial” growers and in a constant hurry to exchange their buds for cash. Every minute counts and they don’t want to ‘waste’ the space or the time needed for drying and curing. This results in harsh, grassy tasting weed that lacks the full-bodied flavor and smooth stone of properly dried and cured bud.
To Do It Right: At harvest-time all you have to do is cut the plant as low as possible and hang the whole thing upside down to dry on a line. The room you use to dry should be the about the same size you grew in (if not the same room). Reminding you from earlier – the humidity should remain a constant 50- 60%. Too high and buds will mold, too low and they dry too fast and taste bad. Temperature should be around 65-68°F (18.3-20°C), wherever possible. Make sure the room is dark, as you learned that light degrades THC pretty quickly.
All kinds of processes, like the transport of sugars inside the plant still take place, even when you cut it down. These processes will slowly come to an end while the drying progresses, but are the main factor for the end-taste of your smoke. That is the first reason why you don’t want to quick-dry your weed. The second reason is the way that a plant dries. Plants are made up of cells and, as we all know, cells contain mainly water. Exposed to air, the (dying) plant’s outer cells will dry out first but the above-mentioned processes will still transfer water from the inner cells to the dryer outer cells, thus causing the plant to dry equally all over. By removing the stalk and cutting off the individual colas, you prevent this natural process by taking away the extra moisture that would be drawn from the stem to the leaves and bud.
Make sure you hang the plants so that they do not touch each other (invites mold). With constant temp and humidity, the plants should be ready for manicuring in 3-4 weeks. At this time trim colas from the main stalk, and trim large and medium fan leaves (save them for making hash), leaving most of the smaller leaves sticking out of the bud in tact. Hang them up again and for a day or two, until ‘popcorn’ dry. The stems should snap when you bend them, and the bud should be dry, but not brittle.
Curing Properly: Trim all remaining leaf (save for hashmaking) tight to the buds, and trim smaller buds from larger stems. Store them airtight; air at this point degrades THC.
Note: Ziplock bags are not airtight! You could use buckets with an airtight lid like used for food and sauces and such, but the best containers are those glass jars with the rubber seal and latch.
Just put as much bud in it as possible using light pressure. The point is to fill it as much as possible, so not too much air remains in the container. The less air, the better. To be safe, check them the next day to make sure it’s still dry (did not “sweat”). Any excess moisture at this point will invite mold. If it did sweat and is moist (soft) again, lay the bud out on something other than newspaper and put in a dry place to get the last water out. Repack and place the container in a cool, dark place, like a refrigerator. Fridges have high humidity so they must be absolutely airtight. The longer it sits (up to around a month, maybe longer in the fridge) the better it gets, both in taste and potency.
At around the month mark, you can move it to the freezer to almost stop the aging and curing process. Once you’ve got some buds stored in the freezer, you have a private stash that will last a long time. If you’ve got the patience to wait, the smoke will be sweet and smooth. The high will be mellow, and longer lasting. If you grew enough to last you a while, then after a few harvests you will be able to have properly cured buds at your disposal, with no downtime waiting for the next batch to cure! If you’re not in a hurry to sell your crop you owe it to your head to wait the extra time and have great tasting, very potent bud! Curing is the only way to make harvested bud more potent, so try it, you won’t be disappointed.
Once you have learned how to grow a crop the next step is to cure it. You don’t want to always smoke weed that’s harsh and bad tasting. Here are some basic tips and a few advanced ones you can experiment with. Preparing the harvest curing the crop adding flavors.
Preparing The Harvest
Curing your harvest is an important step in the cultivation process. Many new growers are so eager to try the product they don’t even wait for it to mature. They cut off buds that aren’t ripe and dry them out fast. I’ve heard of people putting buds in the microwave because they couldn’t wait for them to dry. If taste, aroma and maximum potency is important to you then you want to cure your buds and not just dry them.
The First Steps: Preparations must be made well before curing begins. The experienced grower harvests his crop when 50% – 80% of the pistils have turned color. If you have grown out the strain before you have a good idea when they will be ready. Don’t forget to flush! Remember – the growing medium and the plants themselves store some of the nutrients you have given them. This will give a nasty taste if you harvest without clearing it out. Excessive nutrients will also make the buds hard to burn. This can be done by changing the solution and using only plain water. Some growers will change the solution twice because the rockwool or grow rocks may hold a little. With soil you need to change to plain water at least a week and preferably two weeks before harvest depending on how much soil in each pot. Don’t use slow release fertilizers because they are very hard to clear out.
Note: Outdoor farmers who need to use slow release can time it and use just liquid fertilizers toward the end.
So by now you have harvested right at the peak. You cleared out the nutrients beforehand and you have fragrant, spicy highly potent buds you want to preserve.
Curing The Crop
Immediately after the harvest comes the cure. The reasons for curing and not just quick drying your crop are to make the herb sweet smelling and increase the quality of smoke. You want it mild not harsh and you want a good smell and flavor. After all that work don’t ruin it with a too quick cure. A good “proper” cure lasts for from 3 to 8 weeks but satisfying results can be had in two weeks or so. Some growers cure their bud for years! The idea is to remove the water slowly enough to let biological processes take place that convert the sugars and starches into harmless and flavorful compounds. Sugar or starch will give a harsh smoke that hurts the lungs. Plants need sugars to live on and they produce them from fertilizer and sunlight.
This curing process also breaks down some of the chlorophyll which gives herb it’s green color. Too much chlorophyll gives an unwanted leafy vegetable taste. Your main enemy when you are curing is mold. After pot is dried it’s not very susceptible to mold but you have to maintain a certain level of humidity to let the curing process do it’s work. The way you control humidity is by controlling how much ventilation you allow. You want some ventilation but not too much. Too much and it dries out without curing properly, too little ventilation and you may get mold. If you see or smell the slightest sign of mold you must immediately stop the cure and let it dry out. If mold is unchecked it can destroy your crop in short order. Mold can be detected by sight and smell. It looks white usually and will be fuzzy. If you see it in one part you can be sure the spores are all over so you may as well let it dry. Mold also has an odor which is always nasty. Never never smoke herb that has mold on it.
You want to avoid light and heat at all times with your crop after it has been harvested. Light will destroy it and temperatures over about 80°F (26.6°C) are bad. The best place to store it is in the freezer or fridge. If that’s not practical a cool dry dark place will do. You need an enclosure to put your crop in for the cure. Depending on the size of you crop you can use a cardboard box, a closet or an unused room. With the cardboard box you want to hang the plants from a string. Don’t just dump everything into the box because the plants on the bottom won’t get enough air and may turn moldy. Many growers put string across the open top of a box and tape the ends to the outside. They then would crisscross several strings and attach the plants with twist ties. Make sure the box is tall enough for your plants. If it’s not tall enough you can cut the plant in half or even cut off each branch and hang it in the box. The plants or branches should be loose and have some space between it and the next. It doesn’t take a lot of space just as long as air can circulate.
With a closet you do the same thing. You might want to put nails or thumbtacks in the walls for the strings or the clothes hanger bar may be enough. If you are using a whole room you need to set up something to keep the plants hanging upside down off the floor. The first few days you allow more ventilation and as the plants get dryer you allow less. In the box leave the top off, with the closet leave the door open and if you use the whole room leave the door open and use a fan to blow air in. After one or two days you will have lost a good bit of moisture and you can begin to restrict air flow.
Put a section of newspaper over the top not quite covering the whole top of the cardboard box. As the cure progressed cover the top more and more. As soon as the leaves began to get stiff cover the top completely. They still got a little air because the newspaper was not airtight. With a closet after a day or two close the door all except for a couple inches. As the cure progresses and the plants get drier, close the door completely. Almost all closets have cracks around the door that air can come through. If you have a very large closet treat it like a room. When using a whole room to cure, after a day or two of letting the fan blow air in, close the door part way. With the room cure it’s a good idea to have a fan inside moving the air around and another fan in the doorway blowing fresh air in.
Watch the plants very closely to see how fast they are drying. As soon as you notice a little bit of stiffness to the stems they have lost probably 50% of their moisture. When the leaves start to get a little bit crisp you have lost most of the excess moisture and you must restrict ventilation some more. Using a whole room at this point you turn off the fan blowing air in but you leave the door open a little. You never cut off ventilation completely because mold is a threat right up until the end. The leaves should start to get a little crisp after a week or two. If it happens sooner you may be using too much ventilation and should cut back.
Along about this time you should notice a very nice smell. This is the curing smell and it smells a little like baking bread along with a piney or fruity or skunky smell from the pot. This is the nice smell you want your herb to have. If you notice the least bit of a nasty or rotten smell it is probably mold and you need to check very closely. After the leaves start to get a little stiff and you have restricted the air flow it takes anywhere from a week to 6 week more to finish it. When to stop is up to you. You might want to decide by the color of the herb. It gets less green as it goes along. Buds will retain the green color longer than will the leaves. Buds may still be green at the end of the cure but not quite as bright a shade of green.
You will be the proud possessor of a stash of sweet smoking, good tasting buds without the harshness of fresh cured smoke.
Adding Flavors
People pay a lot of money to get seeds they think will grow pot that smells like blueberries or chocolate or something else. Often these strains are hard to grow or may not be as potent or high yielding as other less expensive strains. People want to know if orange bud smells and tastes like an orange. With the proper techniques you can make your favorite variety smell and often times taste like anything you want. You want to do this without ruining the cure. It’s no point having blueberry pot that burns your throat or doesn’t get you high. Do not pour any syrup or similar flavorings on your pot. The sugar will make it very harsh and you are inviting mold. There are better ways. The best flavor enhancing stars while the plant is still growing. You can do a certain amount while it’s curing and you can even affect the smell/flavor somewhat after it’s been cured. There are two main approaches, inside out and outside in. You can apply flavors inside the plant while it’s still growing and you can try to add flavors after it’s been harvested but this is from the outside. Anything you put in your plants water will affect the taste of the finished product particularly if you harvest it right fterwards. Many growers learn this lesson the hard way. One grower even reported fertilized using fish emulsion right before he topped the plant. Bad move! His resulting top smelled like fish and had a foul taste. Yuck.
What you want to do is select a flavoring that is very concentrated. Lets take orange for an example. You could use orange juice but if you could find concentrated orange extract you would have less pulp etc to deal with. You will find some concentrated flavor extracts in the grocery store. Want your pot to smell like vanilla? Vanilla extract is cheap and readily available, so is lemon extract (cooking variety). Other extracts can be found in stores that specialize in baking supplies. Lets say you can’t find any of that and you want to use what you have on hand. I took the example of orange flavoring. If all you have is orange juice you could use that. I would suggest filtering it first to get out as much of the pulp as possible. A coffee filter works well but it’ll take a while to filter it all. You may have to change filters a few times. Those with hydroponic units will shudder at the thought of a lot of goop going through their system. That’s why I suggested the concentrated extracts if you can find them. It’s important to do this shortly before harvest. For one thing, most extracts including the ones you make up yourself have a lot of sugar in them.
This sugar will ferment and decay rapidly, even more so in a hydro unit. With hydro I recommend putting the flavoring in the water between 1 and 3 hours before harvest. This rule isn’t set in stone but I heard from one grower who used a sugar based clearing solution on his crop and less than 24 hours later the water was foaming from bacteria growth. Plants draw up solution fairly quickly so one hour should be enough for some of the flavoring to reach the top. Three hours should not be enough time for bacteria to grow but you will want to dump out the solution right afterwards and clean out your unit. Use plain water for a few days before harvesting your hydro crop so all that will be in the water will be the flavoring.
If you are a soil grower it’s even easier. You might think it would take longer for the flavor to work it’s way through the plant but this is not the case. All you have to do is let the plant dry out a little before your apply the solution. In other words schedule a watering just before harvest. Naturally you were giving your plants plain water for several days to a week or two before harvest weren’t you? Give the plant the water with the flavor when it’s a little bit thirsty and it will draw it right up. One hour is more than enough time for this to happen. After harvest it’s important to give it a good cure. Resist the temptation to fast dry some of the weed to try it out. You will find it’s even more harsh than it would be normally because you have added some sugar to the plant by way of the flavoring. The curing process will take care of the extra sugar and give you nice mild smoke. It will also have the flavor and aroma you are looking for.
What some people think is a nice hint of strawberry may be way too strong to the next person. What one grower thinks is very blueberry may not smell or taste like blueberry to his friend. I suggest that you don’t treat your whole crop this way while you are experimenting. Soil growers will find this easy because they could use something different in each pot. Hydroponic people may want to isolate a plant or two with the solution. This wouldn’t be very hard because you wouldn’t need circulation for the short period of time it would be soaking in it. Other things you could try are guava, pineapple, grapefruit, passion fruit, cherry, mint or even pina colada. Stronger and more concentrated flavorings will have a more pronounced effect than more dilute products. You may need gallons of orange juice to get what you want but a half ounce of concentrated strawberry essence might do the job nicely.
In short, experiment and see what works for you. The other approach is to use something in the curing process. People have had good results with orange peel, lemon peel or other citrus peels. This will only give a bit of odor, it’s not as strong a technique as the previous one I mentioned. For those who just want a hint of something this may work fine. It’s important to watch very closely for mold when curing. The moisture from the peels may promote mold if you’re not careful. Let the herb dry for a day or two before you add the peels This might work a little bit with pot that’s already cured and dried but it’s less effective at that point.
Water Curing
Water curing is an innovative idea. The resin in marijuana is not water soluble, so everything in the plant that is water soluble is an impurity. Water curing involves taking dry marijuana and submerging it in distilled (or at least not chlorinated) room temperature water (room temp is important, heat degrades potency and cold will make trichomes brittle). Change the water daily. This can be done for anywhere from 3-14 days and results in a dark chocolate brown marijuana. We marijuana is wet marijuana and the same slow drying techniques should be used to remove the moisture from the marijuana the second time around to insure complete drying.
Curing & Potency Level
Curing does affect marijuana potency in a very positive manner. Curing cannabis after harvesting for few days to several months will improve the potency, as well as the taste and texture of the buds. As you know; curing takes place after cannabis has been harvested, manicured and partially dried.
Most cannabis will retain a significant quantity of moisture within its stems and inner buds even when the outside feels dry. This is especially true for very dense buds, more care must be taken in drying loose airy buds because sometimes they can dry too fast.
Cured Buds Undergo a:
- Reduction in Chlorophyll content.
- Reduction in plant starch content.
- Reduction in nitrate levels.
- Loss of moisture.
- Loss of volatile terpenoids, and the polycyclic aromatization of other terpenoids.
There are several process and effects which take place during curing that can rationally and scientifically explain the increase in potency and improvement of the smoke in cured material:
Moisture Content: Moisture is essential for the curing process, it is both your friend and enemy. If too much moisture is left in the buds, with out the regular mixing, venting and turning of buds involved with curing, molds and bacteria can quickly form and ruin the taste and potency of your stash. On the other hand, without the necessary moisture metabolic processes essential to curing do not take place.
Fresh cannabis plants are around 80% water(all %s by weight); curing generally begins after the cannabis has lost half of its initial mass, and contains approximately 33% of its initial water.
Once curing is complete and the pot is dry, it should still contain 10-15% moisture, approximately 2-4% of its initial water. This is an ideal because most bacteria and molds can not grow below 15% water content, and below 10% cannabis buds tend to powder.
Cannabinoid Conversion: Naturally, as the metabolic processes continue during curing, the conversion of cannabergerol to tetrahydrocannabinol will continue and the potency of the pot will increase. This is because cannabergerol(CBG) is the non-psychoactive precursor for tetrahydrocannabinol(THC). Of course, the exact change in THC content will necessarily be dependant upon the concentration of CBG in the fresh material at harvest. Of course any remaining precursors necessary to form additional cannabidiol(CBD) and other cannabinoids will also be consumed and converted.
Be aware though if curing is excessively prolonged (most connoisseurs would agree after 6 months no more benefit could be had from curing), the conversion of THC to non-psychoactive cannabinol (CBN) will occur. The exact rate of decomposition can vary widely depending on handling and storage conditions, but can be less than 10% to greater than 40% decomposition per year.
Continued Metabolism: Also as these metabolic process take place, the plant needs energy which leads it to consume the sugars, starches, nitrates, and minerals. Many of these compounds are metabolized and released as water and carbon dioxide, therefore removing what is essentially inert material from the pot increasing the concentration of cannabinoids therefore making it more potent.
Much of these positive metabolic processes can be most effectively begun with thorough flushing and stripping of the plant before harvest. This will help reduce the amount of time necessary for a good cure.
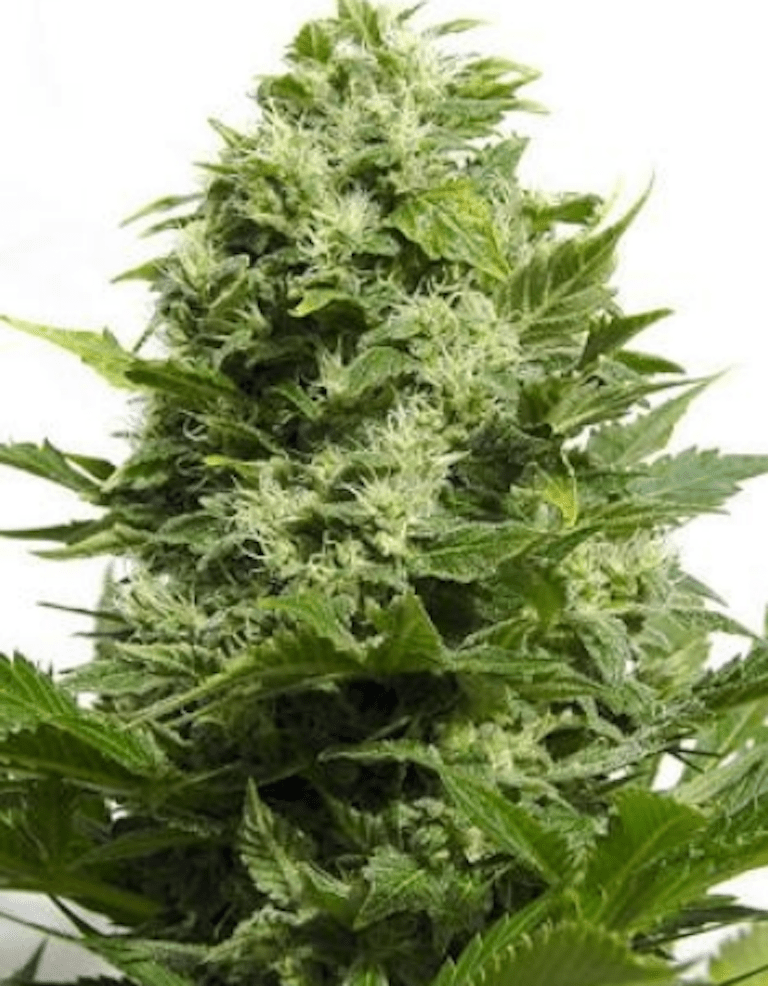
Curing will not only improve potency, but the color and look of most cannabis buds because as the chlorophyll is broken down purple, gold, and white coloration can emerge and the trichomes will appear more pronounced. Decarboxylation: Some decarboxylization will take place during curing as well. This happens when the carboxyl group (COOH) located at C-2, C-4, or the end of the hydrocarbon chain at C-3 is destroyed leaving a hydrogen attached and liberating CO2.
Decarboxylization is necessary to convert cannabinoids to usable psychoactive forms; the plants (and your body) carboxylize cannabinoids to make them more soluble in water (for metabolic reactions and excretion).
Research indicates that this effect is fairly minimal during the curing process though. Decarboxylization will take place naturally very rapidly at temperatures of over 100C. So smoking and most any cooking will decarboxylize the cannabinoids. As decarboxylization occurs, the loss of CO2 will liberate a small amount of inert material making the pot more potent via concentration of the cannabinoids.
Taste & Odor: Terpenoids are the highly volatile compounds that give marijuana much of its characteristic odors, and therefore tastes. The most current research also suggests terpenoids lend to the high, sometimes very significantly. Cannabinoids are phenolated terepenes so its not surprising that many hundreds of different terpenoids are synthesized as well.
As pot ages, some of the terpenoids go through polycyclic aromatization in the process of decomposition. This agglomeration of terpenoids will change the flavor; hence the ability of cured pot to show flavors that didn’t seem present in the original fresh material. Much of the very volatile terpenoids will also evaporate and or decompose, especially with prolonged curing or storage. This action will remove some matter from the pot increasing the cannabinoid concentration and therefore potency. It must be noted that excessively long curing or storage, higher temperatures, or extremely low moisture content will cause such through evaporation of the terpenoids that the cannabis will generally loose almost all of its natural flavors.
Fermentation: When vegetation dries, the individual cells which maintained life processes die. But marijuana can still be conditioned by means of fermentation. Fermentation is the process in which microbes and plant enzymes break down complex chemicals into simpler ones, mainly starch and sugars into alcohol and simple acids. In the process chlorophyll is destroyed, giving the material a more ripened appearance. If the fermentation is stopped early, the marijuana has a sweeter taste because of the sugars which the ferment produced.
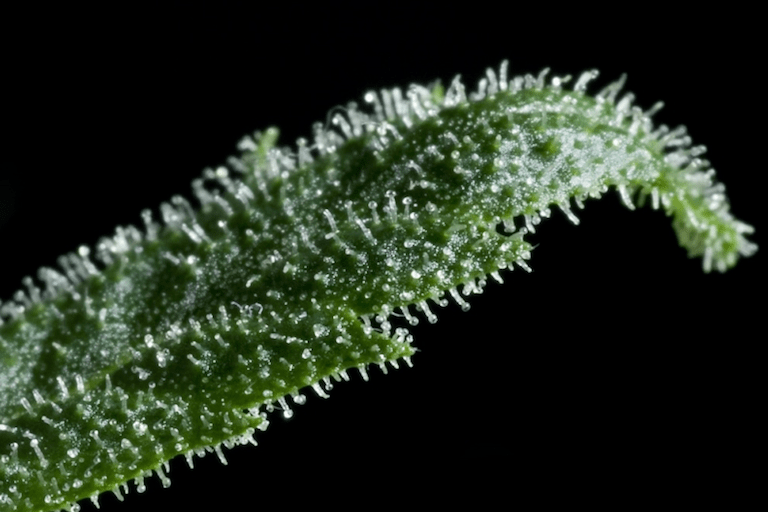
Fermentation occurs when the moisture content of the marijuana is raised above 15 percent and the temperature is above 60°F (15°C). The more tightly packed the material, that faster the ferment proceeds. The rate of ferment is controlled primarily by varying the moisture content, but each batch proceeds at its own rate because of differences between plants in nitrogen content. (Nitrogen is necessary to maintain fermenting bacteria.) The process is delicate; should the ferment proceed too rapidly, the marijuana may be converted to compost. Watch the fermentation closely. After the desired colour or flavour (from a dried sample) is reached, dry the grass quickly to stop the process.
During fermentation, flavorings can be added to give the marijuana a spicy aroma. Such spices as cinnamon, cloves, ginger, mace, sage, or vanilla are placed between the fermenting material. Orange, lemon, or lime peels are also used. About half an ounce of spice or four ounces of peel are used for each cubic foot of material to be fermented. The spices are wrapped in cloth sachets. The citrus peels are strung.
They can be placed between the layers of marijuana.There are two types of fermentations: self-generating and forced. They are best used with leaves or immature plants.
Self-Generating Fermentation: Self-generating fermentation proceeds rapidly only when there is enough material to make a heap at least one cubic yard large. When smaller quantities are used, too much of the heat generated by the bacteria is dissipated, so that the process is slow and is more properly considered aging.
Place the material in a large container or in a pile with a tarpaulin placed over it, and lightly spray it with a mister if it is dry. Let the pile heat up for a few days, and then break it down. If it is repacked, the marijuana will develop a dull matte appearance and lose its sugars. IF the process is allowed to proceed even further, the marijuana will disintegrate.
Forced Fermentation: Forced fermentation can be used with small quantities of material. It requires an enclose chamber in which heat and humidity can be regulated. Pack the marijuana loosely in a kiln or other chamber, and raise the temperature to 135°F (57.2°C). Maintain humidity at 75 percent. Check the progress of the ferment periodically. Within a week the ferment should be completed. During this ferment there is a release of ammonia compounds, resulting in some foul odors, but upon completion of the ferment and drying, the marijuana should smoke sweet and mellow.
Curing With Glass Canning Jars Step-By-Step
This method for glass canning jars gives the strongest aroma and best texture for smoking. Here’s the procedure, it couldn’t get easier:
Step 1. Cut, manicure, hang your plants in a cool, dark place until totally crispy and smokeable in a joint – usually will be for 5 to 8 days. Optimum conditions are 68-74°F (20-23.3°C) and between 50% and 60% RH.
Step 2. Place bud gently into wide-mouth glass canning jars. Close the lid until buds sweat (usually 2 or 3 hours the first time). Open jars and let buds dry to crispy again. If you are curing larger buds you have to get some air in there and turn the buds over. Larger colas usually have enough flow around them so you don’t have to mess with them too much unless they are really touching each other inside the jar. Be gentle.
Step 3. Repeat the sweating process – open the jar until crisp, close until sweated. After about a week of this (depending on location), you get to that perfect point of curing where there is enough moisture to keep it smelling strong but as soon as you take it out of the jar to smoke, it crisps up and can be rolled.
Storing Marijuana
When curing and storing your precious buds that you have waited so long to finally enjoy, the single most important investment you can make is a quality container. The absolute best container for curing and storage of cannabis buds is an all glass jar, with a large opening for easy access. Wide-mouth jars with glass bodies and tops with a rubber seal are an ideal choice. Never store cannabis in plastic! Always glass. Generally try to avoid all plastics in direct or close contact with your cannabis – these materials are slightly porous and the phenolic acids and terpenoids can react with plastics, leaving your buds a bitter aftertaste. This never happens with glass. With a proper rubberized top, glass containers also offers tighter seals(which means creamy-centred, incredibly potent, tasty preserved buds).
Using a wrong container means a cruddy cure and bitter-tasting weak buds. As featured in High Times Magazine, 420 Science has created specialized medicinal marijuana storing jars to guarantee elite bud preservation. These high-quality containers contain hermetically-sealed lids and are made of 100% Italian borosilicate glass. These superior containers ensure your buds stay super fresh.
420 Science’s 420 Jars come in all sorts of sizes (up to a monster size 1.5 gallon!), colors, and designs. You can even totally customize
any cool artwork you want on the outside!
So in order to store your marijuana properly, gently handle and place your fresh marijuana into the containers (you may have to cut the buds to size if they don’t fit) and then seal the lid. Store the containers in a dark area where the temperature is between 50-65°F (10-24.4°C) and the humidity is between 40%- 60%.
It’s recommended to open up the containers 3-6 times daily for a few minutes to allow moisture to escape by fanning with your hand. Also shake the bud around a bit every couple of days. If any moisture builds up on the inside of the cap, wipe it off. Also, give the buds about a quarter turn once a day. This will ensure that different parts of the buds are exposed to the air in the container, maximizing drying effectiveness. Continue to do this for 7-10 days. When properly dried, marijuana will burn evenly when smoked in a joint (if all the stems are removed that is).
If using glass, the taste will be of supreme quality and the THC will have finally reached a point where it is ready to be ingested or stored. You don’t have to keep opening the containers to release moisture after the initial ~8 day curing period.
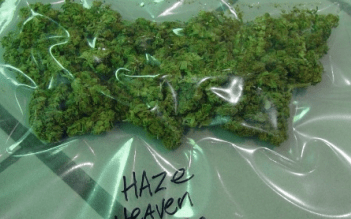
If you’re planning on storing your buds for a year then they should definitely be sealed in an airtight container and stored in a location that is dark and cool. A freezer works best but it is totally fine to store them in a fridge, basement, or closet. Just remember in order to preserve the marijuana potency at the maximum level then storing marijuana near light, air and heat are the things you want to avoid.
It is not recommended to store your dried buds in the freezer. Some of the THC can become easily damaged when frozen. Refrigerators also contain too much humidity. If you can somehow control the humidity levels in your refrigerator then this is an acceptable storage location.
If you plan on storing your marijuana for a few months or so then you will need to purchase a vacuum sealer (for sealing food) to seal the marijuana in a completely airtight sterile environment. If stored in a dark area that is between 40-55°F (4.44-12.7°C), the the marijuana in vacuum sealed plastic will keep your buds potent, healthy, and “vintage” for up to 5 years!
Note: If marijuana is stored in an area of high humidity (such as the beach or tropical climate), even vacuum sealed marijuana can eventually become as humid as the surrounding air. No worries, as long as you kept a close eye on it and no mold was allowed to form on your buds this just means you’ll have to dry it again before smoking. As long as there is absolutely ZERO mold then the humidity itself will not degrade the THC quality.
WARNING: Make sure your storage environment is DARK. Any light will degrade your precious THC.
Final Storage tips:
Potency during curing and storage can be maintained by observing some basic precautions:
- The buds need to be kept in the dark, protected from light, which will quickly decomposes the THC.
- Moderated temperatures should be observed during curing, 50-75°F (10- 23.8°C) being ideal.
- Excessively hot temperatures will promote oxidation and the growth of mold and bacteria, and very cold temperatures can prolong curing and drying for up to several months.
- During storage, buds should be stored as cold as possible, if temperatures of 32°F (0°C) or less are to be used, make sure the bud is dried to a very low moisture content before storage (to ensure that cell walls are not burst by the freezing water).
- If prolonged storage is planned evacuating the oxygen and replacing it with carbon dioxide, nitrogen, argon, nitrous oxide, or any other inert gas will help slow oxidation, as well as the addition of antioxidants such as ascorbic acid packets or vitamin C tablets.
- The most stable way to store cannabis is as whole unbroken buds or unpressed trichomes. Excessive rough handling or pressing can easily damage the protective cell walls and plant waxes that help protect cannabinoids from oxidation.
Regeneration/Rejuvenation
After a seedling has been grown to maturity and the buds are harvested, you may realize you want to perpetuate a plant you neglected to take cuttings from. This is possible through a technique known as regenerating. The regeneration process begins at harvest. High grade favorable plants that have already been harvested can be forced back into the vegetative cycle and then into flowering. There is no seed preparation, cutting, planting, or re-potting involved. To regenerate, rather than cutting the plant down at the stem as you would normally during harvest time, you leave it intact with a few branches. Be sure to leave some vegetation and growing tips on the plant to increase its survival rate.
Cut the main stalk down to the point where below which several growth tips or buds are remaining. Return the plant to a vegetative fertilizer and constant photoperiod. Over the next several weeks, the plant will elongate and develop new upward growth. It is very important not to overwater the plant after it has been cut back. The reduced above ground plant structure is still being fed by the entire existing root system, which can cause an excessive amount of water uptake and the resultant stress associated. The use of fertilizers containing some ammonium form nitrogen, such as chicken manure, will encourage rapid growth and stem elongation. Trace element supplements, co2 and strong light are helpful.
Once the plants are pruned, leave the lights on continuously. The plants will switch into vegetative growth and start to grow in about 1-2 weeks. They can be forced to flower once more when they reach their desired size. A common method is to first grow the plant indoors and then after harvest regenerate it outdoors in the spring.
Pruning Regenerated Plants
Plants that are regenerated, cloned and even grown from seed will need to be pruned at some point to encourage the plant to produce as much as possible and remain healthy. Pruning the lower limbs creates more air-flow under the plants in an indoor situation and creates cuttings for cloning. It also forces the plant’s effort to the top limbs that get the most light, maximizing yields.
Plants that are regenerated need to have minor growth clipped so that the main regenerated growth will get all the plant’s energy. This means that once the plant has started to regenerate lots of growth, the lower limbs that will be shaded or are not robust should go. The growth must be thinned on top branches such that only the most robust growth is allowed to remain.
One nice aspect of regenerating plants is that some small buds left on the plant in anticipation of regeneration will not sprout new growth and may be collected for smoke. The plant may provide much smokeable material if it is caught before all the old flowers dry up and die with the new vegetative growth occurring.
Try to trim a regenerated plant twice. Once as it is starting to regenerate, collect any bud that is not sprouting with new growth and smoke it. Then later, prune again to take lower clippings to clone and thin the upper growth so that larger buds will be produced. If a regenerated plant is not pruned at all, the resulting plant is very stemmy, does not create large buds, and the total yield will be significantly reduced.
Hashish
Since so much time, labour, and cost has gone into the production of each plant, growers do not overlook utilization of the “shake” or leaves. Extraction involves the process of removing the essential oil, THC resin, from the leaves remaining on the plant and those removed during pruning.
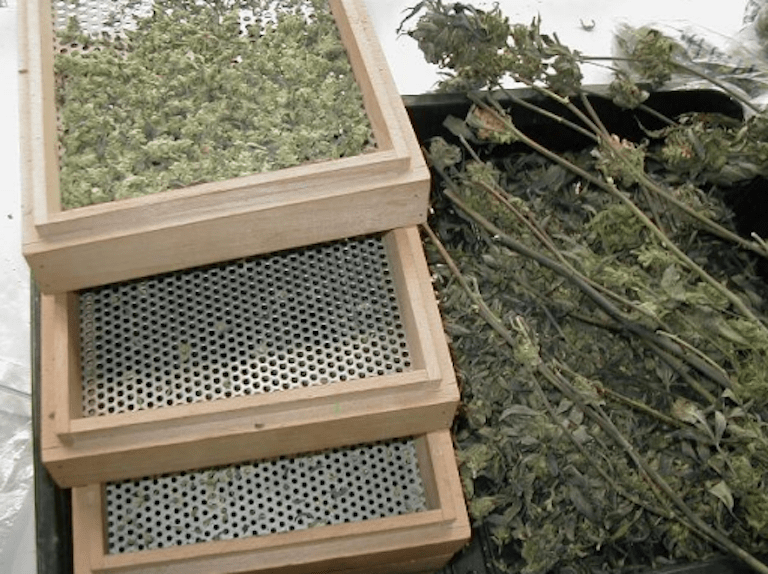
Hashish is a psychoactive drug derived from the Cannabis plant. It is solid, of varying hardness and pliability, softening under heat. Its colour can vary from reddish brown to black, and can also be greenish or golden. It is usually smoked in pipes, and sometimes in joints mixed with tobacco or Cannabis buds. It can also be added to cookies or other food and ingested. Hash is used for its relaxing and mind-altering effects. Many people have claimed that using it gives them enlightened insights.
Hashish is comprised of the compressed trichomes collected from the leaves and flowers of a mature, flowering Cannabis plant. Certain strains of Cannabis are cultivated specifically for their ability to produce large quantities of trichomes, and are thus called hash plants. Trichomes are small glandular hairs containing plant resins which appear on the leaves and stems of the Cannabis plant.
Hash oil is a solution of tetrahydrocannabinol, but is a misnomer in suggesting any resemblance to hashish. It is made out of cannabis and is very potent due to its high THC concentration, which generally varies between 15 and 20%, but can reach 60 to 70% in some cases.
Hash oil is most often dropped on a cigarette or a joint, or it is mixed in food (such as brownies or Scooby Snacks).
Production
Hash oil is produced by allowing a solvent to dissolve the psychoactive cannabinoids that are present in marijuana. These cannabinoids remain behind when the solvent is subsequently evaporated, leaving a relatively pure, highpotency form of marijuana. The color and odor of the resulting extract will vary, depending on the type of solvent used. Current samples of hash oil, a viscous liquid ranging from amber to dark brown in color, average about 15 percent tetrahydrocannabinol.
Various solvents are suitable for the production of hash oil. Isopropyl alcohol, petroleum ether, and acetone are three commonly used solvents. Supercritical fluid extraction methods using various volatile compressed gases are also rumored to be used.
Butane is advantageous to use as it has a boiling point of 31°F (−0.6°C), meaning that it will fully evaporate when left for long enough at room temperature. Butane is cheap and widely available in the form of “lighter refill” cans. Butane also has the advantage of not dissolving the chlorophyll component of whole cannabis – it dissolves mainly the psychoactive resins. Drawbacks include the risk of explosion associated with large volumes of butane gas, and the possibility of contaminants in the butane or the extraction vessel. BHO, or butane hash oil is a common term for the output produced by butane extraction of cannabis. “Purging” of the product or further processing is highly suggested in order to remove any trapped butane/solvent(s).
Instead of throwing away all those resin-covered leaves you cut off during your harvest, you can instead turn them into dank hashish! Resin filled THC glands are produced EVERYWHERE on the plant. It is produced on the stems, leaves, and vegetation surrounding the flowers. The leaves near the flowers are most potent, followed by the younger and then older fan leaves. Our goal is then to separate the THC from the plant and make it into concentrated Hash.
Not all glands are created equal. The quality of marijuana affects the quality of the hash. Every cannabis varietie’s number of glands varies per square centimeter.
What is “Hash” ?
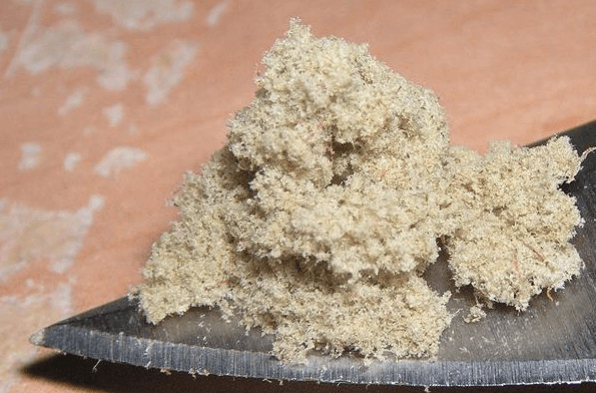
You see the gland heads (the rounded tips of your trichomes) secrete major cannabiniods(THC) in an oil-like substance that you can remove by rubbing your fingers over the bud. This is what is known as resin. The stalks that support the gland head contain less cannabiniods than the actual glandular ball heads.
Making Hash
Hash is made by knocking the trichomes off the surface of the plant, by either mechanical action, and then by pressing the glands together into a glob-like ball or cake. Depending on the method used, the hash may consist of gland heads and stalks and various contaminants, such as the elements mentioned above, and small bits and pieces of plant tissue. Hash made purely from gland heads is
very strong and compresses to a hard plastic-like lump with hand pressure. Hash with a lot of contaminants may require heat and pressure to compact. Hashish contains lots of THC (25-30% is totally common!) Along with the potency of the oil itself, the ratio of oil to powdered marijuana determines strength.

Smoking Hash
The effect of smoking hash can differ from the parent plant, as the heads of the stalked glands may contain more THC in comparison to the side chemicals than the stalks and the tissues of the plant. Hash made only from the heads of the stalked glands is very potent, and can create an uplifting high similar to a vaporizer hit, though deeper and more persistent. As more stalks are added to the hash, the character of the high changes in various ways, though typically good hash has a strong initial rush and a mild, soft letdown. The cystolith and hair trichomes add nothing to the high, but may add to the flavor.
Believe it or not there’s actually a little trick to smoking hash. You can’t just break a big ol’ chunk off and go at it, all that’ll produce for you is a burned coal. An easy technique for properly smoking hash is to place a small chunk of it on the end of a paper clip and light it on fire. It will take a second to flame up. After a second or two of burning blow it out and instantly break it up by spreading it between your thumb and forefinger. If you break it all up quickly enough it will fluff up into a little pile of dark crystals. You can these stick these in your pipe and puff away. Be careful when smoking, you will probably cough up a storm. Take small “sips” and watch out, the cherries might burn your tongue if inhaled too sharply.
Hash Rating
The Moroccan rating system for hash, starting with double zero, then zero, and so on referred to the stage of sifting from which the glands were collected. Zero zero comes from the first pass, zero from the second and lesser grades from subsequent passes over the mesh screen. With each screening a higher proportion of impurities mixes with the glands.
Preparing “skuff”
Before we get into making hash, it is essential to prepare skuff. Skuff (“shake” or bud trim), simply put is leaves and undersized flower parts that are trimmed off of cannabis buds. Unless glands can be seen on the surface of the leaves, they should not be collected as skuff, as all they can provide to the hash is contaminants. Sometimes a leaf will have a frosted appearance, but on closer examination the structures on the leaf turn out to consist principally of hairs, common on the stalks of fan leaves. The first tool needed in making hash is a handheld magnification device to observe the plant surfaces.
In order to be ready for smoking, the THC oil must be dried. Also in order to allow mechanical skuffing the plant material must be dried as well. It is not necessary that the skuff be “cured” as buds are, because the vegetable material will not be used in any way. But I have found that the skuff needs to be thoroughly dried over a long period of time, at least a month, though I prefer two. Skuff processed before that time is not as potent as it should be, and the resulting hash seems never to dry properly to gain the potency back.
Skuffing done in cold, dry conditions will prematurely kick out a lot of cystolith mineral trichomes. The ideal skuffing environment is at low room temperature approximately 60°F (15°C) or so and at normal humidity. Although it has been reported that excellent hash has been made in colder and hotter conditions.
The skuff shouldn’t be physically altered. A drum machine will remove nearly all the drug potential from the plant, regardless of the shape and size of the leaf parts. With large leaf pieces, like those produced by the buds of certain strains, a mechanical aid can be introduced into the machine, like a rubber ball. The ball will gently press the leaf pieces to the screen over time. Crunching up the skuff will only serve to introduce vegetable contaminants into the hash, and will release cystolith and unicellular hairs into the first product from the skuffing, a product which should be the most pure. Be very gentle with the skuff!
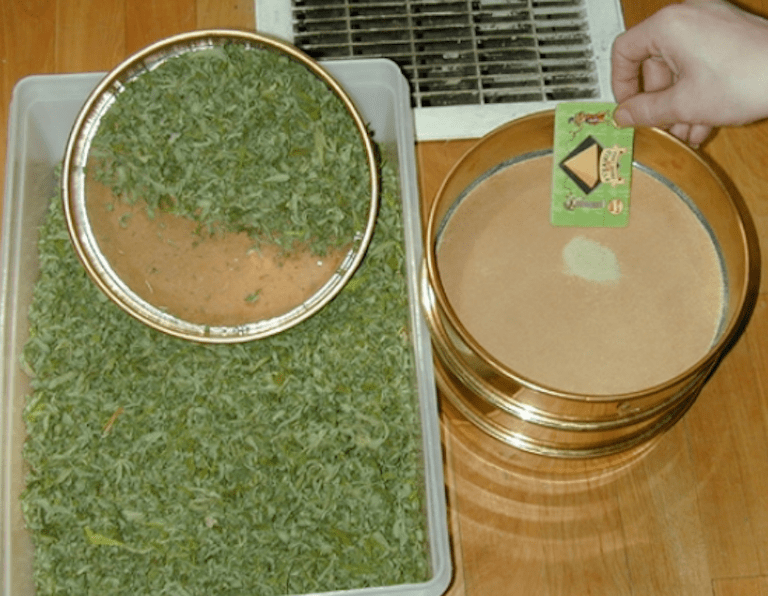
(Editor’s Choice) Smart Weigh SWS600 Digital Scale 600 x 0.1g
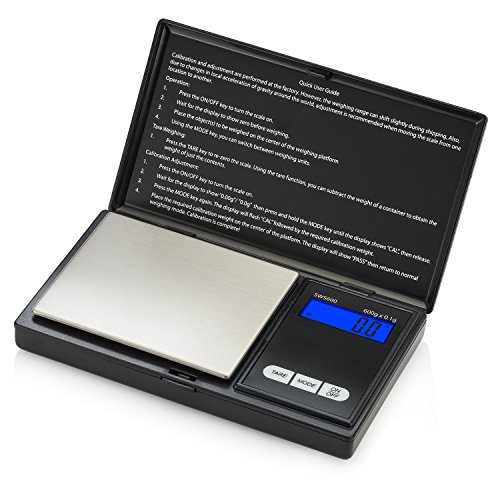
Hash Extraction Methods
Hash is the collected and pressed resin glands from buds. The best hash is “blond” (in reference to its light tan color); only the pure resin crystals are used. Green hash is the next grade, it contains much more of the plant matter than the blond hash giving it its characteristic green appearance. Black hash is generally either hand rubbed hash, which has turned black because of THC oxidation or a mixture of keef (the crystalline resin glands) and other psychoactive alkaloids.
The methods of collecting this resin vary depending on who makes it and what materials are being used. Typically, most hash is made from the manicured leaf left over from trimming fresh pot, but some is made from buds, and can be chemically extracted from all manner of herb leftovers. Real hash handles easily and tends to stick to itself, instead of you. Under very brief heat, it becomes very soft and easy to crumble or smear into little hash curls that can be rolled into cigarettes, or thrown on bowls or hot knives. Remember the best hash is made from the best bud!
Traditional Preparations
- Crystal Collection:
A) Hand rubbing – Hand rubbing is the practice of accumulating lots of resin on your hands then rubbing them together to produce small black balls of hash. Scissors hash is very similar, it is taken off of manicure scissors when pruning bud. This is probably the least effective method of making hash because the hand rubbing breaks open the resin glands oxidizing THC and giving it a black color, but sometimes it’s convenient if handling lots of bud.
B) Sieving – On it’s most crude level, a sieve is a piece of cloth stretched over a pot, which you break up, handle, bounce, or scrape your buds over to knock the resin glands off into the bowl. The best screens are sized at 150 microns and only allow the resin glands and some fine debris to fall through. They can be obtained from hobby and art supply stores. Green keef can be re-sieved to make it more blonde, the plant matter will tend to float on the screen while the crystals fall through. Alternatively, hash can then be turned over a 50-micron screen, which will allow most of the debris to fall through, but leaves the keef. To maximize the resin collection, the bud or budleaf trimmings should be extremely dry and cold. Put it in the freezer for a few hours before processing. Cruder sieved type hash is made bye drying or rolling dried pot in burlap bags, the resins tend to stick to the sides leaving hash.
C) Water extraction – A crude water extraction can be done with some really dry pot and a jar full of ice water. Don’t fill the jar more than 1/5 full of material, throw in some ice cubes and cold water, shake, and voila! The resin tends to sink to the bottom while the leaf matter floats. The vegetation is removed the crystals caught in a coffee filter. A more advanced extraction can be done with 150-micron pore bag to separate the crystals from the leaf. The remaining leaf can be saved to make butter or honey oil. - Pressing:
Once the keef has been collected it can then be pressed into hash. Keef needs pressure and warmth to become that dense lovely THC laden wonder called hash. Very small amounts can be pressed between your fingers and rolled into a ball (if done in a piece of cellophane it will help inhibit THC degradation). Alternatively, a precision press can be used, it’s important to have a good die fitted to 0.001 inches, unless you want to squeeze a bunch of your hard won keef to smash into the gap in the die. Once pressed, most hash tends to darken on the outside but remains blond in the middle. Make sure to pre-press waterextracted hash in a piece of cellophane to help get rid of the water.
Chemical Preparations
- Volatile Solvent Extraction:
A volatile solvent extraction is the simplest method of chemical extraction since it involves simple equipment and solvents that are liquids at room temperature, but low boiling points. Good choices for solvents are alcohols and fine petroleum distillates (EG 99% isopropyl alcohol, 95% ethyl alcohol, and white gas), ketones tend to redux with the cannibinoids, and naphia and heavier solvents are too hard to drive off. Pick a solvent that boils at less than 90 degrees Fahrenheit, and exhibits non-polar tendencies.
Soak your dry weed in the solvent for a few hours to a couple of days, the longer you soak it the more trash comes with the solvent. Then separate the solvent and evaporate. The left over gum is chemically extracted hash. Typically it tends to have a green/black color because most solvent also dissolve plant waxes and chlorophyll, as well as cannibinoids. This green oil can be cleaned from dark green -> light green -> red -> amber using an activated carbon filter on the solution before evaporation. Just fill a tube or funnel with activated carbon (fish tanks, air filters) and run the juice through it. If allowed to soak in ethyl alcohol (usually vodka) and left diluted the green solution is usually refereed to as green dragon, and is drank for some intense effects. - Lipid Based Extraction:
Cannabutter.
(See below for how to make it.) - Direct Isomerization:
Sometimes if the pot is crappy, or you’re dealing with a bunch of roaches, trimmings, or some other inferior source of THC it is desirable to go well beyond what a simple volatile solvent or super critical fluid extraction can do. You want to convert all those free available cannibidiols into more potent THC analogs and cannabinols.
This technique also will render a fully decarboxylized end product, as well as destroying many terpenes and aromatics which can improve or destroy a product depending on the original quality. It is important to understand this is not a full conversion to 9-THC, but to THC analogs and more active cannibidiols, and is included in this discussion more as an educational exercise. Basic isomerization takes place with a quick reflux of your cannabinoids in the presence of any H+ source (acid).
1) Treat your stuff as if it were a volatile solvent or critical fluid extraction.
2) With the remaining resin, dissolve it in a non-polar solvent. Be sure to use one that separates easily from water such as naphia or white gas.
3) Treat this mixture with sulphuric or hydrochloric acid until a pH around 1-2 is reached (approximately one drop of concentrated acid per gram of extract).
4) Place this in a reflux apparatus and cook it for about an hour. In case you’re not familiar this is basically just Pyrex breaker with a large looped tube plugged into the top. This will cause the solution inside to be exposed to elevated pressures as well as temperatures, as well as preserving all of the original contents. Simply simply boiling the mixture in a small strong covered vessel can mimic it.
5) Wash whats left with water, keep the oil layer.
6) Neutralize your mix (bring it to pH 7.0) with a little Sodium Hydroxide solution (pH 9.0) or baking soda then rewash it with water. Save the oil layer again.
7) Allow your oil to evaporate and you should be left with a sticky amber liquid that contains almost pure THC.
I would recommend an extraction for a starting point, since if you start clean your product can only get much better. Once you’ve obtained nearly pure THC, converting it to an acetate is supposed to produce more psychedelic like effects.
More THC analog modifications can be made (to yield pure 9 or 6 THC), but generally the consumption of the original products in these reactions makes them hardly worth while (usually 5-20% yield, so it may be half as psychoactive but you have 5 times as much of it in the beginning).
Hash Oil
Hash oil is basically hash in which the walls of the resin glands have been broken down leaving a gooey oil. Often chemically-extracted hash will be almost an oil, or keef can be dissolved in alcohol, then the alcohol is allowed to evaporate. Hash oil can be smoked like hash in cigarettes, bowls, hot knives, reconstituted into a more hash like substance with the addition of ash or powdered plant matter, or applied to bud to make it more potent (way more potent!).
Hash Additives & Preparations:
A variety of different plant extracts can be, and sometimes have been, added to hash for more a more intense psychedelic experience. Generally only a very small portion of additive is added for the amount of keef available, maxing out around 20% additive and around 5% additive on the low end.
Making Hash – The Primary Methods
The first is flat screening. This is accomplished by using a silk screen frame with fine plastic fabric. Fine steel screens are also used in flat screening. The method involves rubbing cannabis trim across the surface of the screen, the glands and other contaminants dropping through the screen to be collected on a surface like a piece of glass. A flat screen can also be used with an electric motor rigged to produce a back and forth or vibrating motion.
The second method also uses screen, but in a rotating drum, typically motorized using a rotisserie-type motor. A rotating machine takes less skill to use. A drum machine can remove nearly all the glands without depositing any plant tissue. This would be very difficult when solely using a flat screen.
The third method: the glands can also be knocked off the plant by agitating the material in ice water. The glands sink to the bottom of the mixture and can be sieved, dried and pressed together. While this method requires only a blender and a coffee filter, it seems to produce more contaminants than screening, and the output can’t be controlled as well, if at all.
Flat Screening
Flat screens can be made from commercial steel fabric, usually available by special order in printing supply shops, or from plastic silk screen fabric. Because the grade of the hash from a flat screen depends on the vigor of the handling, screens with smaller holes are better, in the range of 110 lines per inch to 137 at the high end. A 125 “mesh” frame is a good compromise. The silk screen material is attached by glue to the bottom of the wood frame, leaving a well on top with the wood pieces forming the sides.
Making good hash from flat screens depends on a lot of personal involvement. The method is simple. The frame is placed over a collection surface, like a sheet of glass or a mirror. I like to attach small wooden blocks to the bottom of the screen frame so that it can be used right side up, with the flat side of the frame on the bottom. That way the skuff is held within the walls of the frame as it is skuffed. The skuff is placed in the frame and is gently pushed back and forth over the screen with a pusher, like a credit card.
Making the best grade of hash can be done by applying almost no pressure to the skuff as it is moved around on the screen. There’s no way that a flat screen can produce as much of the top product as a drum machine, since a lot of the capitate glands will not be in contact with the screen unless pushed into it.
The pressure of the tumbling skuff accomplishes that in a gentle fashion in a drum machine, but extra pressure applied by hand will cause contaminants to be expressed in flat screening.
Additional pressure on the skuff is best done by tilting the plastic pusher card into the skuff as it is moved across the screen. But there is a limit to how much pressure can be applied before vegetable material stars to break off and be passed through the screen. Some vegetable material is acceptable in the lowest grades of hash, but too much pressure will produce a light green product that does not provide the expansive rush expected from hash.
It is difficult, if possible, to extract all the glands from the skuff by flat screening. I’ve found that the exhausted flat-screen skuff is still quite potent, and is welcome by smokers who remember the good old days when you could sit and smoke Mexican grass for hours on end, a social event lost in modern times due to the uniform high potency of home-grown pot.
Although flat skuffing is not as productive or as easy to control as a drum machine, it brings gland hash within the range of anyone with a few dollars and some bud trim.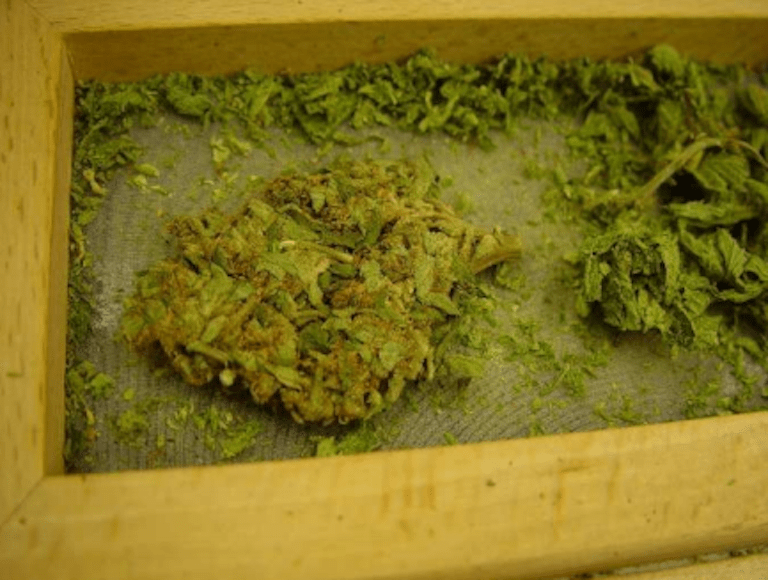
Drum Machines
A drum machine tumbles the skuff inside of a wheel with fabric attached to the rim, like a squirrel cage. The key to the drum machine is the slow speed it operates at. Time replaces the pressure of flat screening, the longer the run, the more contaminants. But proper drum screening never introduces vegetable material into the hash, as it never handles the skuff vigorously enough to crumble the leaves. A drum machine can gently strip nearly all the drug containing glands from plant material.
Drum machines can be purchased from at least one supplier in Holland who calls their product the “Pollinator”. The Pollinator may be a nice machine, but the price is very high considering how simple the machine is. A home-built machine can easily be made for a few dollars by anyone with a reasonable degree of home handyman skills, which is just about a given for cannabis growers.
The BubbleBag Method Step-By-Step
The easiest plant essence extraction method is accomplished through the use of a hash bag, aka swag bag. What your leftover leaves (known as “shake”) and such are composed of is a water base, and on it is resin. Resin is an oil base. Water and oil do not mix, this is how screening works.
You’re first going to need to purchase a hash bag kit (these dudes make really good ones), two 5 gallon buckets, and an electronic egg beater. Swag bags/hash bags are bags with a mesh at the bottom, usually cylindrical in shape. They will get progressively smaller as you continue the process.
First take your work bag, and place it inside a 5-gallon bucket. Next take some ice (about 2 scoops) and pour it in the work bag in order to keep everything cold. Then add a little bit of water. The idea is to make sure everything gets very wet.
WARNING: Water must be PURE water that comes from reverse osmosis only! This water will have very few dissolved solids such as salts that will contaminate your hash and degrade its quality.
Now pour the leaf in slowly and mix it with the ice and water thoroughly.
Your next step is to separate the leaf from the resin. You can do this by using an electronic eggbeater. Hold the bag up and have at it! Mix for about 10 minutes. DO NOT skip this step, you must make sure your leaves properly separate from the resin and the resin settles properly.
Note: You may need to add a lot more water in order to get everything to mix properly.
Next you will place in your second five gallon bucket the rest of your bags, in linear order, starting with the smallest swag bag (should be 23 micron).
Shake your big bag filled with your hash mixture gently. Jiggle it. Next you’re going to lift it up and strain it. Let all the water drain down into the bucket and squeeze the bag. Make sure you squeeze out all the liquid into the bucket.
Now you pour the liquid from bucket #1 that you just strained into bucket #2 (the one filled with the bags in order from smallest to biggest all packed in there at the same time).
Jiggle the first bag up and down to let the water fall through. What you should start to find is resin appearing at the bottom of your bag! Grab it and squeeze the water out of it (you can wear gloves if you like) and place the dried resin on your working surface. We recommend you use a spoon to scoop out the resin. Continue this process for all the bags. You may want to put each bag’s hash in a separate pile, as each will have a different consistency per micron sized bag.
Your ideal consistency is one that presses together very well, is a bit grainy and oily. The resin glands shouldn’t be entirely broken either, which further adds to the hashish’s potency.
When all your hashish has been salvaged, let it dry overnight for at least 12 hours. Now some people will just smoke it as it is, but it works best to put it in the oven at 125°F (51.6°C).
The Blender Method
Put water in a blender. Add a large handful of leaves, stems, seeds and mild weed. Put in 3 or 4 ice cubes and blend it for about 3-4 minutes. Just make sure everything is very finely chopped. Secondly, you will need a gold reusable coffee filter (or 90-line silk screen). Get a large mouth quart mason jar, and strain your Slurpee mixture through it. Once you have strained all the liquid through, run some more water through the leaf material to wash out any extra trichome.
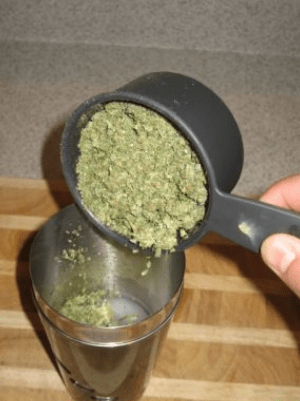
After a few minutes you will notice a white collection at the bottom of the jar, this is the trichome. Let the trichome settle at the bottom for about 20-30 minutes. Next, pour off the top 2/3’s of the filtered green water, leaving the settled trichome at the bottom. Add more ice water to get the green stuff out, and let the trichome settle at the bottom for about 20 minutes again. Repeat this step once more. Pour off as much water as you can without pouring off the trichome, filter the resulting trichome/water mix through a paper coffee filter. The trichome will not go through the paper, but the water will. When all the water has filtered through, a slightly wet, cold, mass of trichome will be left. This will be easy to handle and compress.
The Alcohol Method
Take your stash (stems, seeds, mild weed) and place it in a covered pot, with enough alcohol to cover everything. Isopropyl alcohol is commonly available at pharmacies. Look for alcohol that is 99% pure. Denatured alcohol also works well. Sometimes isopropyl alcohol is called rubbing alcohol. Now carefully boil the mixture on an electric stove.
WARNING: Be careful; the alcohol is very flammable!
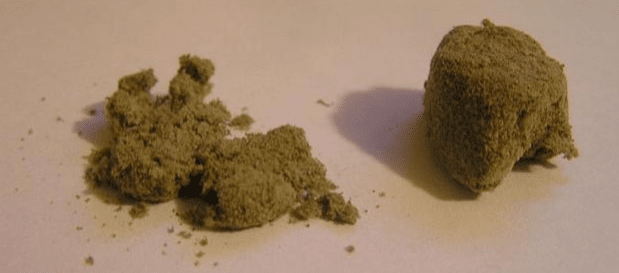
After 45 minutes of heating you can strain the solids out, saving the alcohol. Now, repeat the process with the same residuals, but with fresh alcohol. When the second boil has finished, remove the solids again, combine the two quantities of alcohol and boil again until you have a syrupy mixture. This syrupy mixture will contain much of the THC formerly hidden in the stash.
Making Cannabutter
Bring a pot of water to a rolling boil, then put a small amount of butter in the water. The butter melts, and mixes with the water. Then put the grass or stash in and boil it. Now all the grass will be riling around with the water and the butter. The THC dissolves into the butter. Stir the stuff regularly. After half an hour of cooking the grass, strain out the grass and stash and squeeze all the juice out of it. Then put the liquid in the fridge.
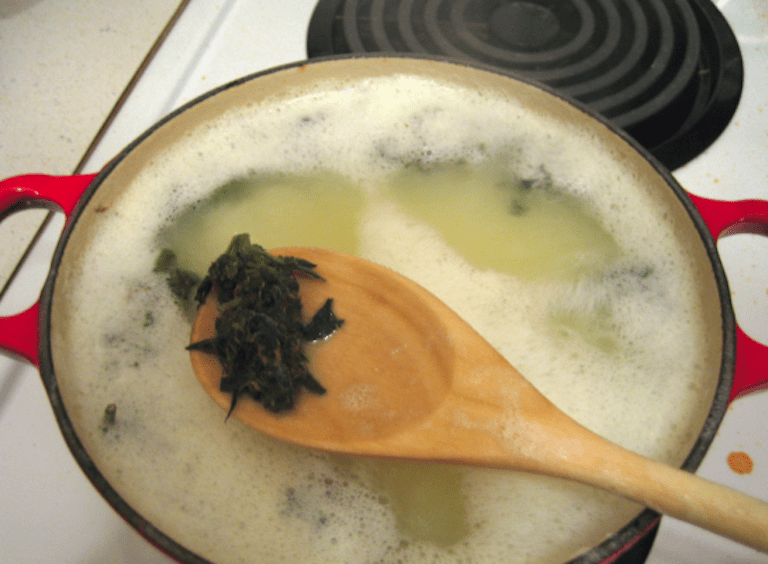
A few hours later, the mixture is cold enough and the cannabutter has solidified on the surface. It will look kind of scummy, but it’s just enchanted butter. Scoop it out and retain it in a bowl or a jar. The cannabutter can be used just like butter, in brownies, cake, etc. Enjoy!
i read your article, it is very comprehensive but it needs more details and videos specially in curing section, hope you improve it for all!
i enjoy reading it and hope you keep doing good work!
from Iran with gratitude!
Indeed. I’ve read a few methods involving using a hygrometer inside the jar. That’s the method I’d love to perfect. Instead of hanging for an unknown amount of time due to personal environment temperature and humidity. Putting it in a jar where you have no clue if it’s wet, moist, dry or in the danger zone of mold creation, something like 83% @ 70F for a week I believe.
The method I’ll be using is hanging the whole trimmed plant for a day or two, then cut the buds and put in glass jar with a hygrometer so I’ll know its actual humidity. Opening the jar on and off to slowly drop the humidity to around 60%. I’ve read a few articles that state a good cure is dropping the humidity slowly over a week or two. For storing my bud, I like to have a 62% humidity pack inside to keep them at a good consistency, so that’s why I don’t like to dry/cure them lower than 60%. Unless I want to try to infuse some flavor into dry bud by adding flavored moisture.
Once I hung the trimmed plant for 3 days then put in the jar and humidity was forty something. IMO that was just a way too fast drop in humidity for such a short amount of time. I never had the proper amount of time to slowly drop it from wet danger zone to 60%. So I threw in the 62% humidity packs to re-hydrate them then started the open lid process.
In any case, I’m a noob at growing and curing. I would just like to see curing instructions that anyone can reproduce exactly the same every time using methods by numbers. Instead of leaving it up to random environments and snapping the branches and/or squishing the bud to guess if it’s the perfect dryness. One little $10 hygrometer can make the world of difference in doing the same cure every time.
From Cali with gratitude!
This article is just beyond, it explains so much, in such detail and with sometimes mentioning sources. Also, it explains correctly that there are many variations which alter the set periods (days/weeks) for various processes from harvesting to curing. What incredibly helps are the tips and tricks that you can use to determine those factor for your own crop which makes this article super useful.
I would agree with Mohammad that videos would help clarify some exact steps but dude heads off and Full speed ahead Ryan Riley!
Riley; you are soooo informed…ty for that. I am 66 yrs old and when living in Toronto, Canada as a hippie had a marijuana plant in my living room. Once in a while I’d smoke the largest leaves! And in the early 70’s my boyfriend and I sold corn from his dad’s field but hid some plants among the crop. THAT was fun and totally unscientific. We were such newbies! Thanks again for educating me so much.
Hi, I need some advice. I have only 2 stems which are now about 4 feet tall, the buds look full on top and some around. They smell good. Am I supposed to pick the buds off now or later and can I just pick off the buds or do I have to cut the whole stem and hang it upside down to dry? Thanks.
Have very mature frosty buds But hardly any smell at all, what’s up with that?
Do you change the light schedule near the end before harvest. ie: put plant in 24 hour darkness 24-36 hours before harvest
Very good article indeed! it covers harvesting very well and since i m in my first grow cycle (and close to harvesting) with my grow box from stealthgrowbox.co.uk , i needed some info! thanks! Ans some videos please!