Are you frustrated with the prices for high quality Grow Light systems?
The most of LED lights being sold online are either poor performing, not true to the features as specified or highly-priced if they are of somewhat better quality. The frustration escalates higher when the highly-priced LEDs don’t perform according to the expectation. Someone may think of building his system if the requirements are not met for growing your gardening greens.
How to Build Your Own LED Grow Light?
Although, it is a bit tricky job anybody can build and install his lighting system by following these simple DIY tips. The open sources can be utilized in gathering the required components to make a customized system as per the need of the plants. It is easy to work with and cheap as well.
DIY LED Grow Light: How to Build?
Building DIY LED grow light needs few accessories, LED chips, tools, and equipment for regulating the current flow in the system.
Tools and required materials
There is a complete list of tools and materials below needed to build a superior LED Grow light system of your choice and the relevant resources to buy these tools quickly while you must the knowledge of parallel and series wiring along with the combination of both in any circuit.
#1 Weller WLC100 40-Watt Soldering Station

It’s a very Lightweight design and good for a small or hard task. Its tip is plated with iron & nickel while it transfers heat excellently.
this soldering iron is good for small circuits, microprocessors, kits, and minor crafts.
#2 Precision Wire Stripper

It’s fairly lightweight and easy in operating for electrical jobs. Moreover, the safety lock makes it slim to adjust to small places while storing.
Get your jobs done with precision and accuracy using this wire stripper.
#3 Thermal Conductive Glue-GENNEL
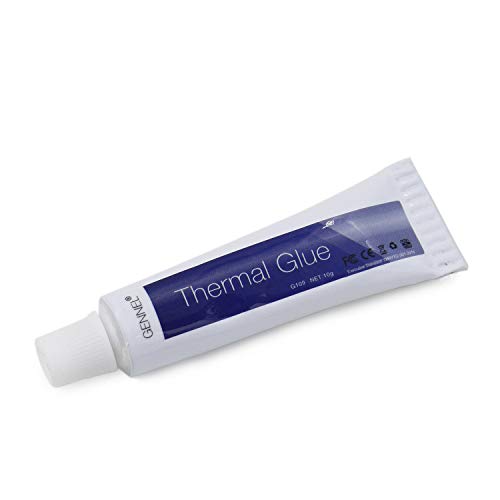
This heatsink glue is ideal for MOSFET being a strong adhesive and stable at higher temperatures as well.
It sets its full strength within 3 minutes of application.
it is widely used in domestic and commercial switch gears and electrical appliances.
#4 Metal Panels
There are a variety of panels available in the market while you can select any panel according to your need as different panels have the variable capacity to install LED ranging from 1 dozen to a few hundred.
#5 AWG Wire & Marker
You can have 4-5 feet of wire piece from your garage or store along with a marker from the writing-table.
#6 LED Strip Arduino Driver
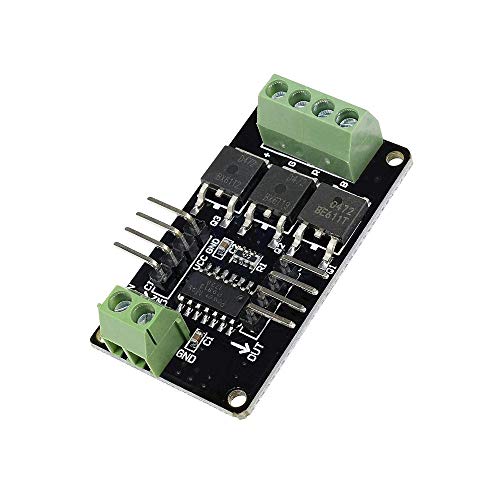
This driver is capable to control RGB light bar up to 72 Watts. You simply need to set the timing of red, green and blue lights on your pc and installing the same chip to Arduino driver board.
an interface can be adjusted to work on 5.5 volts-DC current while an external power supply of 12 volts of DC power is needed. Installation with very easy by screwing in 2 holes only.
#7 DC Voltage Regulator

DC to DC converter converts unstable 12 volts into stable 5-volt, 5 Ampere whereas it can work on 24 volts as well. It protects the lighting system from over-voltage and steps down according to the output needs.
This regulator can withstand high temperature and shuts down on short circuit. So, the best for LED and landscape lights and comes with extended power cord.
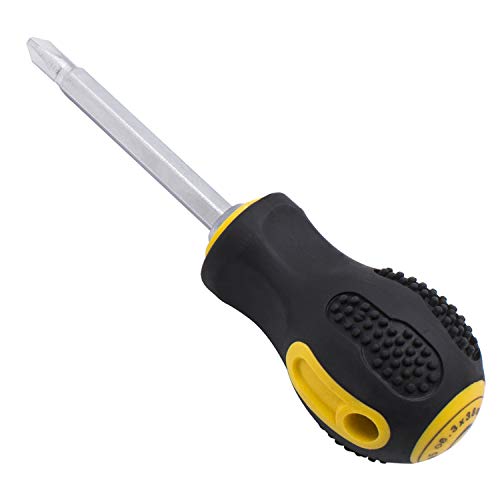
#8 Screw Driver, Nuts, Bolts
For screwdrivers
For Nuts & Bolts

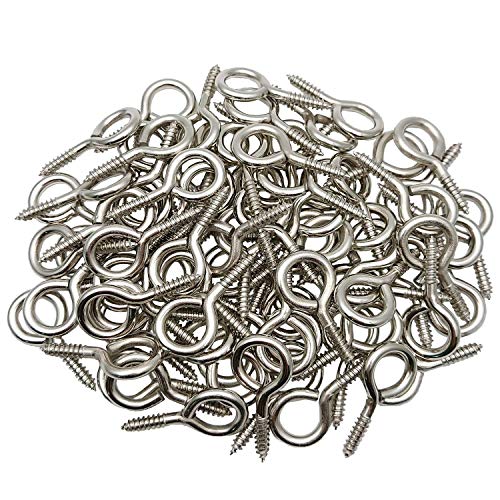
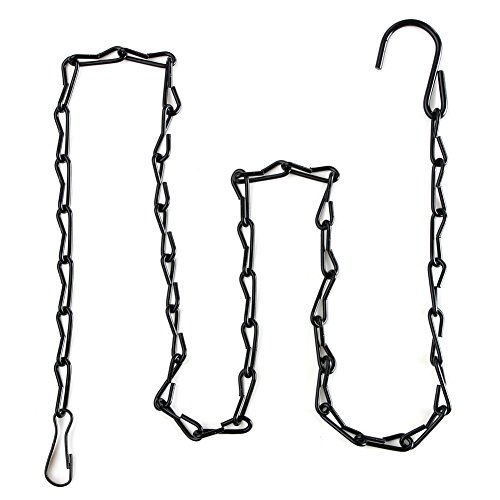
#9 Eye hooks and rope/chain for hanging light
For eye hooks
For daisy chain
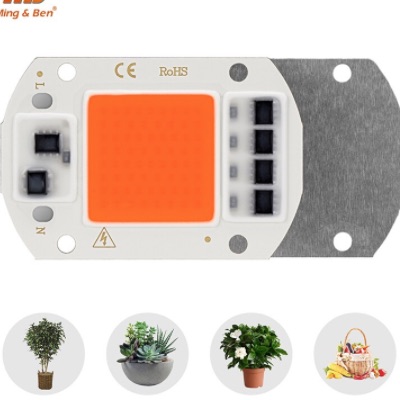
#10 LED chip
LED chips may be of variable size depending on your needs and desire. There are a variety of chips available in different market places. 3W, 5W, and 10W chips are in use in different LED grow light panels and it depends on the light requirement and area of your planting.
#11 Dc Brushless Cooling Fan 2 inches

The size of the cooling fans depends on the size of your panel and similarly the number of fans to be installed as well. Fans in different sizes are available on amazon. For 2 inches fan, this the best option.
After you have all the accessories and equipment follow the steps below to assemble an awesome LED Grow Light that suits the credentials that your plants should love.
How to build?
Before we move onward to a DIY assemblage of the grow light systems, prerequisite knowledge of some terms associated with the lighting system, plant response to the types of light arrangements, and the equipment in use is necessary. Let’s have a brief about them.
Light possesses several features that affect the growth and development of plants including the intensity and the quality of light, uniformity and angle, brightness and direction that determine the process of photosynthesis and physiological processes. Chlorophyll is the driving force in photosynthesis that absorbs the wavelength of varying intensities from 400 nanometers to 700 nanometers often called PAR or PPFD with its peak absorption from 600-700 nm in the red and 400-500 nm in blue wavelength of light. PPFD is measured in μmol m-2 s-1 that is an outcome of the DLI-Daily Light integral and period of light by the source in 24 hours and is directly connected with the production of biomass by absorption of nutrients and water by the plants in that time.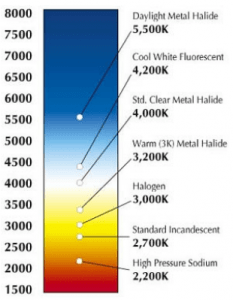
The quality of light is the combination of the spectrum that enables different processes of growth and development in plants along with controlling the plant’s metabolic activities that concentrate on the quality of the product like color, taste, and maturity by maintaining it genetic and phenotypic characteristics.
Ultra Violet Spectrum (200-400 nm): It reduces the growth of fungus and is responsible for inducing resistance in the plants against diseases and pests along with stimulating pigmentation in leaves for further vegetative growth.
Blue Spectrum (400–500 nm): It controls stomatal opening in the leaves, helps in the vegetative growth stimulation and foliage development.
Green Spectrum (500–600 nm): It controls stomatal closing and maintains a balance of the moisture in the plant tissues while initiates photosynthesis in the deep tissue of leaves.
Red Spectrum (600–700 nm): It controls stem elongation, internodal distances, and hormones that control pollination and fertility of the plants.
Far-red Spectrum (700– 800 nm): It controls stem elongation, induces flowering, and the maturity processes.
#1 LED Drivers
LEDs perform better under low voltage so AC needs to be converted to a stable DC for their smooth functioning. DC to DC converters is best to drive them with the step-down options and regulators that make them efficient and energy saving. The drivers with the low DC input are preferred over AC drivers with a minimum output of 5 Volts and 5 Amperes.
#2 Heat Dissipation
The LEDs are generally associated with producing low heat that is controlled through active and passive heat sink methods. Heat dissipation is generally controlled through aluminum sinks in the passive cooling system while in the active heat sinks additional airflow is maintained using extra exhaust fans to keep the system cool and to avoid high temperatures.
#3 Dimmable options
LED light dimmers are an effective technique to control the brightness options at the different stages of the plant’s need. Another option is to install pulse-width modulation switch to the source and program it to switch up and down for the brightness control using a sensor or an analog dimmer can also be used instead of PWM switch that needs constant attention of the growers for brightness control.
DIY Installation for Panel
The first step is to ensure that each LED is connected in series with the MOSFET. All the power that comes to these LEDs will be controlled by utilizing Arduino PWM (Pulse width modulation) pin. The Arduino helps in complete separate control for all the different LED colors and thus helps in maintaining the required lighting. All the LEDs of a single color should be connected in series in the form of an array. Different LEDs’ types should be joined in separate PWM pins of Arduino.
This separate Arduino connection comes handy when you want to leave room for further adjustment or want to add more LED depending upon the requirement. The LEDs produces heat with light too, to overcome this issue, all the LEDs are held in place with the thermal tape in an Aluminum heat sink. This helps in even heat distribution and helps to avoid overheating.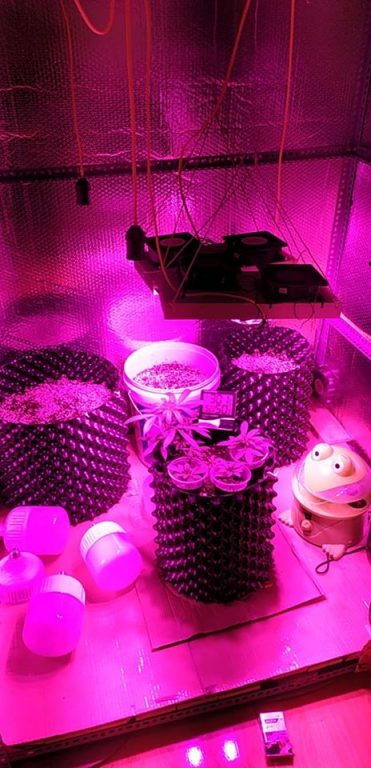
The LEDs are further connected with a power supply with the help of a voltage regulator. The voltage regulator, here, helps in supplying a smooth and thorough voltage to the LEDs, ensuring the smooth and uniform running of the LEDs.
For the best quality of light, all the LEDs should be placed evenly over the surface. It is better to draw a diagram before going for the physical installation so that all the steps are carried out proficiently without hassle. The successful completion of a diagram will help you to connect all accessories and drivers more precisely.
the best DIY LED Grow Light (Step by Step Instructions for Installation)
Since by now you are very well aware of the terms used in the manufacturing of LED lights, here is the list of tools you need to install your LED Grow light.
you have already tools and equipment in hand while the new hardware or software to be used in the making will be shared instantly along with the suitable link for their availability.
#1 Step A: Arrange and organize your parts in hands along with the wiring.
#2 Step B: You may need the following tools, check availability with your store.
Pencil or a market, Flathead screwdriver, Wire Stripper, Tape, Drill, and Spatula.
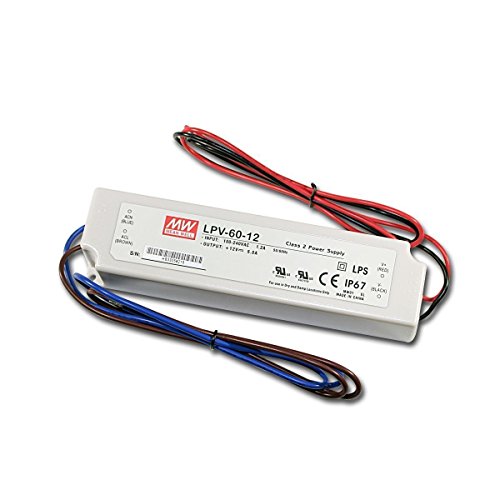
#3 Step C: Makers DRIVER have the channels for inserting Mean Well drivers, go with that.
You may get Mean Well driver LPV-60-12 from here.
insert all modules into the relevant channels as on the instruction manual from 1-5.
#4 Step D: Use marker for highlighting all locations of LED on the board keeping a distance of 1-2 inches between the heat sink and driver. The placing of LEDs may vary depending on the light requirements of your plants.
#5 Step E: Apply Grease into the LED channels to hold them tight.
#6 Step F: Make holes on the 4 corners of the board and insert screws into them, loosely.
#7 Step G: Insert the boards of LEDs into the channels, align them in rows onto the heat sink and repeat for all boards, similarly.
#8 Step H: Add Makers LED PRO driver on the board.
#9 Step I: inter-connect LED board 1 and 2 with wire by cutting the strip ends to reach each other for connection.
Connect -ve channels of board 1 with the terminal blocks to all corresponding channels. Similarly, +ve channels on board 2 and tighten all wires in connection.
#10 Step J: Make the connection of LED board 2 to the pro driver. Use the estimated wire length by marking the driver’s location on the board. Cut the stripped ends and tighten ends of the wire by inserting them into the terminal blocks.
#11 Step K: Repeat step’J’ for the Positive wires to connect LED board 1 and to the pro driver using the approximate length of the wire and cut the stripped ends for connecting them mutually.
#12 Step L: Make holes on the driver to pass the wires of the heat sink fans near the terminal block.
#13 Step M: Make the connection of fans with the Pro drivers on the block by stripping the ends of wires and tighten them firmly.
#14 Step N: Make a hole using a drill into the end-cap for DC power and another wiring.
#15 Step O: Pass the wires through the hole in the cap.
#16 Step P: Connect the power cable to the Green terminal on Pro driver.
#17 Step Q: Connect LED Controller to driver.
#18 Step R: Push LED Controller into heat sink through the available provision.
#19 Step S: Peel off the protective plastic cover from the lens.
#20 Step T: Install end cap at their position.
#21 Step U: Mount 1 or 2 Fans as the provision is.
#22 Step V: Connect wires to DC power supply
#23 Step Y: Adjust Amps and Volts according to the wattage of the LED until they illuminate.
Congratulations, you are done with that.