
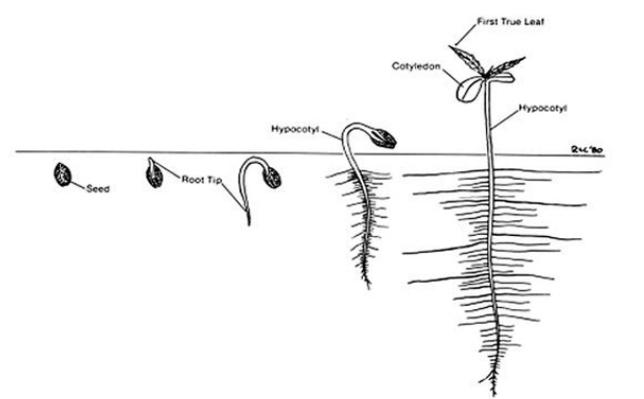
Germination
Once you have decided that it is time to use your seed to grow a plant, you will have to initiate plant growth by germinating the seed. During germination moisture, heat, and air activate hormones within the durable outer coating of the seeds. Soon, the seeds outer protective coating will crack and the root (a tiny white sprout) is pushed downward outside. Next, seed leaves emerge out from within the shell as they search upward in search of light. Soon after a seedling is formed. Regular mineralized spring water contains all the nutrients a seed needs in order to germinate properly. Once the seeds sprout fertilizer is then added 2-4 weeks later.
To help you out, here are the high times top seed banks
The first thing you need to know is to expect out of 10 seeds approximately 2 will germinate into strong healthy female plants (the end goal). The rest will be male, weak, or not germinate at all. Please note that seeds that are stored too long will germinate slowly and have a higher failure rate. Most healthy vigorous seeds will begin to sprout within 2-7 days. Some seeds may take even a month to germinate, even if the best conditions are met! But these will probably grow very slow. At least half your seeds will have germinated by 21 days.
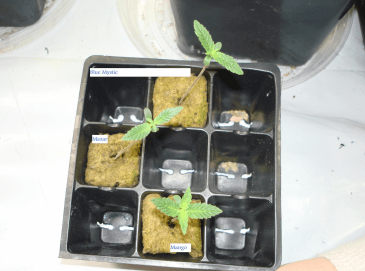
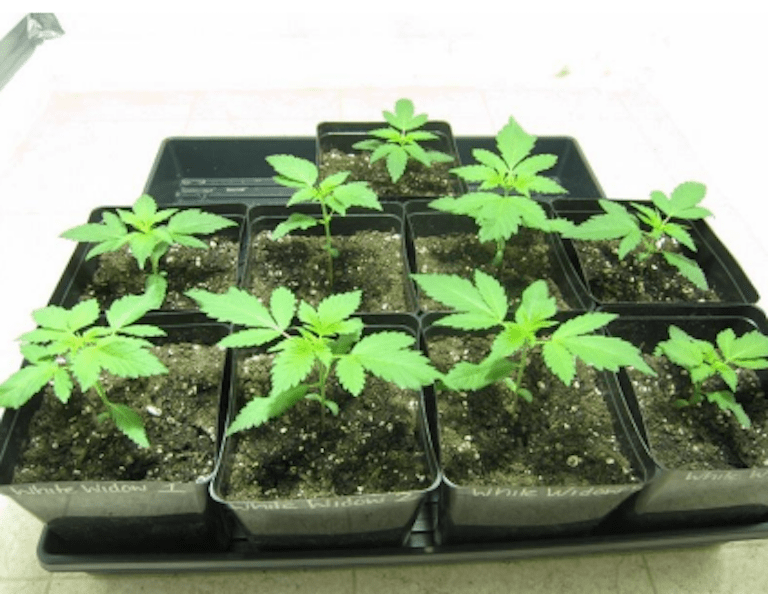
As the seedlings mature, remove any sickly, male, and underdeveloped plants from your garden. Focus your attention on caring for the strong female plants that have the potential to create for you a massive rich harvest. The next step is to select the best mother plant for the cultivation of super clones.
Cannabis seeds need only water, heat, and air to germinate. They do not need fertilizer, extra hormones, or any light (right now). All the plant needs at this time is contained within the tiny seed.
Properly germinated seeds (ideally strong, mature and under a year old) will sprout in 2-7 days when kept moist at 70-90°F (21.1-32.2°C) with pure water.
Unfortunately sometimes your seeds will not germinate. With high-grade cannabis seeds costing so much money, it is extremely important (and not to mention cost effective) that you pay very close attention to this section. Misinformation and bad technique are often used in cannabis seed sprouting. Fortunately, the information presented here for you is literally what I have found to be the most successful ways of germinating marijuana seeds. This information will allow you to get the highest germination success rates possible.
Cannabis seeds can be stored for up to 5 years in a cool dark place with relatively medium humidity. But they do go bad, so germinate early!!
Note: if you buy your seeds from a quality seedbank, you have a right to expect that close to 100% of them will germinate (if guidelines outlined below are followed) and breed true to the variety you have selected.
For soil simply place your seeds 3/8 of an inch deep in soil. One fresh seed per each pot. Keeping the seeds moist is critical. The water activates hormones within the seeds and begins the enzymatic seed sprouting process.
Most growers will plant twice as many seeds as they need, because generally half (or more) of their plants will turn out to be male, which will then be eliminated from their garden. This gives rise to Sinsemilla plants (unpollinated female plants – the ultimate harvest). Sinsemilla is Spanish for “without seed”.
As far as lighting goes, delicate sprouts are placed under lights about 6 ft. from a 400W HID and about 8 ft. from a 1000W HID. Keeping the sprouts and seedlings at a temperature of about 75-80°F (23.8-26.6°C) is BEST.
A warm, moist growth environment breeds high germination success. I recommend you get a growth mat, or germinate in the warmer months.
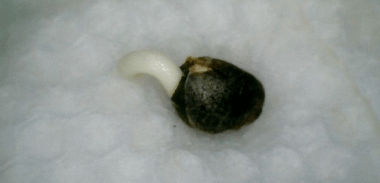
When the appropriate conditions are given to the seed for an adequate length of time, the plant will sprout a root. After the root is about a quarter of an inch long the seed can be placed in it’s new home environment where it can grow.
If you are going to be growing marijuana in soil, you can germinate the seed directly on the spot where it will grow. Simply place the seed where you want the plant to grow and cover it with about a half inch of loose soil. Press down firmly, but don’t compact the soil or else you risk decreasing it’s oxygen supply!
Keep the soil around the plant moist (not soaking wet) by spraying it with water aged for at least 3 days in a hand sprayer. Keeping the seed moist but not wet by spraying it may not be possible especially if you are growing outdoors. So you may wish to germinate your marijuana seed indoors using the method described below.


Temperature
Regular room temperature (approximately 60-80°F[15.5-26.6°C]) is suitable for seeds that originated in a colder climate, but a higher temperatures are necessary to ensure optimal speed and health when germinating and growing some seed strains that originated in areas where it is very warm all year long.
If you have no freaking clue where your seed originated from, not to worry, just try germinating a single seed at room temperature (78°F [25.5°C] being the best). If your seed doesn’t sprout, try germinating it at (10°F [-12.2°C] hotter, or perhaps a little colder until you find out what temperature works best. The majority of growers feel that 75-80°F [23.8-26.6°C] is the absolute best temperature range for high germination rate success, myself included.
Air
Air (oxygen) is a critical factor to take into account when germinating your seeds. Quality fresh abundant air is a crucial component for germination and general vigorous marijuana plant growth. If your grow medium is too soggy and moist it will literally drown the seed by cutting off it’s air supply. Also planting seeds too deep can cause this poor germination to happen as well. A general guideline is to plant the seeds twice as deep as the width of the seed.
Germinating Techniques
See also:
Germinating a marijuana seed is comprised of supplying the seed with moisture and keeping it in a dark place that has a fairly consistent warm temperature. You must learn and understand proper germination techniques (and do it right) in order to get a high percentage of successful sprouts. In nature, seeds germinate underground where it is dark and moist, usually in the spring. Before
planting seeds, they can be soaked in water (or a vitamin mixture); this speeds germination. When growing in soil you can will soak them for one day.
There are many different ways of germinating seeds, depending on the growth environment. For example, if you are growing marijuana hydroponically, you can germinate the seed directly on a small piece of the media that will be used in your hydroponic garden, such as rockwool.
Note: If you’re a first time grower and you bought for example 10 seeds, for your first time start off with only germinating 3 for the first week, then once you get the hang of it, go for all of them.
Soaking
In this method, the grower places his/her seed(s) in a cup of some sort, which is filled with warm water.
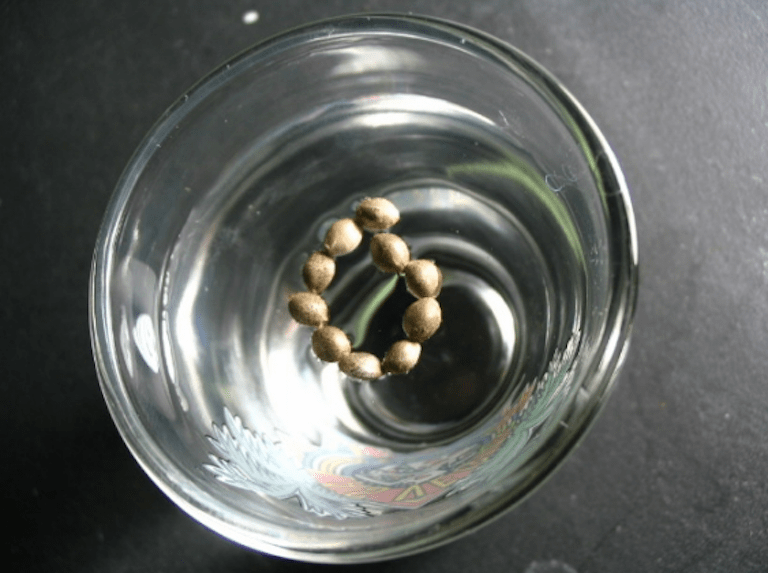
Materials: Cup/mug (one that retains heat well; i.e. ceramic coffee cup), plate/dish/lid (big enough to cover cup/mug/etc.), warm pure water.
Procedure: Place the seed(s) inside the cup filled with warm water. Next, cover it with a ceramic plate (this will prevent heat from escaping, as well as shield the seeds from light). For best results, use water that is a bit warmer than room temperature. This will
compensate for any drop in temperature. It is normal for the seeds to float on the surface; just let them soak for a while then give them a little tap to make them sink (the best, most viable seeds will sink to the bottom). Although it is hard to accidentally over-soak, it’s worth mentioning that seeds using this method should only be soaked until the taproot has emerged.
This method is extremely effective if executed correctly. Most seeds should show their taproots within 24 hrs., and all seeds should show taproots within 48 hrs. (assuming you are using good, viable seeds).
Crucial Tip (for soil-growers): If you want to further increase your germination rates, simply plant your seed(s) shallow; approximately 1-2 cm. deep. The seedling(s) should break the soil-surface within 24 hrs., or 48 hrs. for the most (again, assuming you are using good viable seeds – otherwise, it may take another day or two). Once the seedling(s) has/have sprouted, add a little extra soil at the base of the stem(s) for additional support and root-protection.
You can prepare the seed by soaking it in a glass of lukewarm water overnight, keep it room temperature and stable, for 12 – 24 hours, and if the seed has sprouted put the seed so the sprouting points downwards, i.e. the crack in the seed should face downwards. Make sure the seeds get nice and soaking wet to activate growth hormones.
Once soaked your seeds are ready to be placed between moist paper towels to sprout or they can be planted in a medium such as a rockwool cube.
WARNING: DO NOT soak seeds more than 24 hours. They may get too wet and suffer from oxygen deprivation and rot.
Note: Many professional weed cultivars have a secret; they claim that if you put the seed in Gibberellic acid and the seed is more likely to produce a female plant.
Germinating In Soil
Put soil in a pot and pour water until water fully drains out of the bottom of the pot. Poke a hole, around ~0.4″ deep in the soil with a pencil. Put the seed in the hole and cover the hole gently with dirt. Spray the surface with water, and continue to do so. Place the pot in room temperature (78°F[25.5°C] is best) and keep on spraying the soil with water until you see the sprout emerging.
Take care so you don’t drown the plant at this stage. The seed will germinate in around 5-7 days.

Propagation Kits for Easy Germinating
Another method is to purchase a propagation kit. This functions like a miniature greenhouse. The seeds are placed in tiny holes in rockwool cubes and then the germination hormone that comes with the kit is added, followed by the closure of the unit’s cover. You can also use this kit to help root your clones with ease.
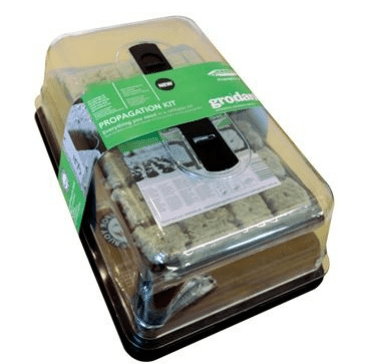
Propagation kits tend to have a very high success rate (oftentimes 100%). They are inexpensive, but you can make your own! Old water-bottle cases work perfectly. You know, the cardboard/plastic ones. Just get a hold of some seedling pots and you can use it as your mini-greenhouse. This is essential for amplifying germination success because these containers can hold the moisture in. Adding a heating pad underneath is essential in colder weather, or else your seeds might still think it’s winter and remain dormant.
Paper-Towel Method
Materials: Paper-towels (at least 2 sheets), 2 plates/dishes (or similar object), warm water.
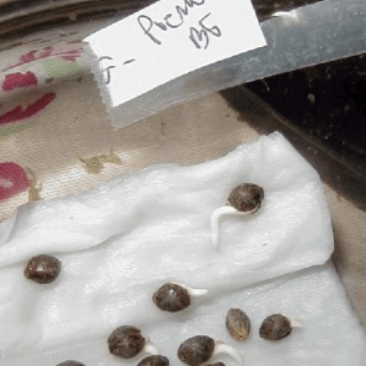
The Method: The paper-towel method involves placing the seed(s) onto a damp paper-towel (which is placed on a plate/dish, or similar object), and covering them with another damp paper-towel. Boil some water and run it all over the plate to kill any bacteria or germs. Run some boiling hot water over the paper towel also, but make sure it doesn’t fall apart. Then squeeze the paper towel until it is damp but not dripping wet with water.
It is imperative that you use water that is warmer than room-temperature. This will compensate for any drop in temperature. Next, cover the plate/dish with another plate/dish/bowl (to prevent heat from escaping, as well as protect the seeds from light). The bowl should cover the paper towel so that no sunlight gets in.
Also, using more than one sheet of paper-towel above and below the seed(s) will yield better results, as well as adding more warm water to the papertoweling/bottom dish before covering the whole arrangement with the optional second plate/dish/bowl.
WARNING: It is imperative that the seeds are removed from the paper-toweling as soon as the taproots have emerged. If the seeds are
left to soak for too long, delicate micro-roots can be torn when the seeds are removed from the paper-towel, which will temporarily
retard germination/growth as well as stress the plant (which could possibly result in an unfavorable male or a dreaded hermaphrodite).
WARNING X2: NEVER LET THE SEEDS DRY OUT!!! Water the cloth and keep it moist. Let the excess water drain away freely and keep it in the dark. The cloth will retain enough moisture to germinate the seed in a few days or so. If fungal attacks are a concern you can water with a mild two-percent fungicide or bleach solution.
Germinating Using The Peat Briquette Method
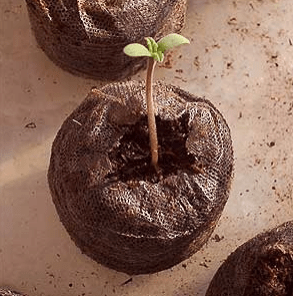
This is a great method! It’s super easy to handle, little risk of damaging the sprouting and easy to maintain the moistness:
Step 1. Take a peat briquette, and put in water and let it swell. When the briquette is done swelling, put one seed in the hole in the middle. Wait for the seed to grow. Don’t let the briquette dry out, add water when necessary and keep the briquette at a warm place 95°F (35°C), preferably in a box with a lid to keep a warm environment. Open the lid very once and in a while to let new oxygen in. When roots have sticking out, it’s time for replanting. Put the peat briquette in a pot and cover the briquette with soil.
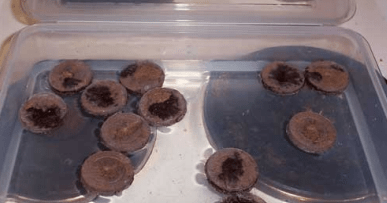
Germinating In Rockwool Step-By-Step
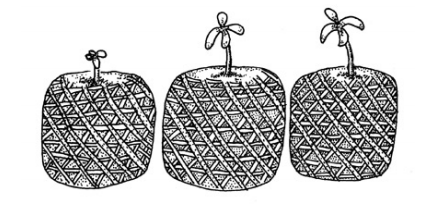
Germinating in Rockwool is one of the most widely used germination methods done today. The great thing about starting on hydroponic media (such as rockwool) is that once the seed germinates then you can place the media containing the seed directly into the garden without touching the seed itself. This is a good idea because a minimum of stress is caused to the plant.
The Method:
Step 1. Soak rockwool cubes in solution of pH-adjusted water.
Step 2. Drain off excess water from rockwool cubes.
Step 3. Place small hole in the middle of the rockwool cube with a match (or any other similar apparatus). Make the depth of the hole about twice the depth of the seed you intend to germinate.
Step 4. Place seed into this hole in the rockwool that you have made and gently brush across rockwool so seed is completely covered.

Step 5. Now place these cubes with seeds in a tray on top of a heat pad if you’ve got one. Keep the temperature between 75-80°F (24-27°C) for optimum germination. Some strains may prefer it warmer, but this is the temperature for the majority of strains. Place a clear cover over the tray so you are creating a humidity tent. This retains much needed moisture.
Step 6. At least once a day, check the moisture of the rockwool cubes. If they need more, apply purified water with a spray bottle. Keep the cubes damp, but not drenched.
Step 7. When you see the plant just penetrate the surface of the rockwool gently remove the seed shell from the recently germinated embryo.
That’s all there is to it! Good luck!!!
Faster Germination With Scarification
You can get reliable (and quicker) germination results using the following technique. It takes a little practice though because there is a little risk involved…
Equipment Needed:
- Seeds
- Paper towels
- Air-tight plastic container
- Pocketknife or sandpaper
- Water
The Method:
Step 1. LIGHTLY chip/scarify outer seed coat in one place. Emphasis on lightly because if you do it too roughly it will ruin a perfectly good seed.
Step 2. Dampen paper towels and place seeds on it. Either fold or roll it up so that its pressing against the seeds.
Step 3. Put paper towels with seeds inside into an air-tight plastic container.
Step 4. Place in a warm location (i.e. on top of a TV set, VCR, or refrigerator).
Step 5. Open every 12 hours to allow oxygen into the container and check on the seeds. Most should germinate in about 24 hours, but there may be a few that need a bit longer.
How Long Will it Take?
Some seeds can take up to 12 days to start germinating, but most will germinate between 24 to 72 hours. The general time frame as mentioned above is 2-7 days. Be patient and give your precious seeds a chance to sprout!
Advanced Germination Procedure Example
Oftentimes professional weed growers will use weak solution of nutrition and protection products in the pre-soak, germination and early growth periods for seed growing.
As an extremely advanced example, one experienced veteran cannabis cultivator combines beneficial fungi, nutrients, a catalyst, and B-vitamins in dilute form to pre-treat cubes and ensure proper feeding of the sprouts after they have sprouted. To create this mixture he uses products such as Piranha, h-1 Humic Acid, B52, and Jump Start made by a Canadian company called Advanced Nutrients that sells its products in Europe.
Together these products prevent harmful fungi while providing nutrients, protectants, hormones, growth boosters and vitamins that increase sprout survival, health, and grow rate.
Note: If you are a beginner grower, don’t stress just yet! I just want to give you a complete overview of an advanced germination scenario so you know what to decide on doing in order to tailor to your individual growing needs.
Within a day or two of the time seeds sprout, he will then begin a feed program that provides nitrogen-rich basic fertilization, B vitamin supplementation, beneficial microbes that feed roots, enzymes, and inoculants. He begins gradually increasing ppm basic fertilizer called Advanced Nutrients Sensi Grow Two-Part combined with H-1 humic, Piranha, Voodoo Juice, B-52 and Scorpion
Juice.
The Jump Start is discontinued when the Sensi Grow starts. He then carefully monitors and adjusts his nutrient mixture ppm and pH in combination with close watch of his plant leaves and growth rates to make sure that he is maximizing growth and later harvest potential.
Again, utilizing the above easier germination methods you can get get incredibly high germination rates. But if you are opting for an elite procedure, it would look something very similar to the above.
Once Your Seed Sprouts
Check daily to see if your seeds have sprouted roots (when one does immediately transfer to a grow medium) and add small amounts of water in order to keep moist. This is also true if you germinate seeds in a piece of cheesecloth, rockwool, oasis cubes, etc or medium other than paper towels.
Once the seeds sprout and a white shoot sprout emerges about a quarter inch, transplant root down into your soil or grow other grow medium. (Transplant them into the progressively larger containers.) Handle it very very carefully, preferably with tweezers and make sure you do not touch or break the tip. Try to minimize the delicate rootlet to prolonged intense light or air. Bury the germinated seed with half an inch of planting medium covering it with the white root tip pointing down. If using rockwool simply pre-drill a .5” hole and place the germinated seeds inside it with the white root tip pointing down. Cover it with one-half inch of moist rockwool. Keep the rockwool evenly moist.
Note: Try and transplant the seeds into the same substance they were sprouted in. This GREATLY minimizes the chance of the all-to-common problem of transplant shock.
WARNING: NEVER TOUCH THE DELICATE ROOT TIP!
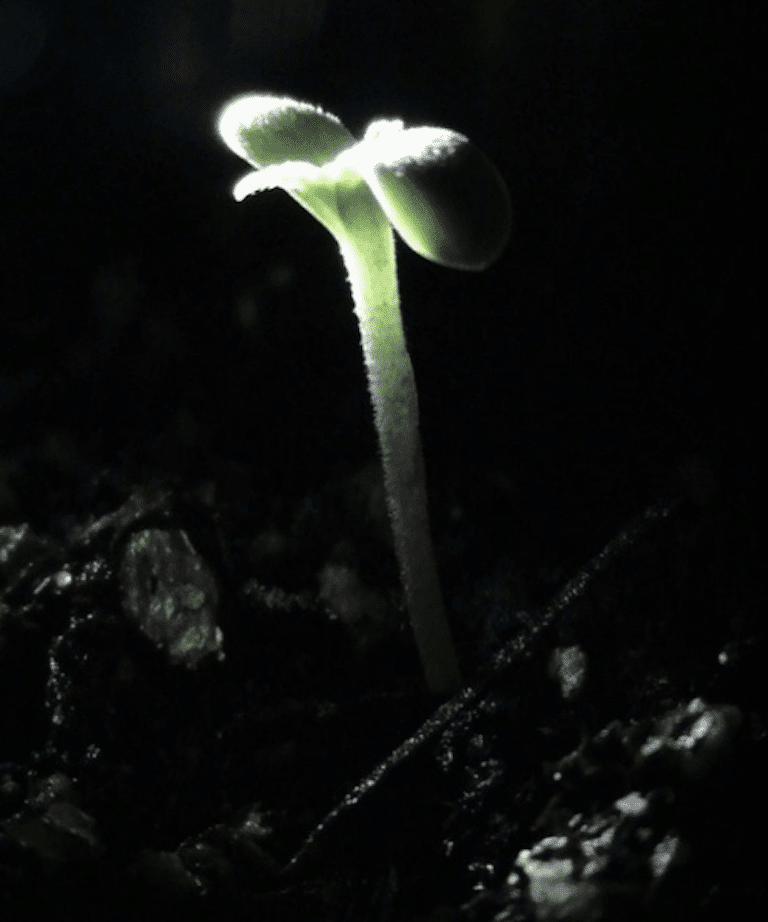
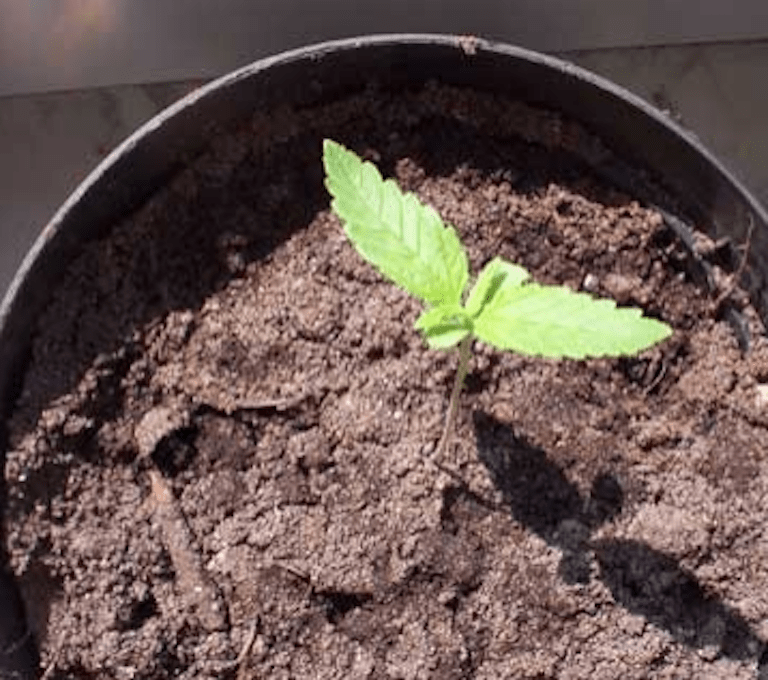
Seedling
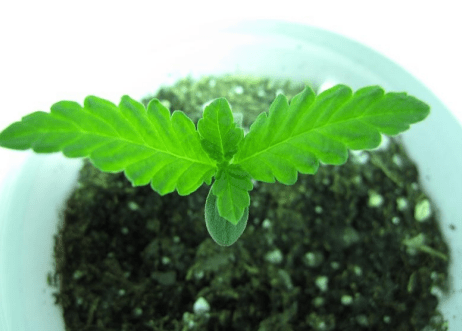
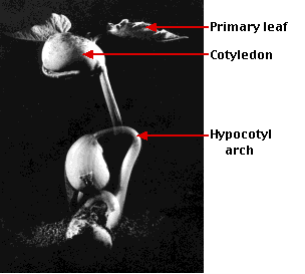
A cannabis seedling has 2 leaves that are known as a “seedling leaf”, or “cotyledon.” These leaves function as the seedling’s initial food store while it develops a vascular system for being able to take care of itself. Those are the first leaves that the plant develops and they are rounded in their shape. As the stem grows the leaves spread out and true leaves begin to appear. The little plant at this point in time officially becomes a seedling. Water and heat are critical at this point in the plant’s development.
When the cannabis plant develops, those leaves turn yellow and die, this is quite normal at this stage. A slight yellowing on the first real leaf might be possible, it is translocation as your plant is now trying to turn food from the soil into twigs, stems, branches, leaves. Same goes for the first set of real leaves, and the subsequent set of leaves that have 3 lamina. Although these real leaves will last a little longer, their life span is also limited. Over watering here is the most common mistake of the newbie grower. It is important to delicately supply the correct amount of lighting – keep the seedling a few inches away (if you are using fluorescent) from the lamp.
It is important to understand that during a seedlings growth a lot of activity is happening “behind the scenes”. This means that in this growth phase the seedling is primarily focused on developing a root system while above-ground growth appears slow. New growers often think they are doing something wrong so they tend to over-water or over-fertilize at this point. Little do they know the plant is speedily right on track.
The new developing fragile root system requires an optimum constant supply of water and warmth. Too much water and you will drown and rot your roots. Too little water and your fragile root system will dry up.
The seedling growth stage lasts for about two to three weeks after seeds have germinated.
Top 10 Reasons Your Seeds Wont Germinate
- Too Cold: Cold temperatures can kill seedlings and prevent germination. Cool temperatures can result in slow, uneven germination, and can trigger attack by soil diseases. You may want to jump start your seeds indoors, before outplanting. Make sure planting is not done too early, when it is still cold and there is a probability of encountering a dreaded frost hazard.
- Too Hot: High temperatures result in excessive soil desiccation and injury to seeds and seedlings.
- Too Wet: Seeds need to be damp, not soaking wet for germination. Excess water prevents oxygen getting to the seed. Poorly drained soils may also cause soil fungi-related diseases. The condition of wet soils may be improved by adding perlite or vermiculite, which will aerate your soil exceedingly well.
- Too Dry: A certain amount of water is essential for germination, so maintaining a constant soil moisture during the germination period is vital, cover containers with glass or plastic sandwich wrap to prevent your soil from drying out. You want to continually spray the topsoil all throughout the germination.
- Planting Too Deep: This will result in delayed emergence – seeds may not be able to grow enough to reach the surface on the limited food storage within the seed. Soil temperature is also lower with depth. Plant your seed 1/2 and inch to an inch down for best results.
- Planting Seeds Too Shallow: If you plant your seeds too shallow they can dry out quickly.
- Soil Too Firm: Making your soil mix too firm can prevent oxygen from getting to your seeds and affect drainage.
- Soil Too Loose: Soil that is too loose will result in too much air surrounding the seed(s) – they will not absorb moisture and will most likely dry out.
- Soil fungus: Seeds can root well or seedlings can fall over and die. Overwatering, poor drainage, and lack of aeration will increase the likelihood of this occurring. Plant seeds in sterilized potting mix, and make sure your containers are cleaned properly.
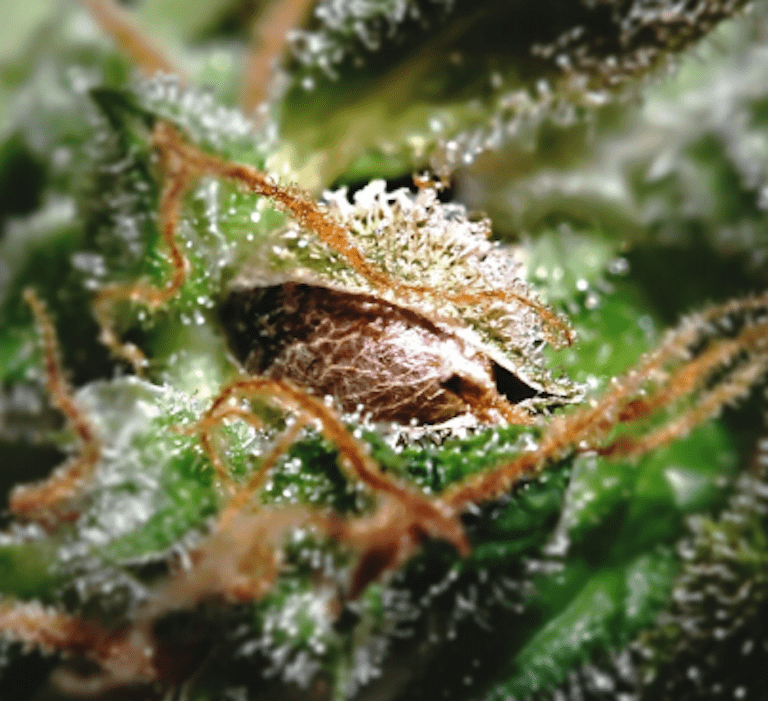
- Non Viable seeds: If your seeds have not been stored correctly they can deteriorate. As aforementioned, look for viable quality dark brown seeds. Avoid immature seeds (typically light colored or whitish that are brittle and break up in your hands).
Planting Seedlings
Cannabis seeds grow best at 78°F (25.5°C). Plant seeds twice as deep as the width of the seed. Yes, that means it barely is deep. Too deep and it wont germinate correctly. During seedling growth a root system develops rapidly, and spreads out to the desired depth. While green, above ground growth remains slow. The emerging new fragile root system requires a constant supply of water and warmth. Too much water drowns the root causing oxygen deprivation and leads to root rot, killing your plant altogether. On the other hand, a lack of water will cause the root system to dry up.
Also temperature is important. By placing a heating mat underneath your tray this is guaranteed to heat your growing medium to the optimum temperature. If the growing medium stays a few degrees warmer the roots will grow much faster.
As for light: Seedlings require at least 16 hours of light daily. At first they require less intense light than they will need at later stages of growth and development.
Note: Healthy roots will be a bright white, not brown or any other color.
WARNING: Only transplant your clones or seedlings once sufficient healthy strong long root mass has developed.
Transplanting Seedlings
Transplanting is done when the seedlings are ready to be transferred from their rockwool tray (or other medium) to another grow medium. The process is simple; carefully lift the seedling from the tray still inside the rockwool cube and place it in another medium such as soil or directly into your hydroponic setup. When transferring the seedling to soil – dig a small hole in the soil and drop the
cube in, then cover the cube with soil. If you’re not using a rockwool cube, simply carefully transfer your seedling into a small hole into the soil and bury it.
Note: The cube doesn’t affect your plant’s growth in any way, some people feel it actually helps support the plant.
Temperature
Temperature is a very important factor in sprouting seeds, and it is a commonly misunderstood one. You can buy heating mats to send bottom heat to the seed zone, but an ambient room temperature between 68-85°F (20-29.4°C) is ideal for most seeds. Temperatures lower or higher than that will interfere with germination. If your seeds are from a hot, equatorial region, they may most likely need slightly higher temperatures to germinate properly. Healthy seeds will germinate within 2-7 days of being placed in cubes or peat pots.
Lighting
Seedlings will need a minimum of 16 hours of light daily. For the first 2-3 weeks they require less intense light and grow very well under fluorescent tubes (an HID light or a Compact Fluorescent Light (CFL) can also be used here). If using a compact fluorescent place it 12-18 inches above the seedlings. If using an HID then place it 3-4 feet above at least to ensure optimum initiating growth.
Note: Many studies have revealed that sprouts can handle high intensity metal halide spectrum lighting for 18-24 hours per day beginning two days after the sprouting, provided the lights aren’t so close to the seedlings that they singe or burn by excess heat. But fluorescents are still preferred and the most widely used method today for newly developing delicate seedlings.
Seedlings that are given insufficient light (such as those grown under fluorescents or on short daylengths below 18 hours a day) will become skinny & stretch. Stretching occurs when a sprout has put on more than an inch or two of stem before its first leaves. A common reason is that plants are given too little light, so they stretch to reach the light. This results in unsteady stems that will never become stable enough to ensure proper growth, and ultimately, produce weak fluffy scrawny buds.
Tapping
This is a great little trick. As soon as the sprouts emerge above-ground, they should be lightly tapped several times a day. This promotes internal strengthening. After the sprouts have been alive for a week or more, their stems should be gently bent back and forth daily VERY CAREFULLY in order to further strengthen the stems. These first steps are crucial for developing strong healthy plants that produce a big beautiful quality heavy harvest.
After the sprouts have been alive for about two weeks, an oscillating fan blowing enough current to make the stems bend very slightly should be directed across the sprout area.
All of the tactics above will make for a thicker, sturdier stalk that will produce bushier, more productive plants.
When to Fertilize Seedlings
Mixes composed of perlite, vermiculite, rockwool, and basically any other grow media should be treated with a mild application (300-400ppm) of fertilizer prior to seed introduction. This will provide available nutrients and help buffer the pH.
Many growers agree: adding some sort of auxin/vitamin based supplement will accelerate early plant development. It is not beneficial to apply additional fertilizer to seedlings in rockwool or other inert media until the first set of true leaves appear, at which point a ¼ to ½ strength application is made.
Excessively rich organic soil mixes are best avoided until the tender, young plants are well established. It is possible to feed young seedlings in soil with a ¼ to ½ strength solution of fertilizer after two to three weeks, or after the first set of true leaves appear; but only if the soil is not overly saturated in terms of nutrients.
What to Look For
It is useful to know that nutrient deficiencies can have the same symptoms as nutrient excesses. In general, if sprouts are gaining an inch or more of height per day, have leaves that are solidly lime green in color, are branching out to be bushy and dense, and have upright (not drooping) leaves and sturdy stems, this is a sign that pH, ppm, water supply and feed regimen are ideal for the plants.
At this point you should have a general idea of which seedlings are healthy and which are sickly. By the 3-5th week of growth your seedlings will be big enough to determine whether or not they are strong and healthy. Remove from your garden any weak, sickly plants and focus your attention on the remaining strong survivors.
Purple Stems
Often growers will find their tiny seedlings begin to exhibit purple stems.
No worries – A seedling’s purple stem doesn’t necessarily indicate an unhealthy plant. Purple Stems could be a result of plant genetics, if this is the reason, you are to expect a purple stem throughout the entire life of the plant. It must be noted that purple stems aren’t a dominant trait, and are rarely genetically induced.
A baby sprout with a purple stem is almost always 100% natural. Young seedlings are still adjusting to their environment and may be slightly lacking in a nutrient. If this is the case, healthy plants will regain their green/greenishbrown color within a few days to a week or two tops.
If you have ruled out the possibilities of genetics and the seedlings adjustments to life, you should begin looking for a nutrient deficiency. Purple stems are commonly caused by a Phosphorous (P) or Magnesium deficiency, if there is a Phosphorous deficiency you may also notice symptoms such as brittle leaves or greyish spots. To assist the uptake of Phosphorous (as well as most other nutrients) you should ensure the pH is slightly acidic– 6.0 will suffice.
Increasing Female Plants from Seeds
Remember how a seedless (Sinsemilla) female plant is your ideal goal as a grower? Well, environmental factors begin influencing your plant’s sex the moment the seedling has three pairs of true leaves (cotyledons don’t count!)
These factors are:
- Humidity: High humidity increases the chances of female plant development. Low humidity increases male plants. Low grow medium moisture also increases males. The same is valid for the moistness of the seedbed.
- Temperature: Lower temperatures make for a larger number of female marijuana plants, higher temperatures for more male marijuana plants.
- Lighting: More blue spectrum light energy increases the number of females, whereas red light increases males. Fewer hours of daylight (about 14) increases the number of female plants. Longer light exposure (18 hours+) will tend to make more male plants.
- Nitrogen: Increasing the level of nitrogen (N) makes more female plants, lowering creates more males.
- Potassium: Lowering levels of potassium (K) encourages the development of female plants, increasing potassium (K) increases the male tendencies. (So for the first two weeks a higher level of nitrogen and a lower level of potassium will encourage female plants to develop.)
- Environmental Stress: Any environmental stress will greatly increase the chances of male plants growing from your seed.
- Colour of Light: More blue light makes for female cannabis plants from seed, more red light makes for more male cannabis plants.
- Hours of Daylight: Few hours of daylight (i.e. 14 hours) makes for more female individuals, a long day (i.e. 18 hours) makes for more male cannabis plants.
- Soaking: Soaking your seed(s) in Gibberellic acid makes it/them more likely to produce a female plant.
Plant Stress
Cannabis crops grow the fastest and produce the richest, heaviest harvest when they are given a stable optimal growth environment. Stressed plants produce much less than unstressed plants. Examples of common stress factors include, but are not limited to; lack of water, drowning of roots (too much water, ultraviolet light, nutrient toxicities, acidic exposure, overly cold or hot growing conditions (including soil and grow medium temperatures as well as air), photoperiod fluctuation, low light intensity, plant mutilation (from pruning too much or too fast) etc.
Stress will greatly reduce growth. Although in some rare cases stress may actually cause your plant to produce more resin, the slow inhibited odd growth simply outweighs the extra resin advantage. Many new growers make the mistake of removing their plants large green shade leaves thinking that it is allowing light to shine on their lower leaves, enhancing growth. Although this is good logic in theory, it is simply not the case. The aforementioned method will cause growth as slow as molasses and greatly diminish harvest.
Only ever remove leaves that are half damaged by burns, pests, death, or disease. Also do not make the newbie mistake of removing a yellowing leaf to early, oftentimes once the stress is eliminated the plant will regain it’s vigor and health, including it’s vibrant green coloration. For maximum growth enhancement remove only spindly, dimly lit lower branches. This stresses your plants very little and speeds growth of the upper foliage. Stress can also affect your plant’s sex.
The 9 Common Culprits of Slow Plant Growth
- Light Deprivation: Although your plant may be receiving light, particular strains may require higher light levels than others. A recommended light level for optimal full bud development is 50 watts/m2. Full sunlight is 100,000 lumens max.
- Light spectrum: Light that does not contain enough red spectrum (too much blue). Light spectrum can have a dramatic effect on plant growth, with different light frequencies affecting different photosynthetic and various other crucial processes within the leaf. Selecting a blue spectrum in a vegetative growth phase is preferred, with red spectrum in flowering.
- Over-watering: Soil moisture that is not absorbed rapidly turns stagnant; the plant quickly uses up any oxygen within the water, then is unable to respire further, resulting in moisture low in oxygen. Pythiumaka “root rot” (a common plant problem) thrives in low-oxygen conditions. Over-watering will slowly suffocate your roots, preventing sufficient oxygen uptake by the roots, and
ultimately causing dreaded root rot. - Low Nutrient Strength: The plant is unable to acquire the necessary amounts of nutrients to sustain high growth rates. Large and mature plants can take higher nutrient strengths.
Note: Nutrient strength is also related to the light intensity; plants under fluorescent lights usually require a lower nutrient concentration than under HIDs. - Nutrient Lockup: Adding too much of a nutrient (ex. Magnesium) can lockup one or more nutrients, rendering them chemically unavailable to the plant. Nutrient lockup can occur at extreme pH ranges (ie. under 5.0, over 7.0).
- Soil With High Bark Content: Bark is very acidic and may affect soil water pH. The roots will not be able to grow through the bark, preferring to grow around the chunks of bark. This slows down root growth and most obviously plant growth. Once transplanted into proper soil, plants will show remarkable recovery.
- pH: pH that is too high or too low (acidic soil) will result in plants that are unable to absorb nutrients, or in adequate quantities within certain pH ranges.
Optimum pH varies with each medium:
Hydroponics and aeroponics: 5.6-5.8
Soilless: 6.0-6.3
Soil: 6.5-7.5
Many soilless mixtures tend to be fairly acidic, due to their high % bark content. - Low Temperatures: Plant metabolism will decrease at low temperatures. Chemical reactions within the plant will take longer. Optimum plant growth often requires close temperature regulation; daytime temperatures between 77- 86°F(25-30°C) are preferred. Differences in daytime and nighttime temperatures should not be dramatic; as this difference may shock the plant and stunt growth.
- Low Soil / Medium Temperature: Evaporation from a medium(i.e. peat pots) tends to chill the medium quite a bit due primarily to the evaporation cooling effect. As the peat pot warms, it draws moisture outward, the evaporation effect cools the peat (like sweating). New growers often make the mistake of adding excessive amounts of water, resulting in cold soil, poor root
formation and severely slowed growth.
Pests, Fungi, & Diseases
(For complete pest identification, prevention, and elimination please refer to the Emergency Marijuana Plant Guide (Free Ebook).)
Next: Part 5. Growing With Soil
Previous: Part 3. Lighting