If you have thought about growing weed but are worried that you can’t afford it then why not take a look at this latest trend – the DIY space bucket. A space bucket is incredibly easy to make and can be constructed using materials that can be readily got hold of. Plus, in comparison to a grow room or grow tent, a space bucket requires a lot less power to light up the space meaning your electricity bills won’t be as high. If this all sounds good to you then read on to find out how to make your very own space bucket.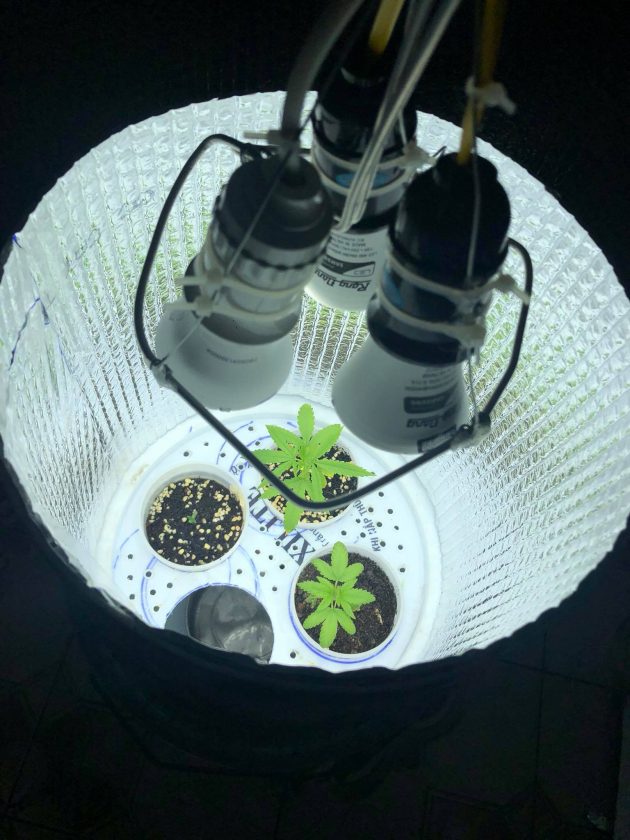
How does a Space Bucket work?
While you can’t expect huge yields from a space bucket you can be confident that you can grow yourself some healthy marijuana plants for a very low cost and effort. So, what is a space bucket and how does it actually work?
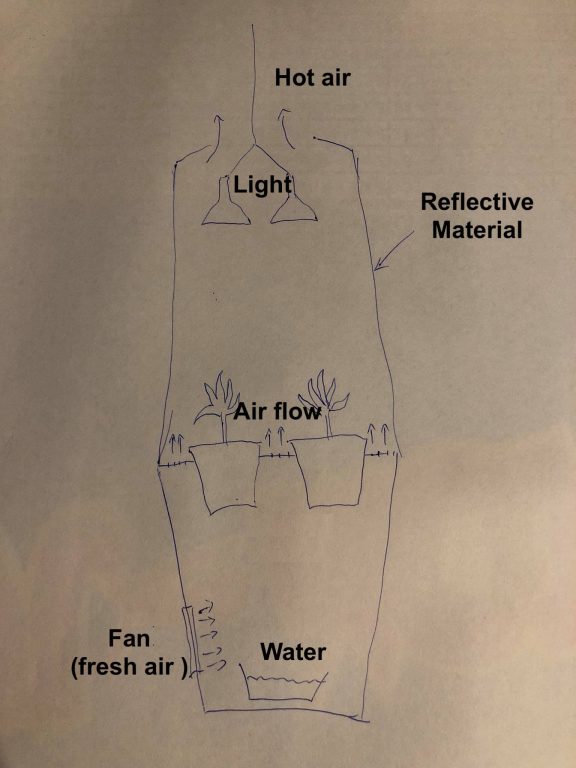
A space bucket is a simple container with a light fitted to the top. The design has been developed to create the optimum environment for growing weed in the cheapest possible way. It is a great choice if your budget is low and you don’t have a lot of space available for growing.
Materials you need: Grow Bucket Kit
To get your hydroponic space bucket up and running the kit list is pretty simple. You can get most products at your local hardware store or online. In addition to these items below, you will need some wire, glue and masking tape (items that you’re likely to have lying around the house anyway!).
Buckets 4 x 20L
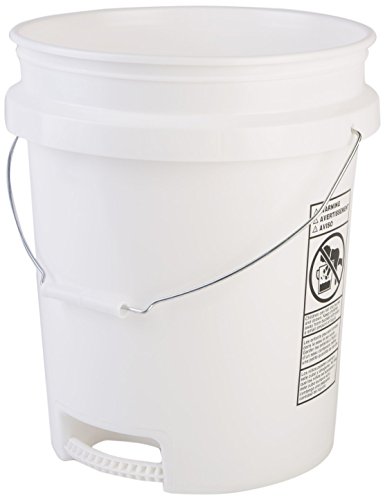
To get started you will need 4 x 20L buckets – check out these super strong and durable buckets from Hudson Exchange. However, you don’t need to go all out in terms of bucket quality – if you are on a real budget you can grab whatever you can find at the hardware store (some you can even get for under $5 per bucket).
Light Bulbs – 23Wx 6
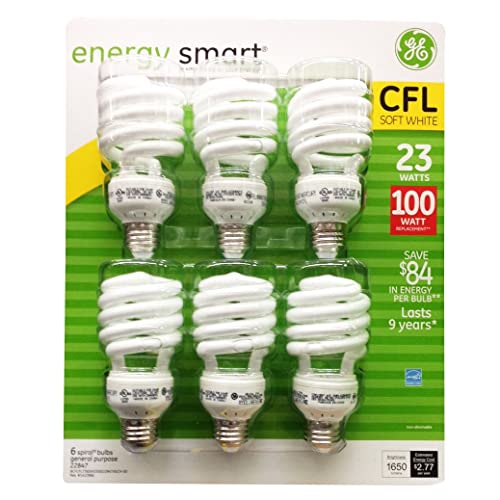
For a 20L bucket, you will need around 6 23w CFL light bulbs – these should give the brightness you need in the space without causing too much heat (which can be dangerous). These bulbs from Amazon are a good, durable choice but cheaper options should be available if you’re on a budget and you can also use as few as 4 bulbs. If you are on a higher budget you can also use space bucket LED lights or select grow bucket LED bulbs for your set up.
You will also need some sockets to screw your bulbs into, you will need the same number of these as the number of bulbs you use. Check out these
Side-Snap Socket Boxes from Westinghouse
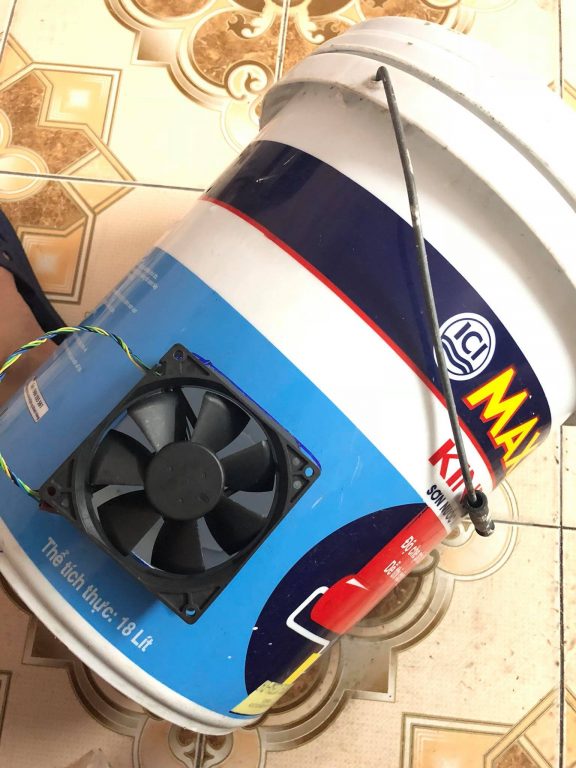
PC Fans x 2
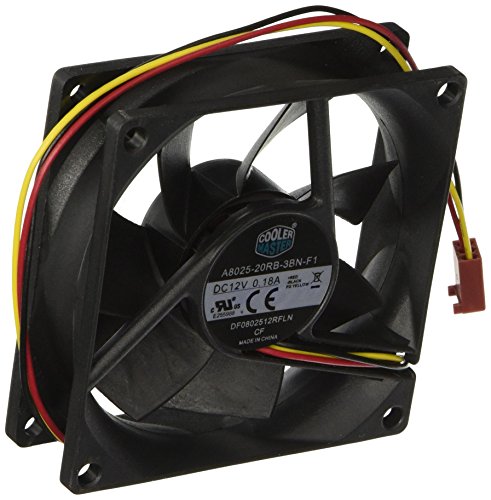
Purchase at least 2 PC fans as you need to keep the area cool to avoid both your plants overheating and to keep your set up safe. These PC fans from Cooler Master are some of the cheapest and best around – producing strong air-flow for enhanced cooling performance. For under $7 per fan, you can’t go wrong.
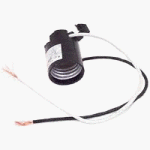
12v Power Adapter Supply x 1

You, of course, need a power source to get your space bucket up and running. This 12v Power Adapter from ZJchao is super cheap and does just the job that you need it to – powering up your bulbs. Not bad for under $5.
Reflective Material
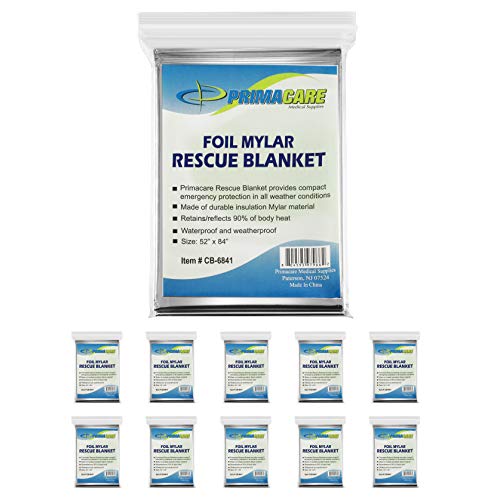
For the inside of your buckets, you will need some sort of reflective material. This could be Mylar, which you can purchase from the link above or your local hardware store, or you could also use white paint. If you purchase white buckets themselves, you won’t need to purchase any additional reflective material.
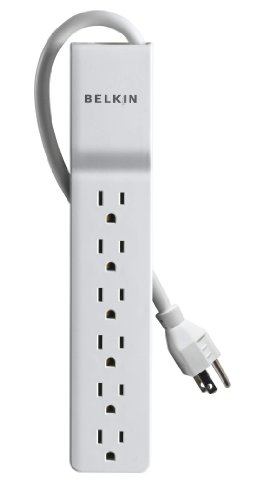
Power Strip
like this one here (make sure whatever you buy has surge protection).
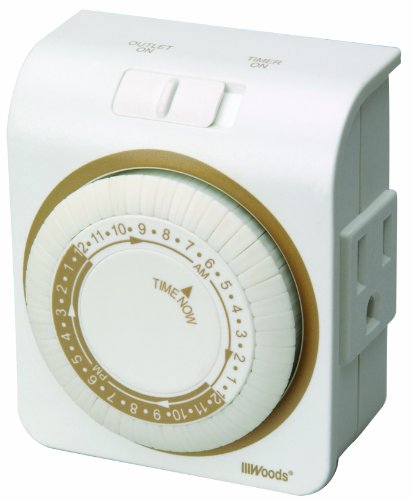
24 Hour Timer
So that you can be in full control of the light your plants receive and ensure the safety of your space bucket, you will need a 24-hour plug-in mechanical timer to set when your lights should be on or off. This will give you greater flexibility and ensure the light to dark ratio that your plants receive is perfect.
How to Make a Space Bucket
So you have everything you need to get started but before we go through our step-by-step guide on how to make your space bucket lets have a brief chat about safety first. Make sure you get yourself clued up on how to use electricity safely to keep your space bucket (and yourself) as safe as possible.
Prepare your Bucket
1. Create Holes for Drainage
Select the bucket that will be your main container and, using a screwdriver, create some holes in the bottom of the bucket. These should be evenly distributed – starting with a circle of around 8 holes near the center of the bucket and then a wider circle of the same amount of holes around the edge of the bottom of the bucket.
2. Add Reflective Material
Attach your Mylar (if using) to the inside of your bucket or paint the inside using your white paint if you’ve gone for this option.
3. Light-proof your bucket
Being able to control the light your plants receive is essential for healthy plants. If your buckets are black this step isn’t as essential, however, if your buckets are white or of a lighter color you will need to light-proof them. You can do this by painting your bucket black or stick layers of black tape to cover the entire outside of the bucket. This simple step will make all the difference to your plants.
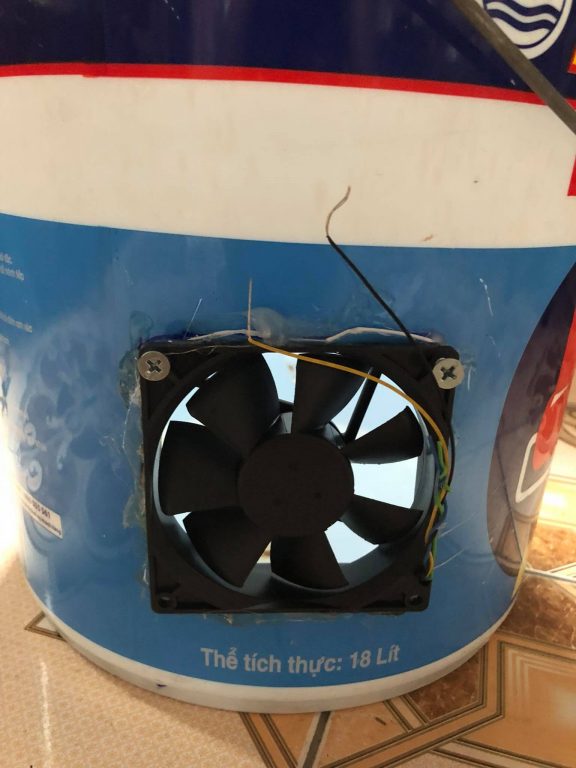
Attach your Fans
The reason you have the PC fans is to keep your plants at the right temperature – so one fan is there to extract the hot air, and the other to draw in cool air. For this reason, one fan needs to be pointing inwards towards your plants, and one pointing towards the outside of your space bucket.
1. Cut your fan holes
Cut two holes on the sides of your bucket – they need to be on opposite sides. For your exhaust fan (the one pointing outwards and extracting the hot air) make sure this is near to the top as this will be removing the heat generated by your lights.
The size of your holes will depend on the size of your fans, but you want to make sure that they fit snugly and are not loose.
2. Connect the power supply
Now you have the fans fitted to your bucket you can connect your power source to them (the 12v Power Adapter Supply). You can use wire nuts to connect the fans to the power supply.
Create Spacers
As the height of one bucket is too small – this is where you bring your other 4 buckets in. Cut the bottom off the rest of your buckets so that they can stack on top of your original bucket. They need to fit perfectly so that no light escapes from them. Ensure that each bucket has the same reflective and light-proof material that you have used for your original bucket. With this sort of set up, you can easily adjust the height of your hydroponic grow bucket.
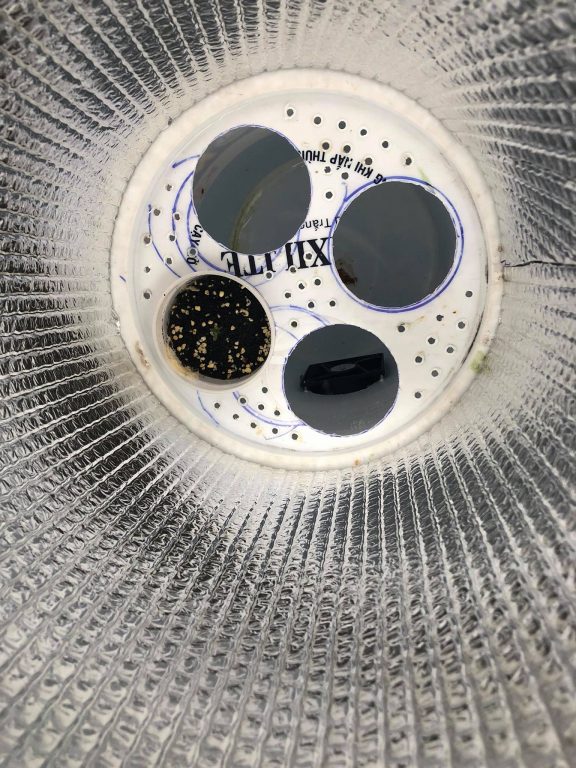
Attach your Lights
1. Cut your bulb holes
Select a lid and cut holes the correct shape to fit the socket boxes for the bulbs. You then need to wire your bulbs in parallel with the cable and plug. If you have never done this before it is a good idea to get yourself clued up on how to do this.
2. Attach a container to the lid
Once you have successfully completed your wiring it is a good idea to attach a lid over the wiring to keep it safe. Make sure that you
don’t
select a conductive material for this purpose.
Attach your Power Strip
All of your devices are almost ready to be connected and for this you need your power strip. You can now attach this to the side of your bucket – the best way to do this is using glue to make sure it is super secure. With the power strip in place, you can now plug in your lights, the 12V power supply for your PC fans and can connect your 24h timer.
Final Checks…
You’re almost there, it’s time for some final checks. At this stage your main bucket and spacers should all be connected – ensure all of your space bucket is thoroughly light proofed and cover any gaps with your black tape. Also, ensure that you have also ensured all of the insides of your buckets have your choice of reflective material applied.
Now set your 24-hour timer to the hours of light and darkness you want your plants to have, plant your marijuana plants in the main bucket and put the switch on – you are now the proud creator of a Space Bucket! Sit back and enjoy watching your space bucket grow.
How to get rid of the smell of weed – Space Bucket Carbon Filter
Marijuana plants can give out a pretty potent odor so you might want to consider getting a carbon filter for your space bucket. A carbon filter can be attached to your exhaust fan and will be powered by your 12V power adapter supply. For stealth growing and a smell-free living environment. Investing in a carbon filter is the next step in space bucket development.
Finding the Best Strain for Space Bucket Grows
Always remember that when it comes to growing weed there’s no better way to learn than getting first-hand experience. This guide gives you the resources to build your first space bucket, but once you’ve got it all pieced together don’t worry if you still feel a little bit lost, but just remember with every grow attempt you’ll get better. With every grow cycle, your knowledge will be enhanced helping you become an expert cannabis grower in no time.
In this section, we will point you to some top tips for growing cannabis in space buckets before highlighting some of our favorite weed strains for growth in space buckets.
Top Tips for Growing Cannabis in Space Buckets
1. Flower your plants sooner rather than later
As a general rule, it’s usually better to move your plant to the flowering stage early than late. This will be advised on your seed packet but is usually after no more than a month. Whilst you can keep the vegetation stage going longer this is likely to make your plant grow much taller when you do move to the flowering stage, but you will want to train your plant to grow as short as possible to get the best yields.
2. Try a variety of plants
Just because our favorite strain for space buckets is Bubba Kush, doesn’t mean it will be yours and will grow best in your exact setup. By growing different plants you’ll get a better understanding of the needs of different strains and which ones like your exact setup the best. Fortunately, most strains welcome the tender care space buckets offer
3. Get to know your strain
Despite tip 2, for the best yields, it is also important to get to know what your plant likes and how it will grow in a variety of situations. Yields are variable and hard to predict due to differences in growers, genetics, vegetation time, nutrient use, and soil. By improving your experience and deep knowledge of a particular strain you will improve your understanding that could help you turn yield from a typical harvest into an abundant dream harvest.
4. Don’t water your plant too often
Cannabis plants love to be grown in a well-drained medium so you should always be careful about how much water you are putting in. Use the dryness of the soil and the weight of your pot to decide when to water your plant rather than sticking to a rigid schedule if you can. Once every 3 or 4 days is good enough when you have proper drainage.
5. With nutrients, it’s better to use too little rather than too much
When you’re using fertilizers it’s important to remember that giving too little is always better than giving too much as too much will burn your plant. It can also drop the pH level and cause your plant to have issues with osmosis. Too many nutrients are also harder to resolve as they can be pretty immobile once in soil.
Best Strain for Space Bucket
#1 Crop King’s Bubba Kush Feminized Cannabis Seeds
https://www.cropkingseeds.com/products-page/strains/bubba-kush/
These excellent seeds are a great choice for space bucket growth as they grow really stocky plants with bulky buds. They are derived from Bubble Gum and Original Kush and also have Afghani roots which produces a relaxing high thanks to a decent production of THC and CBD. You’ll also love the sweet hashish, chocolate and coffee flavors you get as you feel overcome with relaxation once you get to your final product.
As this strain grows nice and stocky it’s a good choice in a space bucket, but its bushy nature also means you’ll see decent yields from each plant. The sticky and dense buds are also a sight to behold and will leave you salivating as you watch it grow. Fortunately, with just 9 weeks flowering time, you won’t have to wait long to test it out. You can also grow this plant relatively easily without the need for masses of first-hand experience.
#Space_Bucket_Cannabis #Space_Bucket #Bubba_kush #THC #Feminized_Seeds
#2 For Beginners: Auto Lemon Haze Feminized
https://www.marijuana-seeds.nl/auto-lemon-haze-feminized
If being required to bring a few gardening skills to the table puts you off Bubba Kush, then why not go for this great auto-flowering option? This lemony skunk also has a really uplifting high that comes on quickly and stays with you for hours. Although this does get quite big, you are rewarded with super yields from these seeds, especially for an auto-flowering strain.
The best thing about these seeds for the novice grower is obviously that they are auto-flowering. This takes a lot of the stress out of growing and having to decide when is the best time for you to tell your plant that it is ready to flower as it will happen naturally when it is ready. You also need less light with this strain to save you money on your energy bills. This is a reliable product with consistent yields that is great to get you started growing in your space bucket.
#Space_Bucket_Weed #Space_Bucket #Lemon_Haze #Auto_Flowering_Cannabis #Yields
#3 For Experts: Afghan Hash Plant Regular Seeds
https://www.seedsupreme.com/cannabis-seeds/landrace-strains/afghan-hash-plant-regular-seeds.html
If you’ve been growing for a while and want to put your space bucket growing skills to the test then why not check out the benefits of buying regular seeds that allow you to start moving into breeding your own strains? These great seeds produce nice and short plants with heavy yields in just 50-60 days of growth. Made from seeds collected from the 1970s this is definitely a strain for those that like to reminisce about the good old days.
These seeds are photoperiod, so you’ll have to choose the best time to move them to the flowering stage and also get to grips with spotting a female and male cannabis plant. It’s important to be able to spot the male plants as soon as possible and have the space to grow them away from your females with these seeds as they are not auto-feminized. For expert growers, this is a great choice.
#Space_Bucket #Breeding_Cannabis #Cannabis #Afghan #Yields
#4 Best Small Strain: Crop King’s Northern Lights Auto Flowering
https://www.cropkingseeds.com/products-page/strains/northern-lights/
If the reason you have gone for the space bucket growing method is because you are lacking in growing space, then these seeds a great option. These plants grow super compact but are still not shy in terms of their bud production, which grow nice and densely. You’ll also be pleasantly surprised by the rapid 8-week growing time and the resultant weed that gives you a mellow and stoney high from a decent production of 15% THC.
A long-time favorite, this strain is something most people have heard of for a reason. Now available in this quick auto-flowering variety, it is a no-brainer to give this one a whirl if you are a beginner grower with just a small space to give your first grow a try. You will find it produces a strong aroma, but this will be a smell you will love and will prepare you for the strong stoning you’ll get when your plant is ready for harvest.
#Space_Bucket #Northernights #Cannabis #Stoned #Auto_Flowering
#5 Best Strain for Quick Space Bucket
(Scammer) truenorthseedbank.com/cinderella-99-fast-canuk-seeds-elite-strain
When starting out in the space bucket growing world it is likely that you are looking for an easy grower when it comes to marijuana plants. This Cinderella strain has been created using a combination of two original phenotypes that have fast flowering properties – the Grapefruit and Auto-Pineapple – so will do just the job.
Once you have the Cinderella safely in your space bucket it will take just 42 days to flower – which is around 2 weeks faster than normal cannabis plants. In terms of flavour, you can expect mild citrus notes and sweet undercurrents, as well as a high potency. A perfect crop for indoor growing and a suitable seed for beginners – get this planted in your space bucket and enjoy the results.
#Space_Bucket #Cannabis #Seeds #Cinderella #Fast_Flowering #Yields
Conclusion
Growing your own weed has never been easier thanks to the invention of the Space Bucket. For between $100-$200 you can set yourself up in the growing world and start your own small scale home cultivation for your own use. Most of the items you need you can purchase online or from your local stores and you can easily make the grow box yourself following our simple steps.
In terms of selecting the right strain for your Space Bucket, there are numerous seeds you can choose from. Whether you are a beginner or an expert wanting to give a new growing technique a try there are strains to suit all capabilities and tastes.
The indoor space bucket is a great option for those wanting to grow their own but have limited space and a limited budget.