Part 12: How to Grow Weed for High Yield – Advanced Growing
To help you out, here are the top seed banks that work in any country.
Genetics


In depth genetics is beyond the scope of this work. You could literally fill an entire 1000 page volume on the technical scientific topic of cannabis breeding alone. I wanted to include as much information as I could to get you guys started without making this into an overly scientific “encyclopedia” if you will. I’ve included everything you’ll need to know to get started breeding your own cannabis right away! Feel free (and I recommend that you do) to go research this topic on your own to develop your own comprehensive understanding; the results are very rewarding!!!!
Breeder’s Glossary
Before you get started breeding you need to become familiar with a few technical terms. You don’t have to read them all, but if you become confused below refer back to your very own Breeder Glossary. Breeding is an advanced cannabis cultivation process, know that going in.
Adaptation: The process by which individuals (or parts of individuals), populations, or species change form or function in such a way to better survive under given environmental conditions. Also the result of this process.
Allele or Allelomorph: One of a pair or series of forms of a gene which are alternative in inheritance because they are situated at the same locus in homologous chromosomes.
Asynapsis: Failure of pairing of homologous chromosomes during meiosis.
Autogamy: Self-fertilization.
Avirulent: Inability of a pathogen to produce a disease on its host.
Backcross: a cross of a hybrid to either of its parents. In genetics, a cross of a heterozygote to a homozygous recessive. (See test cross)
Backcross Breeding: A system of breeding whereby recurrent backcrosses are made to one of the parents of a hybrid, accompanied by selection for a specific character or characters.
Balance: The condition in which genetic components are adjusted in proportions that give satisfactory development. Balance applies to individuals and populations.
Basic Number: The number of chromosomes in ancestral diploid ancestors of polyploids, represented by x.
Biotype: A group of individuals with the same genotype. Biotypes may be homozygous or heterozygous.
Bivalent: A pair of homologous chromosomes united in the first meiotic division.
Breeder Seed: Seed produced by the agency sponsoring a variety and used to produce foundation seed.
Breeding: The art and science of changing plants or animals genetically.
Bulk Breeding: The growing of genetically diverse populations of selfpollinated crops in a bulk plot with or without mass selection, followed by single-plant selection.
Certified Seed: Seed used for commercial crop production produced from foundation, registered, or certified seed under regulation of a legally constituted agency.
Centromere: (See kinetochore)
Character: An attribute of an organism resulting from the interaction of a gene or genes with the environment.
Chiasma: An exchange of partners between paired chromatids in the first division of meiosis.
Chromatid: One of two threadlike structures formed by the longitudinal division of a chromosome during meiotic prophase and known as a daughter chromosome during anaphase.
Chromosomes: Structural units of the nucleus which carry the genes in linear order. Chromosomes undergo a typical cycle in which their morphology changes drastically in various phases of the life cycle of the organisms.
Clone: A group of organisms descended by mitosis from a common ancestor.
Combining Ability: General, average performance of a strain in a series of crosses. Specific deviation from performance predicted on the basis of the general combining ability.
Coupling: Linked recessive alleles occur in one homologous chromosome and their dominant alternatives occur in the other hromosome. Opposed to repulsion in which one dominant and one recessive occur in each member of the pair of homologous chromosomes.
Crossing Over: The exchange of corresponding segments between chromatids of homologous chromosomes during meiotic prophase. Its genetic consequence is the recombination of linked genes.
Diallel Cross, Complete: The crossing in all possible combinations of a series of genotypes.
Dihybrid: Heterozygous with respect to two genes.
Dioecious: Plants in which staminate and pistillate flowers occur on different individuals.
Diploid: An organism with two chromosomes of each kind.
Diplotene: The stage of meiosis which follows pachytene and during which the four chromatids of each bivalent move apart in two pairs but remain attached in the region of the chiasmata.
Disease: A departure from normal metabolism and a reduction of its normal potential for growth and reproduction.
Disjunction: The separation of chromosomes at anaphase.
Dominance: Intra-allelic interaction such that one allele manifests itself more or less, when heterozygous, than its alternative allele.
Donor Parent: The parent from which one or a few genes are transferred to the recurrent parent in backcross breeding.
Double Cross: A cross between two F1 hybrids.
Emasculation: Removal of the anthers from a flower.
Epistasis: Dominance of one gene over a non-allelic gene. The gene suppressed is said to be hypostatic. More generally, the term epistasis is used to describe all types of interallelic interaction whereby manifestation at any locus is affected by genetic phase at any or all loci.
Epiphytotic: An unarrested spread of a plant disease.
Expressivity: The degree of manifestation of a genetic character.
F1: The first generation of a cross.
F2: The second filial generation obtained by self-fertilization or crossing F1 individuals.
F3: Progeny obtained by self-fertilization of F2 individuals.
Factor: Same as gene.
Facultative: Parasites which can grow and live in environments other than living host tissue.
Family: A group of individuals directly related by descent from a common ancestor.
Fertility: Ability to produce viable offspring.
Fertilization: Fusion of the nuclei of male and female gametes.
Foundation Seed: Seed stock produced from breeder seed under the direct control of an agricultural experiment station. Foundation seed is the source of certified seed, either directly or through registered seed.
Gamete: Cell of meiotic origin specialized for fertilization.
Gene: The unit of inheritance. Genes are located at fixed loci in chromosomes and can exist in a series of alternative forms called alleles.
Gene Frequency: The proportion in which alternative alleles of a gene occur in a population.
Gene Interaction: Modification of gene action by a non-allelic gene or genes.
Germplasm: The sum total of the hereditary materials in a species.
Genome: A set of chromosomes corresponding to the haploid set of a species.
Genotype: The entire genetic constitution of an organism.
Haploid: A cell or organism with the gametic chromosome number (n).
Heritability: The proportion of observed variability which is due to heredity, the remainder being due to environmental causes. More strictly, the proportion of observed variability due to the additive effects of genes.
Heterosis: Hybrid vigor such that an F1 hybrid falls outside the range of the parents with respect to some character or characters. Usually applied to size, rate of growth, or general thriftiness.
Heterozygous: Having unlike alleles at one or more corresponding loci (opposite of homozygous).
Homology of Chromosomes: Applied to whole chromosomes or parts of chromosomes which synapse or pair in meiotic prophase.
Host Resistance: The result of genetic manipulation of the host which renders it less susceptible to pathogens that would or do attack the host.
Hybrid: The product of a cross between genetically unlike parents.
I1, I2, I3… Symbols that are used to designate first, second, third, etc. inbred generations.
Inbred Line: A line produced by continued inbreeding. In plant breeding, a nearly homozygous line usually originating by continued self-fertilization, accompanied by selection.
Inbreeding: The mating of individuals more closely related than individuals mating at random.
Independence: The relationship between variables when the variation of each is uninfluenced by that of others, that is, correlation of zero.
Isogenic Lines: Two or more lines differing from each other genetically at one locus only. Distinguished from clones, homozygous lines, identical twins, etc.. which are identical at all loci.
Isolation: The separation of one group from another so that the mating between or among groups is prevented.
Kinetochore: Spindle attachment. A localized region in each chromosome to which the “spindle fiber” appears to be attached and which seems to determine movement of the chromosomes during mitosis and meiosis.
Line Breeding: A system of breeding in which a number of genotypes, which have been progeny tested in retrospect to some character or group of characters, are composited to form a variety.
Linkage: Association of characters in inheritance due to location of genes in proximity on the same chromosome.
Linkage Map: Map of position of genes in chromosomes determined by recombination relationships.
Linkage Value: Recombination fraction expressing the proportion of crossovers versus parental types in a progeny. The recombination fraction can vary from zero to one half.
Locus: The position occupied by a gene in a chromosome.
M1, M2, M3… Symbols used to designate first, second, third, etc. generations after treatment with a mutagenic agent.
Male Sterility: Absence or non-function of pollen in plants.
Mass-Pedigree Method: A system of breeding in which a population is propagated in mass until conditions favorable for selection to occur, after which pedigree selection is practiced.
Mass Selection: A form of a selection in which individual plants are selected and the next generation is propagated from the aggregate of their seeds.
Mating System: Any number of schemes by which individuals are assorted in pairs leading to sexual reproduction. Random; assortment of pairs is by chance. Genetic assortative mating; mating together of individuals more closely related than individuals mating at random. Genetic disassortative mating; mating together of individuals less closely related than individuals mating at random. Phenotypic assortative mating; mating individuals more alike in appearance than the average. Phenotypic disassortative mating; mating of individuals less alike in appearance than individuals mating at random.
Meiosis: A double mitosis occurring in sexual reproduction which results in production of gametes with haploid (n) chromosome number.
Metaphase: The stage of meiosis or mitosis at which the chromosomes lie on the spindle.
Mitosis: The process by which the nucleus is divided into two daughter nuclei with equivalent chromosome complements, usually accompanied by division of the cell containing the nucleus.
Modifying Genes: Genes that affect the expression of a non-allelic gene or genes.
Monoecious: Staminate and pistillate flowers born separately on the same plant.
Mutation: A sudden heritable variation in a gene or in a chromosome structure.
Obligate: Parasite that cannot multiply in nature without a host.
Oliogenic Resistance: Resistance determined by one or few genes whose effects are readily detectable.
Outcross: A cross, usually natural, to a plant of different genotype.
Pachytene: The double-thread or four strand stage of meiosis.
Parasite: Lives in or on another organism and obtains nutrients from it.
Parthenogenesis: Development of an organism from a sex cell in respect to some characteristic.
Parameter: A numerical quantity which specifies a population in respect to some characteristic.
Pathogen: A parasite which produces disease in its host.
Pedigree: A record of the ancestry of an individual, family, or strain.
Pedigree Breeding: A system of breeding in which individual plants are selected in the segregating generations from a cross on the basis of their desirability judged individually and on the basis of a pedigree record.
Penetrance: The frequency with which a gene produces a recognizable effect in the individuals which carry it.
Phenotype: Appearance of an individual as contrasted with its genetic makeup or genotype. Also, used to designate a group of individuals with similar appearance but not necessarily identical genotypes.
Phytolexins: Substances produced or formed by host plants in response to injury, physiological stimuli, infectious agents, or their products that accumulate to levels which inhibit the growth of microorganisms. Some include toxic substances produced to repel insects and nematodes.
Polycross: Open pollination of a group of genotypes (generally selected), in isolation from other compatible genotypes, in such a way as to promote random mating.
Polygenic: Determined by several genes whose effects are readily detectable.
Populations: In genetics, a community of individuals which share a common gene pool. In statistics, a hypothetical and infinitely large series of potential observations among which observations may actually constitute a sample.
Progeny Test: A test of the value of a genotype based on the performance of its offspring produced in some definite system of mating.
Protandry: Maturation of anthers before pistils.
Protogyny: Maturation of pistils before anthers.
Pure Line: A strain homozygous at all loci, ordinarily obtained by successive self-fertilizations in plant breeding.
Qualitative Character: A character in which variation is discontinuous.
Quantitative Character: A character in which variation is continuous so that classification into discrete categories is not possible.
Random: Arrived at by chance without discrimination.
Randomization: Process of making assignments at random.
Recessive: The member of an allelic pair which is not expressed when the other (dominant) member occupies the homologous chromosome.
Reciprocal Crosses: Crosses in which the sources of the male and female gametes are reversed.
Recombination: Formation of new combinations of genes as a result of segregation in crosses between genetically different parents. Also, the rearrangement of linked genes due to crossing over.
Recurrent Parent: The parent to which successive backcrosses are made in backcross breeding.
Recurrent Selection: A method of breeding designed to concentrate favorable genes scattered among a number of individuals by selecting, each generation, among the progeny produced by matings of the selected individuals (or their selfed progeny) of the previous generation.
Registered Seed: The progeny of foundation seed normally grown to produce certified seed.
Rogue: A variation from the standard type of a variety or strain. Roguing; removal of undesirable individuals to purify a stock.
Resistance: The restriction of development of a pathenogenic agent or parasite. Can vary in degree from immunity (no development) to only slight retardation relative to a so called susceptible reaction.
S1, S2, S3… Symbols for designating first, second, third, etc. selfed generations from an ancestral plant (S0).
Segregation: Separation of paternal from maternal chromosomes at meiosis and consequent separation of genes leading to the possibility of recombination in the offspring.
Selection: In genetics, discrimination among individuals in the number of offspring contributed to the next generation. In statistics, discrimination in sampling leading to bias. Opposed to randomness.
Self-Fertilization: Fusion of male and female gametes from the same individual.
Self-Incompatibility: Genetically controlled physiological hindrance to selffruitfulness.
Single Cross: A cross between two genotypes, usually two inbred lines, in plant breeding.
Species: The unit of taxonomic classification into which genera are subdivided. A group of similar individuals different from other similar arrays of individuals. In sexually reproducing organisms, the maximum interbred group isolated from other species by barriers of sterility or reproductive incapacity.
Strain: A group of similar individuals within a variety.
Synapsis: Conjugation at pachytene and zygotene of homologous chromosomes.
Synthetic Variety: A variety produced by crossing a number of genotypes selected for good combining ability in all possible hybrid combinations, with subsequent maintenance of the variety by open pollination.
Telophase: The last stage in cell division before the nucleus returns to a resting condition.
Tetraploid: An organism with four basic (x) sets of chromosomes.
Top Cross: A cross between a selection, line, clone, etc., and a common pollen parent which may be a variety, inbred line, single cross, etc. The common pollen parent is called the top cross or tester parent. In corn, a top cross is commonly an inbred-variety cross.
Transgressive Segregation: Appearance in segregating generations of individuals falling outside the parental range in respect to some character.
Translocation: Change in position of a segment of a chromosome to another location in the same or different chromosomes.
Variation: The occurrence of differences among individuals due to differences in their genetic composition and/or the environment in which they were raised.
Variety: A subdivision of a species. A group of individuals within a species which are distinct in form or function from other similar arrays of individuals.
Virulence: Capacity of a pathogen to incite a disease.
x: Basic number of chromosomes in a polyploid series.
X1, X2, X3… Symbols denoting first, second, third, etc. generations from and irradiated ancestral plants (X0).
Zygote: Cell formed by the union of two gametes and the individual developing from this cell.
Zygotene: A stage in meiotic prophase when the threadlike chromosomes pair.
Breeding
Breeding is a method whereby you can make seeds from your crop. If you are like most growers out there, you have purchased or obtained a great strain that has become your new favorite & you would like to produce more seeds from your crop in order to continue the strain. In the following method we will show you how to continue a strain. Please note that you will not be able to replicate the plants again unless they are IBL. What breeding can and will do for you is generate seeds that will contain most of the parent plant’s genetic blueprint (features), but maybe not all. Some of your offspring will turn out to be like the parents but others will show different traits. These different traits can include color, potency, and taste.
The cool thing about cannabis is that it can be reproduced asexually or sexually.
Asexual propagation is what is known as “taking cuttings” or “cloning”. The process is when growth shoots or branches are removed from chosen donor plants and induced to form roots in a separate grow medium. These rooted cuttings are then used to plant a uniform crop of genetically identical individuals. This method of propagating growth asexually to ensure uniformity in growth, yield, and consistency is quite popular today (as you recall reading from the Cloning section).
Sexual propagation on the other hand is when the male and female sex cells (biologically labeled “gametes”) unite in the female plant to form a new offspring. This process occurs when the male pollen unites with an ovule within the ovary of a female flower to create an embryo which eventually matures and develops into a seed.
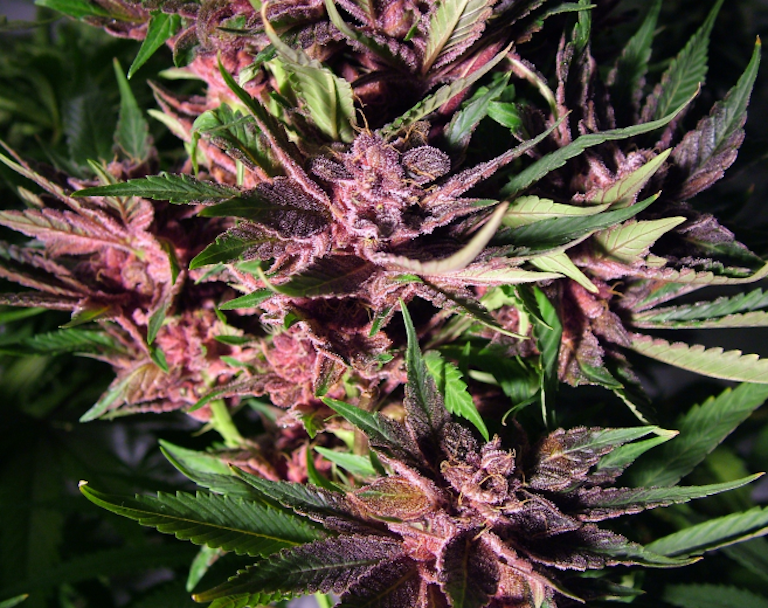
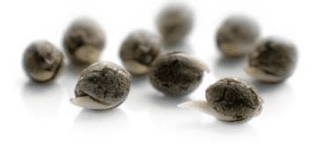
Once Flowering ends, the bud will contain seeds. Check them. Ideally they need to be dark in color. If they are white shiny then they aren’t good because you have harvested them too early. Make sure you wait until the very end of Flowering to harvest your seeds!
Each seed has its own unique genetic blueprint that contains genes from both of its parents. Since offspring produce slightly varied traits, the goal of advanced breeding methods is to weed out the plants that do not contain favorable traits, and continue breeding the one’s that demonstrate superior genetic traits in order to develop new and improved strain strains.
Here’s what the general process looks like: Commercial breeders will often grow a very large number of plants which only a few outstanding specimens are chosen. Their offspring are then selected and oftentimes crossed with other strains of cannabis that have desirable traits. An example of this is a plant that matures super early that is not very potent may be crossed with a plant that takes a very long time to mature but produces extremely potent flowers. The first generation will be fairly uniform. The second generation will tends to sort out into early and late plants of varying potency.
The desirable characteristic-bearing plants (in this case early potent plants only) are then selected for even further breeding, this will stabilize the variety of cannabis after several generations. The goal of commercial seed growers is to stabilize many characteristics at once so that the plants will be uniform.
Since indoor growing allows for manipulation of many indoor environmental factors, you can breed some pretty awesome bud.
One awesome method for producing lighting fast maturing strains is to plant a garden using equatorial cannabis strains (extremely early-flowering plants). By breeding this type of plant with high potent plants, in a few generations you can develop your strain into an incredibly fast-maturing, potent marijuana plant.
Note: Remember, taking cuttings is the only way of preserving the exact genetic makeup of any plant.
Breeding Technique
It is possible to breed and select cuttings from plants that grow, flower, and mature faster. Some plants will naturally be better than others in this regard, and it is easy to select not only the most potent plants to clone or breed, but the fastest growing/flowering plants as well.
Find your fastest growth plant, and breed it with your “best high” male for fast flowering, potent strains. Clone your fastest, best high plant for the quickest monocrop garden possible. Over time, it will save you a lot of waiting around for your plants to mature.
When a male is starting to flower (2-4 weeks before the females) it should be removed from the females so it does not pollinate them. It is taken to a separate area. Any place that gets just a few hours of light per day will be adequate, including close to a window in a separate room in the house. Put newspaper or glass under it to catch the pollen as the flowers drop it.
Keep a male alive indefinitely by bending it’s top severely and putting it in mild shock that delays it’s maturity. Or take the tops as they mature and put the branches in water, over a piece of plate glass. Shake the branches every morning to release pollen onto the glass and then scrap it with a razor blade to collect it. A male pruned in this fashion stays alive indefinitely and will continue to produce flowers if it gets suitable dark periods. This is much better than putting pollen in the freezer! Fresh pollen is always best.
Save pollen in an air tight bag in the freezer. It will be good for about a month. It may be several more weeks before the females are ready to pollinate. Put a paper towel in the bag with it to act as a desiccant.
A plant is ready to pollinate 2 weeks after the clusters of female flowers first appear. If you pollinate too early, it may not work. Wait until the female flowers are well established, but still all while hairs are showing.
Turn off all fans. Use a paper bag to pollinate a branch of a female plant. Use different pollen from two males on separate branches. Wrap the bag around the branch and seal it at the opening to the branch. Shake the branch vigorously. Wet the paper bag after a few minutes with a sprayer and then carefully remove it. Large plastic zip-lock bags also. Slip the bag over the male branch and shake the pollen loose. Carefully remove the bad and zip it up.
It should be very dusty with pollen. To pollinate, place it over a single branch of the female, zipping it up sideways around the stem so no pollen leaks out. Shake the bag and the stem at the same time.
Allow to settle for an hour or two and shake it again. Remove it a few hours later. Your branch is now well pollinated and should show signs of visible seed production in 2 weeks, with ripe seeds splitting the calyxes by 3-6 weeks. One pollinated branch can create hundreds of seeds, so it should not be necessary to pollinate more than one or two branches in many cases.
When crossing two different strains, a third variety of plant will be created. If you know what characteristics your looking for in a new strain, you will need several plants to choose from in order to have the best chance of finding all the qualities desired. Sometimes, if the two plants bred had dominant genes for certain characteristics, it will be impossible to get the plant you want from one single cross. In this case, it is necessary to interbreed two plants from the same batch of resultant seeds from the initial cross. In this fashion, recessive genes will become available, and the plant character you desire may only be possible in this manner.
Usually, it is desirable only to cross two strains that are very different. In this manner, one usually arrives at what is referred to as “hybrid vigour”. In other words, often the best strains are created by taking two very different strains and mating them. Less robust plants may be the result of interbreeding, since it opens up recessive gene traits that may lead to reduced potency.
Hybrid offspring will all be very different from each other. Each plant grown from the same batch of seeds collected from the same plant, will be different. It is then necessary to try each plant separately and decide it’s individual merits for yourself. If you find one that seems to be head and shoulders above the rest in terms of early flowering, high yield and get buzz, that’s the plant to clone and
continue breeding.
Breeding to Make Seeds
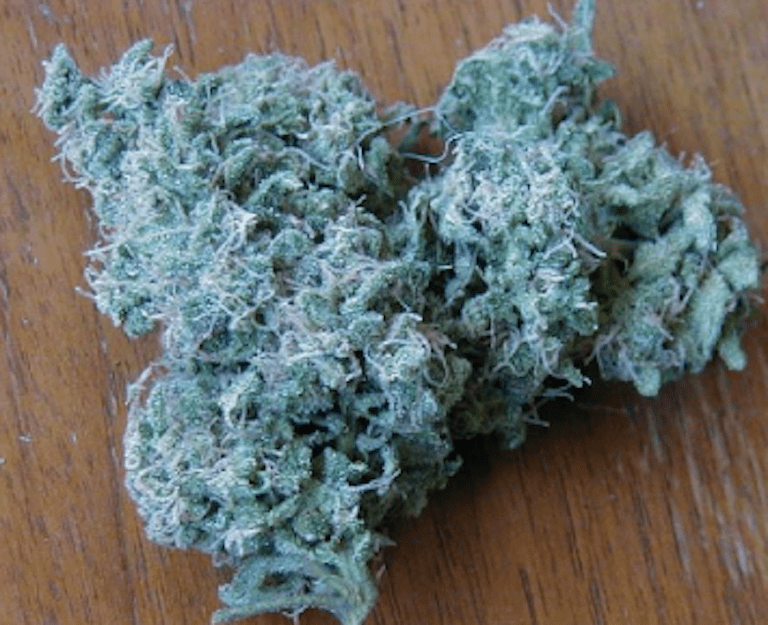
Sinsemilla: When the female plant is not allowed to pollinate, it grows full of resin that was intended to make seeds. False seed pods swell with THC laden resin and the pistils turn red and orange and withdraw into the pods. Then the plant is harvested. Seeds are not part of the bud when the flowers mature. This is called Sinsemillia, and simply means “no seeds”.
Sinsemilla Seeds: It is possible to cross your favourite two female plants to create a new strain of seeds that will produce all female plants. Preferably, these two plants will be different types of plants, not from the same mother’s seeds. This will create the best offspring, since it will not lead to inbreeding. It is easier to gauge the quality of female plants than male plants, since the smoke is more potent and easier to judge it’s finer qualities. Plants from seeds created in this fashion will be all female plants since there will be no chance of male chromosomes from female parents.
Use Gibberellic Acid on one branch of a female plant to induce male flowers. Gibberellic Acid is sold by nursery supply houses for plant breeding and hybridizing. Spray the plant once every day for 10 days with 100 ppm gibberellic acid. When the male flowers form, pollinate the flowers of your other target female plant you have selected. Just pollinate one branch unless you want lots of seeds!
Once the branch has male flowers, cut the branch and root it in water, with glass under it to catch the male pollen when it drops. Use a rooting solution similar to the above cloning solution. Collect the pollen with a plastic bag over the branch and shake it (more on pollen in a moment). Use a razor blade to scrap up fallen pollen and add it to the bag too.
It is also possible to pollinate the flowers of the plant you create the male flowers on, crossing it with itself. This is used to preserve a special plants characteristics. Cloning will also preserve the plants characteristics, but will not allow you to store seeds for use later. Crossing a plant with itself can lead to inbreeding problems, so it may not be the optimum solution in many cases.
Some growers have tried using Gibberellic Acid, sprayed on a healthy female, every day for over a week reporting no male flowers appearing on the plant. Your mileage may vary.
Making Seeds Step-By-Step
So say you purchased an expensive strain and you would like to make more seeds without any interference from another strain. Well you’re in luck because this is actually quite simple!!
The first factor that must be followed to ensure success is to make sure the male and female plants are together from only the same strain batch. DO NOT introduce another strain into the mix. Say for example you have God’s Gift (or any other) strain, make sure all the male and female plants in your grow room are the God’s Gift strain. By allowing the males to pollinate the females you will get God’s Gift seeds. Unless your strain is an IBL, the offspring will lose some of the genetic features that the parent plants had.
Step One – Selecting Breeding Parents: In selecting female plants, you will want to select one based on yield, smell, potency, flavor, resistance to pests, color, etc. In other words, choose the best female plant with the most favorable genetics. (It is even optional, but recommended to smoke a sample harvest from your chosen plant strain, so make sure it is optimal. Drying and curing can change the aromas and flavours, so it is good to include a post-harvest evaluation.)
Choosing male parent plants with desirable characteristics is a little tougher. Since males do not produce flowers it is hard to judge by resin content, smells, floral size etc. Many breeders have a crude, but time-tested method of determining superior male plants, and that is by rubbing the stem with your finger. If it exudes a pungent odor, it is most likely a good plant. A superior method, that is more time consuming, is by taking the pollen from your chosen male plant and using it to make seeds with the chosen females. Then you grow out your resulting seeds and examine them to determine the male’s effect. This is by far the most reliable method for etermining the genetic value of the chosen male candidate.
Note: The male plant MUST Remain on a 12/12 schedule. Many growers report that if the male does not have ample lighting it will in most cases cease to finish the flowering cycle followed by complete shutdown of pollen production within several days.
Step Two – Collecting Pollen: Once the flowers are ready to open you can then extract the pollen from the male flower. You will witness the male flower open out from its pod. The best place and time to gather pollen is after it bursts and falls onto the leaves. Start off by cutting off a branch. Place a plastic bag over the branch and secure the bottom with a piece of string or a tight rubberband. This prevents pollen from leaking. You have to be careful as airborne pollen can travel miles. Keep the branch inside the bag for several days to collect pollen. Once enough pollen seems to have been collected inside your bad, shake the remaining pollen off inside the bag.
Step Three – Storing Pollen: A great way to store pollen is to purchase small jar or an oldschool film canister. (You can also put some water in a film canister and drop an alkaseltzer tablet in, then pop the lid closed… watch what happens! Just kidding ;). ) You can save your pollen in these canisters for the next harvest.
It is very rare to have excess pollen to store, but if you happen to have extra pollen available you can store it in a freezer in an airtight container for about 18 months (below freezing temperatures). I highly recommend you use it within 6 months to ensure maximum quality. Pollen does not have a long natural shelf life; it is easily destroyed by high temperatures and moisture.
Step Four – Pollination, Method 1: In order to pollinate the eager females simply cover the female branch with the bag of pollen (sealing the bag with a rubber band, string, or wire tie around the base of the bag and stem) and shake the pollen onto the female flowers. And wha-la! Make sure you do a through shaking that will allow the pollen to come into contact with as many pistils as possible. Congratulations, you now have some very happy pollinated female plants. Some veteran growers leave the bag on for up to as much as 3 days to ensure maximum pollination.
Note: Be very careful when shaking and removing the bag, as any airborne pollen can easily pollinate any nearby plants. Many experienced growers pollinate their plants in a completely separate isolated area because of this very reason. They then will spray the plants with water to destroy all the unused pollen and then move the plant back into the grow room.
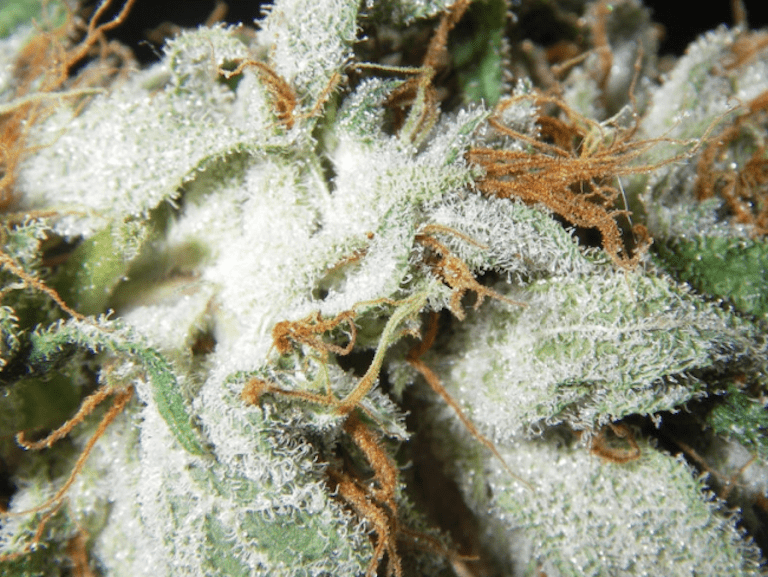
Method 2: An additional method of pollination is to use a small paint brush to carefully paint the pollen onto the pistils. Start by dipping your brush into the pollen container. Next gently brush the pollen onto the pistils. This technique is very beneficial to the breeder who only needs to make a few seeds. After fertilization, most seeds will become completely ripe and ready in approximately 6 weeks, some even earlier. How can you tell when your seeds are ripe? It’s simple. Seeds become ripe when they turn mostly a dark brown or grey, tiger striped, and they sit loosely in the calyx. White, yellow, and green seeds are 9 times out of 10 immature and not viable.
Now that you have a general overview of each step, let’s dive into more details of each process:
Collecting Pollen Step-By-Step
(Editor’s Choice) VIVOSUN Gardening Hand Pruner Pruning Shear
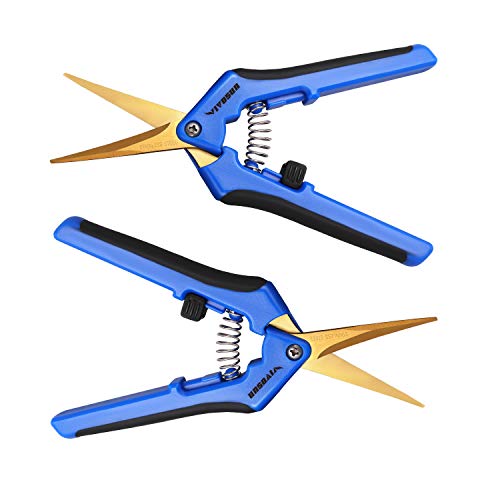
– Titanium Coated Curved Precision Blades (2Pack Curved Blade)
– Best Trim Scissors Cannabis
– 620+ reviews
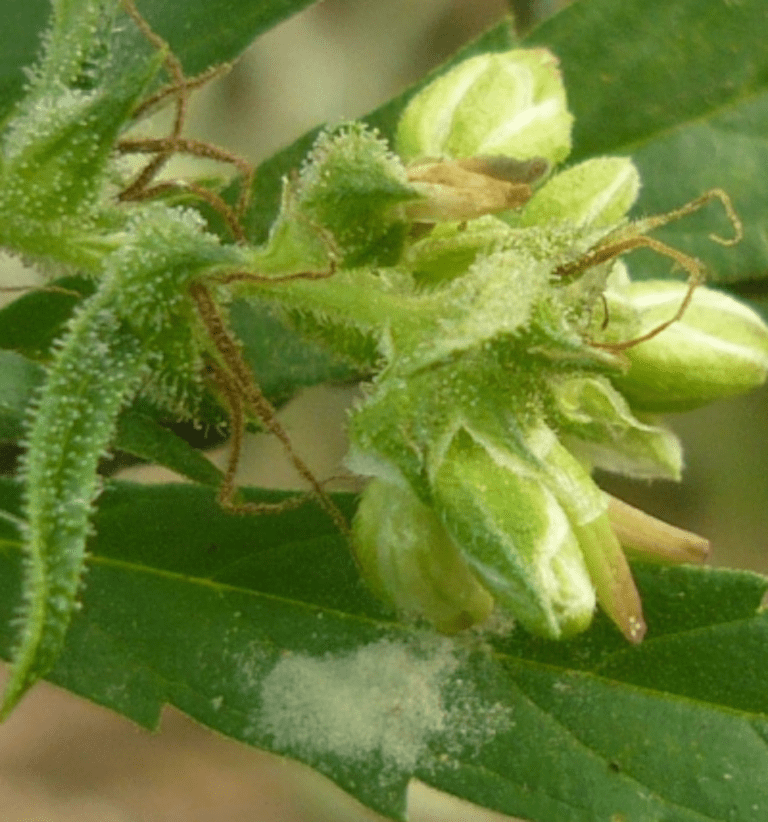
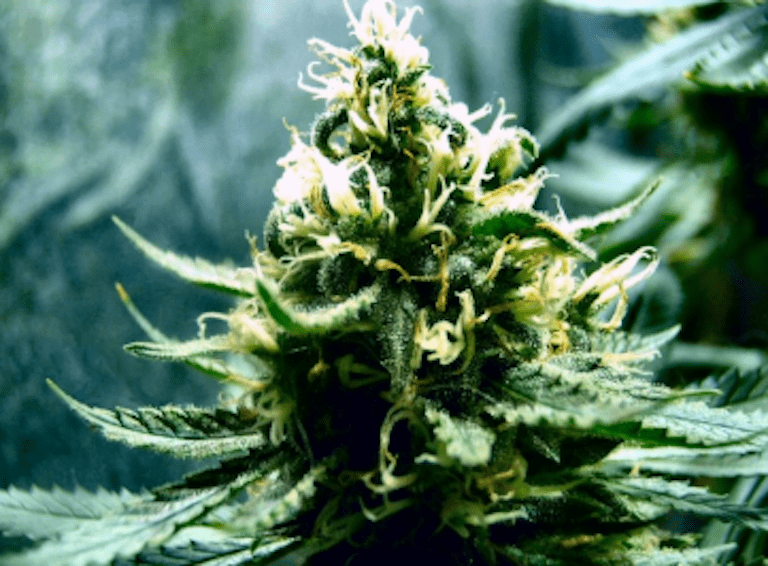
Step 1. First, take a mature flowering male plant, like the one pictured. It is advisable to wait until the majority of the flowers are open and practically bursting with pollen. This is obvious from yellow powdery residue on the leaves.

Step 2. Next, get a pair of scissors, piece of wax paper folded in half, with one end folded over to form a corner. Wax paper works extremely well here since it resists moisture which will quickly spoil your pollen.
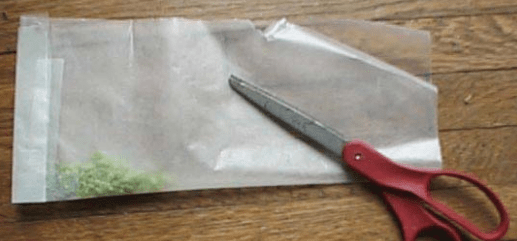
Step 3. Then take the scissors and cut a nice big branch off – just snip one so it is easy to handle.
Step 4. Carefully lay the branch in the opened wax paper, close the sides with the holding hand so a breeze doesn’t blow too much away. Then; twist, jiggle, shake, and rub the branch against the wax paper.
Step 5. After a few branches to see how much you have collected, remove some of the flowers that have fallen off and check out what you have so far.
Step 6. Once you have run out of branches (or you feel you have enough pollen) shake the pollen down into the cover you made and remove any additional flowers that still remain. Once all the male flowers are removed you can unfold the wax paper to be sure to get them all. You can then transfer the pollen to a new piece of wax paper if you desire.
Step 7. The final step is to wrap it up, tape it, and congratulations – you now have enough pollen for a few million seeds. You can now carefully unfold it and use a small paint brush to dip into it and pollinate buds. Or if you are really lazy you just pinch some out and sprinkle it.
Making A Basic Hybrid
In order to make a basic hybrid you must take a male plant from one strain and a female plant from the other. Depending on genetics, certain features of one strain will be more apparent and favored in offspring than the other, and viceversa. Also some variations that were not present in the parents may also appear (if the parents were both not IBL).
Before you begin it is important to keep in mind cannabis is an extremely variable and polymorphic species. Many traits have many many possible expressions. So keep on growing lots of variations which will ensure you a wide array of phenotypes and combinations of traits for future selection. The first step is to determine what your goal is, or in other words, what desirable characteristics does your ideal plant have?
For indoor plants, these traits include it’s shortness, bushy growth, height, densely formed buds, taste (including specific flavors), aromas, THC content, and quality of high (long-lasting, soaring, sedative). Also the plant’s resistance to disease, insects, and any other health related issues is important. It is critical to select plants that have vigor and good strong health.
Figure out your end breeding goals first. Begin with the end in mind.
Sometimes plants will have ideal traits and negative ones. For example one may produce high THC content buds, but grow lanky and tall and be very susceptible to growing mold.
Your strategy is then to slowly weed out the negative traits in each generation of bred plants, until you have an ideal breed you are happy with, for yourself or for your customers.
Crossing
If you cross an Indica with a Sativa you get seeds which produce a hybrid. All seeds carry a genetic mix of their mother’s and father’s traits. The traits that are the same for the mother and the father will be passed on to the seeds. One way of crossing I this. Let’s label the parents as P.
Crossing these parents give the F1 generation of seeds.
- P(mother) x P(father) = F1
- F1(female) x F1(male) = F2(if two f1 seeds are crossed they give rise to the f2 generation sons and daughters)
- F2(female) x F2(male) = F3
- F3(female) x F3(male) = F4
Most likely the fathers and mothers don’t have the same traits, and after some generations the traits you prefer will therefor have gotten lost in the gene mixing. When you reach F4 the traits that you like will most likely (there is always the possibility but it is a really really small possibility) be gone. An inbred line (IBL) is a strain that is stabilized, i.e. the good traits are preserved and the bad traits are excluded. An IBL (inbred line) is a genetically homogenous strain that grows uniformly from seed. A hybrid is a strain made up of two genetically unlike parents, IBL or hybrid. If you don’t own a laboratory, you can not know that the mother and father share the same traits, you can only make a good guess. To create an IBL you need to cross a lot of plants and grow many many generations of plants, I.e you need both time and space. Backcrossing involves breeding a descendant back against one of the original parents (eww!).
I’ll call the first backcross seeds B1:
Two examples of Backcrossing:
P(mother) x F1(male) = B1
F1(female) x P(father) = B1
Cubing produces a larger population with a very close genetic heritage. Cubing involves backcrossing three times using the subsequent generations back against the original parent that you want cubed. i.e. first cross:
- P(mother) x P(father) = F1
- (begin cubing with the first backcross) P(mother) x F1(male) = B1
- (second backcross) P(mother) x B1(male) = B2
- (third backcross) P(mother) x B2(male) = B3
How can I change my marijuana’s taste / smell?
The different tastes of certain strains of cannabis are a product of controlledbreeding programs. The flavour and smell of Cannabis comes from five substances: mono- and sesqui-terpenes, alpha- and beta-pinene, limonene, myrcene, and beta-phalandrene. The amount of each substance present in a given strain will determine the flavor and smell.
Breeding Goals
Before you begin any breeding strategy, the most important first step is to define your goals. Are you growing for yourself or for commercial production? Indoors or out? Mostly Sativa or mostly Indica? Keep only the plants that have the qualities you want, and mercilessly kill the rest.
Select plants that don’t fall over; if you have to prop them up with toothpicks you might as well cull them. Keep the ones that are free from abnormalities and hermaphroditism. Hopefully you’ve got enough many seeds to be ruthless. Keep the ones that show better resistance to disease and pests. Even though the progeny performance is more important than the individual, there is a positive relationship between the overall vigour of an IBL and the yield of its hybrids. If they produce vigourous plants they are more likely to pass these traits on. Then employ a breeding strategy.
Choosing Your Breeding Stock
Breeding fine cannabis involves carefully choosing the breeding stock. To choose wisely you must first understand the key differences between male and female cannabis.
Female Cannabis: The female cannabis plant, unlike the male, is grown to produce potent marijuana. Premium marijuana is produced in seedless form by eliminating all pollen sources from the growing environment. Seed production reduces the value of marijuana dramatically by lowering the yield and potency of the flowers. Hermaphrodites are plants expressing both male and female flowers. They may fool a grower who mistakes the “hermie” for a female – only to find his crop is ruined by the unexpected release of pollen. Knowledgeable marijuana breeders are very careful to avoid hermaphrodism in their seed lines.
The attributes of a valuable female are the following (in descending order of importance):
- Potency.
- Scent.
- Resistance to hermaphrodism.
- Flavor.
- Rate of flowering response.
- Resin production.
- Stature.
- Floral color.F
- Floral structure.
- Vigour/Yield
Male Cannabis: The male cannabis plant is essentially only useful for breeding. The male plant makes very poor marijuana, being mostly leaves without the dense resinous floral clusters of the female the yield is miserable. More importantly, the male of the species has virtually no potency in comparison to that of female cannabis. The males do carry genes that influence the expression of all the traits listed above, but not many of them are directly observable in the male itself due to the male phenotype being markedly different from the female phenotype. A male cannabis plant’s value is determined by the quality of his daughters.
When starting out with a large number of potential breeding individuals, one desires to weed out the undesirable individuals.
The female is easy to evaluate because all the traits favoring marijuana production are directly observable in the female.
It’s a simple matter of growing and then flowering the females to grade their performance and smoking the resulting marijuana. The breeder then chooses only those females most closely matching the breeder’s personal ideal to be used as seed parents.
The directly observable & important traits of male cannabis are as follows:
- Maturation rate.
- Stature.
- Vigour.
- Resistance to hermaphrodism.
All males expressing poor quality in any of these traits should be culled so as not to pass the weak trait on to the progeny. Males are also observed to have a certain scent and floral structure but the importance of these traits pale in comparison to those listed above.
The potency of male plants, and especially the potency difference between individual males in a group, is generally too subtle to be measured by anything short of professional scientific laboratory equipment. There is no conclusive proof that the most potent male in a group actually creates the most potent female progeny; although it seems intuitive that that should be the case. The difficulty of determining a male plant’s potency is a major hurdle to proving this link.
The potency of a male plant itself isn’t very important, as we aren’t interested in growing males for marijuana production. The value of a male lies entirely in the traits he consistently passes on to his daughters. Therefore its unnecessary to identify the one male amongst a group of potential pollen donors with the greatest potency. It is far more logical to evaluate the female progeny of each male to define the potency of each male in the group.
Male cannabis individuals may be graded for quality by a controlled pollination of identical female clones (one for each pollen donor). This isolates the influence of the male by holding constant the influence of the female on each cross. The seeds resulting from each clone are then grown and the progeny is graded to determine which of the crosses was the most successful. When the group with the most desirable female progeny is identified, the responsible male has been identified as the most valuable.
As you know, males can be kept in the vegetative state exactly like female mother plants; at this point they would be”dads”. Clones from the favored male can be flowered as needed along with the breeding female(s) when seeds are desired.
In most cases there will only be about 10 males to be evaluated after culling all those with directly observable defects. Breeding with larger populations is always preferable, as genetics tends to be a statistical “game”.
By following the above method, growers can accurately pinpoint the ONE male in their small group which is the most potent…in the only meaningful sense of male potency.
Cubing a Clone
This is the technique of mixing pollen from all the selected males. This method guarantees that from the very first group of seedlings, a predefined fraction will be the offspring of the best male plant (defined as the male responsible for creating the best daughters). They will be easy to identify, being the superior plants.
The disadvantage of this method is that the identity of the responsible male is lost, rendering that specific cross difficult to repeat. That’s a major disadvantage if the intention were commercial production of the hybrid strain. However because its more time-saving & practical, mixing the pollen is the best method for home breeders wishing only to obtain a great clone mother. One need only germinate a large enough group of seeds to ensure several female offspring of each select male & the future clone mother will be among them.
Cubing a clone is a way to create a unique seed line (a strain) modeled after a currently existing female individual. The goal is to create seeds from which the females replicate the phenotype of the original female. Obviously the chosen female should be an outstanding specimen.
The Cubing Procedure Step-By-Step
Remember; You must CONTINUOUSLY keep a Bonsai Mother in the vegetative state to provide clones.
Step 1. Pollinate a flowering clone of the original female with the pollen of a related male. The resulting seeds contain ½ the original female’s genes and ½ those of the male. An unrelated male wont have the Y-chromosome of the chosen females family and therefore any Y-linked traits of the family will always be missing in the seed line.
Step 2. Grow the above seeds and flower them. Collect an equal quantity of pollen from each selected male and mix it together.
Step 3. Pollinate a flowering clone of the original female with the above pollen. These seeds contain ½ the original females genes plus ¼ more because the male used was ½ her genetics too. You can call this generation .75 to capture the idea that its ¾ of the original females genetics.
Step 4. Grow the above seeds & flower them. Collect an equal quantity of pollen from each selected male and mix it together.
Step 5. Pollinate a flowering clone of the original female with the above pollen. These seeds contain 7/8 the original genes (1/2+3/8), the “.88” generation.
Step 6. Grow the above seeds & flower them. Collect an equal quantity of pollen from each selected male and mix it together.
Step 7. Pollinate a flowering clone of the original female with the above pollen. These seeds contain 15/16 the original genes (1/2+7/16), the “.94” generation. Theoretically this will be a stable, true-breeding seed line from which all females are replicas of the original.
Note: In cubing we have no further use for the males of previous generations after taking their pollen. Therefore mixing the pollen & losing the identity of best male is no problem here. The goal of the cubed strain is to reproduce the female phenotype, independent upon P1 generations for reproduction after a certain number of steps in the cubing process.
Carefully evaluate the females produced in each generation of the cubing process to monitor their progress. If the results don’t progressively shift toward your goals, then you may have to change your male selection parameters.
Convergent Improvement: If you have a good single cross (A X B), and you know the vigour is the result of the dominance of growth factors, back-cross it several generations to A, selecting for qualities of B that are lacking in A. After two or more generations of back-crossing and selecting, IBLs are produced. Do the same for B. After improved A and B are obtained, they are tested in crosses
and compared to the original (A X B).
Multiple convergence is improving an inbred by convergence of gametes from different sources. If A is a very desirable inbred in crosses, it can be modified in two separate back-cross programs {eg. (A X C) X A, and (A X D) X A}, with the idea that the improved inbreds will be vigourous enough to use as the male parent of a double-cross.
Creating a True Breeding Strain(IBL)
There are a few situations where a plant breeder would want to create a true breeding strain(IBL) and a few ways of accomplishing the task. But understanding the subtle differences of the various techniques is not so easy. This section will attempt to give a basic understanding of what is actually happening with each technique and then apply what is learned to actual projects. Breeding is not a black and white subject and as a whole, it would be too complex to put on paper in an easily understood form. Therefore, I will create small fictional examples to reinforce various concepts and then we will take those examples and concepts and apply some reality to them. Try not to get hung up on the erroneous assumptions used here such as flavour being monogenic, the assumption is simply used to make it easier to learn a certain concept.
Just What Is It That We Are Doing?
Before we dive in to the more heavy material of this segment, maybe we should take the time to understand what we are trying to accomplish when we set out to create a true breeding strain. There are hundreds of possible phenotypic traits that we could observe within a cannabis population. Are we trying to make all of them the same and remove ALL variation? Not likely, the genetic code is
just too complex to try. Plus, since phenotype (what we see) is ½ genotype + ½ environment; everytime the population was grown under new conditions, new heterozygous traits would be observed. Basically, all we are trying to create is an overall uniformity while not worrying about the minor individual variations. No different than a dog breed. You can look at a German Shepard and recognize
it as belonging to a discrete breed. But if you look closer at several German Shepards all at the same time, you will find variations with each and every one of them. Some will be a little taller, some a little wider, some more aggressive, some a little fatter, some darker, etc. But they would all fall within an acceptable range for the various traits. Generally speaking, this is what a plant breeder is trying to accomplish when creating a true breeding strain, or IBL.
However this isn’t always the case. Sometimes a breeder will just concentrate on a specific trait, like say outdoor harvest date, or mite resistance. You could still have a population where some are 2′ bushes and some 10′ trees. In this case, you would say that the strain was true breeding for the particular trait, but you wouldn’t consider it true breeding strain per se. In genetics, wording plays a big part in meaning and understanding.
Ok, so we want to make a cannabis population fairly uniform over a few phenotypically important traits, like say flavour for instance. For simplicity sake, we’ll just deal with the single trait flavour, it’s complex enough. And although flavour is controlled by several gene pairs (polygenic), we’ll make the simplistic assumption that it’s controlled by a single gene pair (monogenic) for many of the models and examples in this paper. There are many flavours such as chocolate, vanilla, musky, skunky, blueberry, etc, but in this section we’ll just deal with two flavours, pine and pineapple. Either gene in the gene pair can code for either of the flavours. If both genes code for pineapple or both genes code for pine flavour, we say that the gene pair (and individual plant) is homozygous for flavour. If the one gene codes for pine and the other codes for pineapple, we say that the gene pair(and individual plant) is heterozyous with respect to flavour. The heterozygous individual can create gametes (pollen or ovules) that can code for either pine flavour or pineapple flavour; the homozygous individuals can only create gametes that code for one OR the other. A homozygous individual is considered true breeding and a heterozygous individual is not.
However, as the words imply, when we are creating a true breeding strain, we are looking at a population, not individuals. We are trying to make all the individuals in the population homozygous for a particular trait or group of traits. Lets say we have a population of 50 individual plants, and each plant has has a gene pair coding for flavour. That means that 100 flavour genes make up the flavour genepool (reality is much more complex). When trying to create a true breeding strain, we are in fact trying to make all 100 of those genes code for the same trait (pineapple flavour in our case). The closer our population comes getting all 100 genes the same, the more homozygous or true breeding it becomes. We use the terminology gene frequency to measure and describe this concept, where gene frequency is simply the ratio or percentage of the population that actually contains a specific gene. The higher the gene frequency, the more true breeding the population is. A fixed trait is where the gene frequency of the trait reaches 100%.
This is the basic backbone of what breeding is all about, manipulating gene frequencies. It doesn’t matter if your making IBL, F1s, F2s, selecting for this or selecting for that, all you are really doing is manipulating gene frequencies. Therefore, to ever really understand what is happening in any breeding project, the breeder must pay attention to gene frequencies and assess how his selective pressures and models are influencing them. They are his measure of success.
What are we trying to create a true breeding strain from?
This a good question. Sometimes a gardener will notice a sport or unique individual in an F2 population, like say it has pineapple flavour when the rest have pine flavour. For one reason or another he decides he wants to preserve this new trait or combination of traits from that single individual. For the sake of ease of comprehension, we tend to call this special unique individual the P1 mom. He could start by selfing the individual OR breeding that individual with another and create what can be described as F1 offspring. If the F1 route was chosen, then breeders can diverge down two new paths. Some breeders will take the progeny of the F1 crossing and breed it back to the P1 mom, and then repeat for a couple more generations. This is referred to as backcrossing or cubing by cannabis breeders. Another common strategy is to make F2 progeny from the F1 population and then look for individuals that match the P1 mom. They would repeat the process for a few generations. We can call this filial or generational inbreeding since the parents from each cross belong to the same generation.
In another situation, sometimes a farmer will notice a few individuals in his fields that stand out from the crowd in a positive manner. Like say they are resistant to a problem pest such as powdery mildew. In this case, he will collect the best of the individuals and his starting population will contain several similar individuals and not a unique single individual as in the previous example. He would skip the hybridizing step (making the F1s) and go straight to the generational inbreeding step.
Applying the Pressure: Another excellent method to influence gene frequencies is to apply selective pressure. The idea here is to select only individuals that carry the desirable genes, and discard the rest.
IBL, f1, F2
An IBL (inbred line) is a genetically homogeneous strain that grows uniformly from seed.
A hybrid is a strain made up of two genetically unlike parents, IBL or hybrid.
When you cross two different IBL strains for the FIRST time, it is called the F1 generation. When you cross two of the same F1 hybrid (inbreed), it is called the F2 generation.
The process of selective inbreeding must continue at least until the F4 to stabilize the recurrently selected traits. When you cross two specimens of an IBL variety, you get more of the same, because an IBL is homozygous, or true breeding for particular traits.
How do I backcross my special female?
In this first situation, we’ll deal with the situation where a plant breeder finds a special individual or clone.
It’s a natural thing to be curious and cross a couple of plants that catch your fancy. Grow them out and find a new variation that you like even better. We can preserve the new variation through cloning indefinitely, but accidents happen and clones die. They can get viruses or can suffer clonal deprivation from somatic mutations over time. It’s also harder to share clones with friends through the mail than seeds. So it’s only natural that we would want to create seed backups of this special clone.
But before we start breeding this clone, we should try and figure what exactly it is we want from the seeds we are going to create. Do we want them to simply be able to reproduce individuals like the special clone? Simple backcrossing (cubing) will accomplish this. Or do we want to to create seeds that will be able to create more seeds like the special clone, a true breeding strain? These are very different in nature. You see, chances are that your special clone will be heterozygous for many of traits she phenotypically expresses. This just means that she will contain genetic information (genes) for two opposing traits, but you can only see one, the dominant one. However, her seeds will only get one or the other of the genes, so her offspring will express all the genetic information she has, including what you can’t see within herself. If you want to create a true breeding strain, you need to preserve all the genes you can see, and remove all the genes that you cannot, but may show up in the offspring. Creating homozygousity. The only way to accomplish this is through selection and generational inbreeding(selecting the homozygous offspring to be parents for the next generation).
Backcrossing and Cubing
Backcrossing is where you breed an individual(your special clone) with it’s progeny. Sick in our world, but plants seem to like it.
- Your first backcross is just a backcross.
- Your second backcross where you take the progeny from the first backcross and cross back to the SAME parent (grandparent now) is often called SQUARING by plant breeders.
- Your third backcross where you take the progency (squared) from the second backcross and cross back to the SAME parent (great grandparent now) is often called CUBING by plant breeders. You can continue the backcrossing but we just call this backcrossing. Cubing is in reference to the number three, as in 3 backcrosses.
Cubing works on the basis of mathematical probabilities with respect to gene frequencies. The more males you use with each cross, the better the chance that your reality matches the theory. In theory, with the first backcross, 75% of your genepool will match the genepool of the P1 parent being cubed. Squaring increases this to 87.5% and cubing increases it to 93.75%. You can arrive at these numbers by taking the average between the two parents making up the cross. For instance, you start by crossing the P1 mom(100%) with and unrelated male (0%) getting 100% + 0% divided by 2 = 50%. Therefore, the offspring of this first cross are loosely thought of as being 50% like the mom.
Take these and do your first backcross and you get 100%(mom) + 50% divided by 2 = 75%. And this is where we get the 75% for the first backcross. Same thing applies as you do more backcrosses. As you will see later, you can apply this same probability math to specific genes or traits, and this can have a dramatic effect on your methodology and selection methods.
Your selection of the right males for each backcross are the crucial points for success with this technique. In each case, you could select males that contain the genes you want, or you could inadvertently pick those individuals that carry the unwanted recessive genes. Or more likely, you could just pick individuals that are heterozygous for both genes like the P1 mom being backcrossed. One of the easiest ways to deal with this is to start by only looking at one gene and one trait, like lets assume that flavour is determined by a single gene (in reality it’s probably not). And do some punnet squares to show gene frequencies through 3 generations of backcrossing. Now lets assume that we found a special pineapple flavoured individual in our pine flavoured population that we wanted to keep. The gene causing the pineapple flavour could be dominant or recessive and the selection abilities and cubing outcome will be different in both cases.
a) pineapple flavour is dominant
P = pineapple flavour and p = pine flavour
Therefore since each individual will have two flavour genes paired up, the possible genotypes are PP, Pp, and pp. Since P is dominant, PP and Pp will express pineapple flavour while pp will exhibit pine flavour, these are their phenotypes. Now since the pineapple is a new flavour, chances are that the special individual will be heterozygous, or more specifically, Pp. Therefore, the only possible parent combination is Pp X pp with the Pp being the parent to be cubed.
Now most will find it tough to pick males with the gene for pineapple flavour since males don’t produce female flowers. Therefore, they will select males randomly and blindly with respect to this trait. The ratio of P to p genes of the male F1 generation to be used in the first backcross will be 2:6. Another way to look at it is to say that the P gene fequency is 25%. This means that one out of four pollen grains will contain the gene for pineapple flavour.
Now it’s this first backcross that first creates an individual that is homozygous (PP) for the pineapple flavour. However, again because of our limited selection abilities, we choose males randomly. From the random males we should expect three out of eight pollen grains to to contain the gene for pineapple flavour. The P1 female will still contribute one P gene for every p gene.
The second backcross (Squaring) will produce the following:
3 PP 8 Pp 5 pp
Therefore, 68.75% will have pineapple flavour and 31.25% will have pine flavour. The frequency of the P gene has risen to 7/16 or 43.75%.
And finally, the third backcross (Cubing) will net the following genotypic ratios:
7PP 16Pp 9pp
Therefore, 71.875% will have pineapple flavour after cubing has been completed. Roughly 22% (7/32*100) of the cubed progeny will be true breeding for the pineapple flavour. The frequency of the P gene has risen to roughly 47% (30/64).
If the backcrossing continued indefinitely with random selection of males and with large enough of a population size, the frequency of the P gene would max out at 50%. This means that the best that can be expected from cubing is 25% true breeding for pineapple flavour and 75% that will display the pineapple flavour. You would never be rid of the 25% that would maintain the pine flavour. This model would hold true when trying to cube any heterozygous trait.
b) Pineapple flavour is recessive
In this case, P is for the pine flavour and p is for pineapple flavour. Convention is that the capital letter signifies dominance. For the breeder to have noticed the interesting trait, the mom to be cubed would have to be homozygous for the pineapple flavour (pp). Depending where the male came from and whether it was related, it could be Pp or PP, with PP being more likely. It won’t make much
difference which in the outcome.
F1 cross is pretty basic, we’ll skip the diagram. We simply cross the female (pp) with the male (PP) and get offspring that are all Pp. Since the pine flavour is recessive, none of the F1 offspring will have pineapple flavour (hint). However, the frequency of the gene p will be 50%.
pp X PP = Pp + Pp + Pp + Pp
Since the F1 generation are all the same (Pp), the pollen it donates to the first backcross will contain a p gene for every P gene. The first backcross will be:
B1 = pp X Pp = Pp + Pp + pp + pp
As you can see, 50% of the offspring will be pineapple flavoured and the frequency of the p gene is 6/8 or 75%. This B1 generation will generate pollen containing 6 p genes for every 2 P genes.
As you can see, the second backcross or squaring produces pinapple flavour in 75% of the offspring. And the p gene frequency within those offspring is roughly 88%. (Remember C88). Of the pollen grains from this squaring, 14 out of 16 will carry the p gene for pineapple flavouring. When they are backcrossed to the P1 mom for the third time, they net the following cubed progeny:
After cubing of a homozygous gene pair, we end up with roughly 88% of them displaying the desired trait (pineapple flavour in this case) and also being true breeding for that same trait. The frequency of this desired gene will be roughly 94%. If the backcrossing was to continue indefinitely, the gene frequency would continue to approach 100% but never entirely get there.
It should be noted that the above examples assume no selective pressure and large enough population sizes to ensure random matings. As the number of males used in each generation decreases, the greater the selective pressure whether intended or not. The significance of a breeding population size and selective pressure is much greater when the traits to be cubed are heterozygous. And most importantly, the above examples only take into account for a single gene pair.
In reality, most of the traits we select for like potency are influenced by several traits. Then the math gets more complicated if you want to figure out the success rate of a cubing project. Generally speaking, you multiply the probabilities of achieving each trait against each other. For example, if your pineapple trait was influenced by 2 separate recessive genes, then you would multiply 87.5% * 87.5% (.875 * .875 *100) and get 76.6%. This means that 76.6% of the offspring would be pineapple flavoured. Now lets say the pineapple trait is influenced by 2 recessive traits and and a heterozygous dominant one. We would multiply 87.5% by 87.5% by 71.9% (.875*.875*.719*100) and get 55%. Just by increasing to three genes, we have decreased the number of cubed offspring having pineapple flavouring down to 55%. Therefore, cubing is a good technique where you want to increase the frequency of a few genes (this is an important point to remember ), but as the project increases, the chance of success decreases …. at least without some level of selective pressure.
Applying Pressure
The best way to significantly increase your chances of success is to apply intended selective pressure and eliminate unintentional selective pressure. Try to find clearcut and efficient ways to isolate and select for and against certain traits. Find ways to be sure your males are passing along the intended traits and remove all males that do not. This includes ALL traits that may be selected for.
Some traits you will be able to observe directly in the males. Other traits like flowering duration you may not. If you are selecting for a trait you can’t directly observe, you want to do some progeny tests and determine which males pass on the most desireable genes. I’ll explain more on progeny tests later.
It’s important that when choosing your best males to ignore the superficial traits having nothing to do with the real traits your looking for. You see, cannabis has several thousand genes residing on just 10 chromosome pairs or 20 individual chromosomes. Therefore each chomosome contains hundred of genes. Each gene residing on the same chromosome is said to be linked to each other. Generally speaking, they travel as a group. If you select for one of them, you are actually selecting for all of the traits on the chromosome. There is an exception to this rule referred to as breaking linked genes via crossing over, but for simplicity sake, we will ignore that for now. Getting back to selection, you could decide to select for a trait such as you like the spikey look of the leaves while really being interested in fixing the grapefruit flavour. But as it may happen, both traits may be on the same chromosome pair but opposite chromosomes. If so, as long as you select the plants with spikey leaves, you will never get the grapefruit flavour you really want. It’s good to keep in mind that each time you select for a trait, you are selecting against several hundred genes. This is why most serious breeders learn to take small methodical steps and work on one or two traits at a time. Especially with inbreeding projects such as selfing and backcrossing.
Now let’s see what kind of improvements we can make in the first example of trying to cube a heterozygous dominant trait using some selective pressure. Let’s say that with each generation, we are able to remove the individuals recessive for the pine flavour (pp), but can’t remove the heterozygous ones (Pp). If you recall, our P1 mom had the genotype (Pp) in that model and the F1 cross yielded (Pp + Pp + pp + pp) as possible offspring combinations. We remove the two (pp) individuals leaving us with only Pp. Therefore our first
backcross will be:
Pp * Pp = PP + Pp + Pp + pp
Again we remove the pp individual leaving us with PP + 2Pp. Going into the second backcross we have increased our P gene frequency from 37.5% up to 66.7%. This means that going into the second backcross 4 of every six pollen grains will carry the P gene.
As you can see, after selecting against the homozygous recessives for 2 backcrosses, we have increased our P gene frequency to 58% from 44% in our squared population. If we again remove the homozygous recessives, our gene frequency increases to 70% (14/20) going into the third backcross, meaning that 7 out of 10 pollen grains will carry the P gene.
B3 cross = 7 PP + 10 Pp + 3 pp
This translates to mean that 95% of the progeny will taste like pineapple after cubing a heterozygous dominant strain if the omozygous pine tasting ones are removed prior to to each backcross. This is an improvement from 72% when no selection occurred. The frequency of individuals true breeding for the pineapple flavour rose to 35%. But more importantly, the P gene frequency improves to 60%. This will be an important consideration when we discuss progeny testing. But for now lets recap the percentage of individuals true breeding for the pineapple taste in each of the models. In the case where the pineapple flavour trait is heterozygous dominant and no selective pressure is used, cubing produced 22% true breeding individuals. By selecting against the homozygous pine recessive, we were able to increase this too 35%. And finally, when cubing a homozygous recessive gene, we are able to achieve a cubed population that is 87.5% true breeding for the pineapple flavour. And as I pointed out earlier, these numbers only apply to single gene traits.
Let’s say the pineapple flavour is coded by two separate genes, one dominant and one recessive, and you are able to select against the homozygous recessive pine flavour while selecting for the dominant pineapple flavour gene. Your cubed population would then contain 87.5% * 35% (.875 * .35 * 100) = 30% true breeding individuals. As you can see, as long as the cubed source is heterozygous, it doesn’t matter how many backcrosses you do, you will never achieve a true breeding strain.
Increasing Bud Potency and Harvest Yield

There are several things growers can do to improve their marijuana yield and potency (THC content). Increasing marijuana yield and THC content is accomplished first by mastering and keeping all the basics consistent, such as marijuana grow room temperature, watering schedule, nutrient feeding, and using the proper high intensity discharge light. This in and of itself will grow impressive marijuana plants. The two most determinate factors of your yield amount is the strains you choose (good genetics) and the Light. Optimal high quality lighting along with spectacular strains will produce awesome yields and an abundance of potent buds from your plants. Also be sure to read the information throughout this eBook for tips on producing massive yields and quality potent buds. Increasing marijuana yield is the desire of all marijuana growers who have mastered the basics.
Mastering the basics of marijuana growing will then allow you to begin considering some advance marijuana growing techniques to increase yield and bud potency. The marijuana plant yield and quality can be increased in many ways.
You see, yield is equally contingent on a number of factors; light, temperature, humidity, water, nutrients, CO2/ventilation, genetics, etc. Think of it as an engine, with each factor of cultivation representing a single piston, sure the engine will run if some of the cylinders are misfiring or not firing at all, but to get the most power from that engine, all cylinders must be firing in sync and at
maximum capacity.
Big frosty buds are your reward for doing everything correctly. There is no magic bullet that makes your yields go from zero to hero. With that being said, I personally think the most important things in regards to yield are proper pH, canopy management, and a reputable line of nutrients.
Here are the factors that will greatly affect your marijuana plant’s harvest yield and potency/quality the most:
Regulate Humidity
THC is found in the resin glands that form on the plant during the maturation process. These glands act as a shield to protect the seed from the searing heat of the sun. This is needed more in a hot, dry atmosphere, than a hot humid one. To maximize resin production drop the humidity in the room for the flowering stage, the lower the better. But no matter how much resin you induce on an Indica it’s still not going to give you the stone of a Sativa; so it does have a lot to do with your personal tastes and expectations.
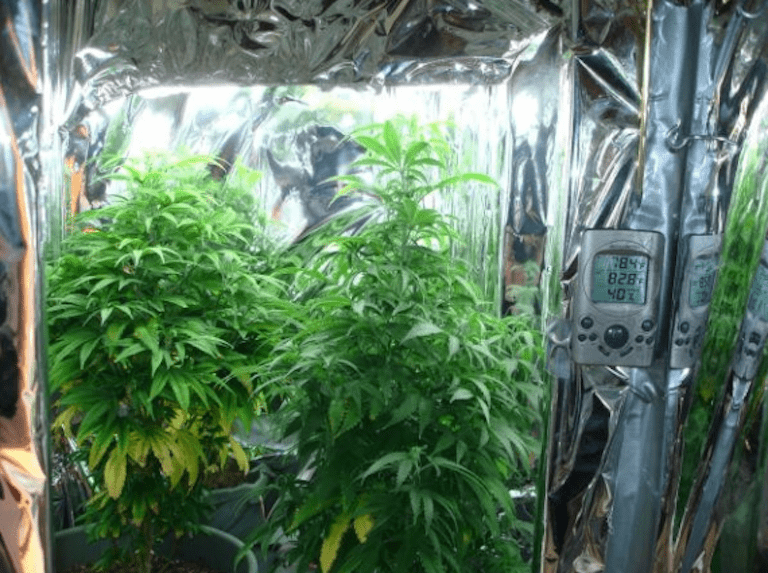
Cannabis does best around 45%-55% rH (relative humidity). During vegetative and late flowering, however letting it drop lower during the final two weeks of flower is advised, as it will help prevent mold problems.
(Editor’s Choice) Eva-Dry E-333 Renewable Mini Dehumidifier

(Editor’s Choice) Inkbird ITC-308 Temperature Controller

(Editor’s Choice) Holmes Cool Mist Comfort Humidifier

Proper Lighting

(Editor’s Choice) Galaxyhydro Series 300W Indoor Plant Grow Lights Full Spectrum with UV&IR for Veg and Flower

Plants need rest too! Some growers recommend 20/4 for vegetative growth. The theory is that plants do better (produce more carbohydrates) with less light over a longer period of time in contrast to a lot of light for a shorter period of time. There is a point of light saturation where more light will work against you by bleaching out the lifeblood of the plant – chlorophyll. Learn to “read your plants” and keep those leaves healthy and green until harvest. Some growers feel that in general you want to give your plants more light during vegetative growth and less during flowering. Their theory is to think about what occurs in nature. The flowering response is not the time to bleach out the leaves with high light intensities (and high Phosphorus foods). Their claim is that ultra low levels of Nitrogen found in bloom foods will generally not support leaf health.
Many will find that after turning to 12/12 for 3-4 weeks to put it up to 13/11 increases yields dramatically and makes the plant flower slightly longer which adds more growth time and overall increases yield.
But still, many grower stress the importance of maximizing light efficiency. They feel the more light marijuana plants receive the faster and healthier they will grow; increasing their yield. Properly hanging high intensity discharge bulbs so light hits the marijuana plant more than anywhere else can easily increase yield. Adding white reflective plastic to bounce light off the walls back to the cannabis
plants is important to produce great marijuana. Focus light where it is needed most. Find the right amount of light for your plants, in due time you will get a feel for the EXACT amount and light exposure times needed to ensure an explosive harvest.
Maximize light efficiency: The more light marijuana plants receive the faster and healthier they will grow. Typically the more light you give the plant , the better the yield will be. Double the lux, double the yield.
Approximate Coverage:
- 400W is 1m2: 5-10 plants
- 600W is 1.5m2: 7-14 plants
- 1000W is 2m2: 15-20 plants
Properly hanging high intensity discharge bulbs so that the light hits the marijuana plant only (in other words, the light does not disperse) can easily increase yield. Adding white reflective plastic, Mylar, or painting the walls a Flat White to bounce light off the walls back to the cannabis plants is an important foundation to produce great marijuana and massive yields. Typically, the more
light the merrier, but be warned that more light will create stronger water, nutrient, and CO2 demands on the plants. You must also have the proper spectrum of lighting as well as a means of efficiently reflecting as much of the light as possible into the garden’s canopy. The norm is to use more bluish light (Metal Halide, cool-white fluorescents) for Vegetative Growth and more reddish
(High Pressure sodium, warm fluoros) light for Flowering.
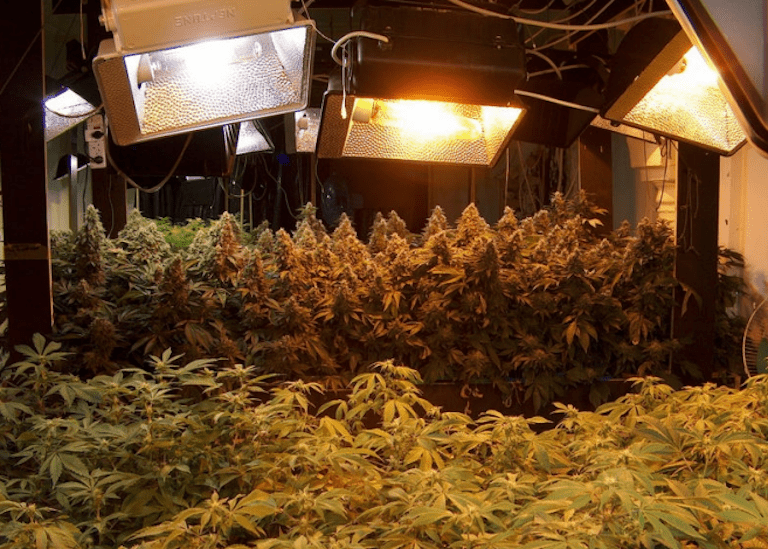
Best MH Grow Light: Apollo Horticulture GLBMH400
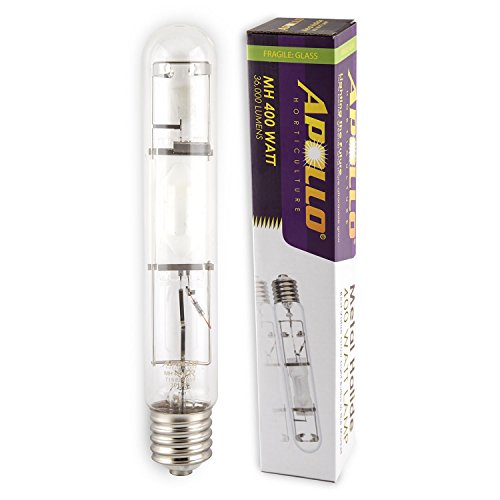
Best HPS Grow Light: Sun System HPS Grow Light

Though it is possible to grow great buds under fluorescent lighting and a few will even argue their superiority to HID’s, most indoor growers use High Intensity Discharge lights such as MH and HPS, and many use fluoros for vegetative growth and HPS for flowering. As you can recall from the lighting section it’s very important to have the light as physically close to the canopy as possible without burning the foliage and still allowing for even coverage. Many new growers believe that dropping the light closer to the plant will be beneficial. Besides heat stress, the bulb puts out radiant energy that causes leaf burn.
(Note it is possible to complete a grow using just HPS or MH).
Lamps can greatly lose lumen output over the course of 9 months to a year. They usually depreciate in lumen output by 30% over this time frame. This means that you will get 30% less yield from your plants but it is costing you the same amount of electric to run them. It is therefore a false economy to run old lamps.
Maintain Optimal Temperature
Temperature and the importance of day/night differential play a key role in both bud potency and harvest yield. In general, a 85°F (29.4°C) / 70°F (21.1°C) day/night temperature is best for most hybrids for maximum carbohydrate production. What’s really important is a good drop in temperature at night, of at least 15°F(-9.4°C). If night temperatures are too high, the plant will use up the
carbohydrates manufactured during the day to the process of respiration as opposed to plant cell division/elongation (tissue production).
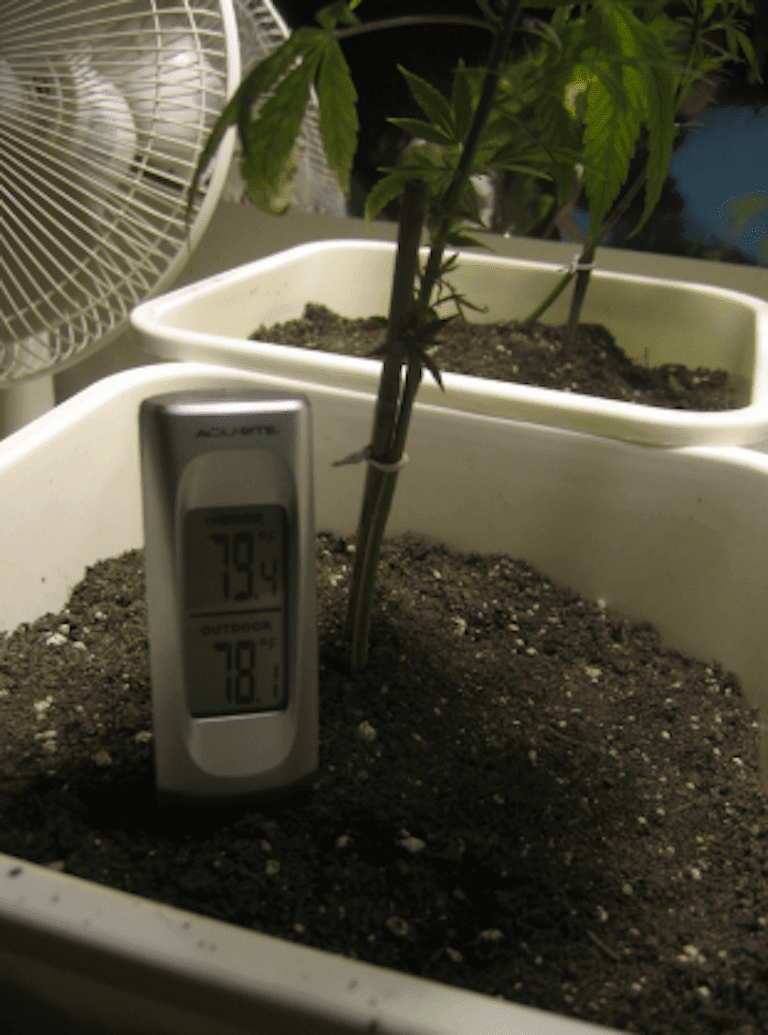
(Editor’s Choice) Sonkir MS02 3-in-1 Soil Moisture/Light/pH Tester

Most cannabis plants will slow or cease growth when temperature gets above 85°F (29.4°C) or below 65°F (18.3°C). Optimal lights-on temp for most strains is about 72-78°F (22.2-25.5°C), with 5 to 10°F (-15 to -12.2°C) cooler during the dark period being a good rule of thumb.
Control Water
Contrary to popular belief, wet/dry cycles are NOT good, especially for organic growers. Keep the soil medium moist but not saturated to the point where air is excluded. When you water, don’t be shy. Water until there is a good runoff. The issue is not over-watering, it’s watering to the point of the exclusion of air.
Digital Meters
Calibrate your digital pH and cf meters regularly. Using buffer 4 and buffer 7 for your pH meters and conductivity standard for your cf meter. Without regular calibrating, these meters could be out of skew, and a wrong reading can make a lot of difference.
Fertilizers
It is critical to use the proper marijuana fertilizers according to the cannabis plant needs. Understanding how and when to use marijuana fertilizers will greatly increase your marijuana yield.
Developing their own marijuana fertilizer formula is often one of the major talents of a veteran marijuana grower. A pH and PPM meter is required to develop the best marijuana fertilizer formula. This is discussed in detail in the Nutrient section.
Understanding how much cannabis fertilizer your marijuana plants can handle during both the vegetative and marijuana flowering phase is critical to increasing marijuana yield. Some marijuana plants are referred to as heavy eaters, that is, they can consume plenty of marijuana fertilizers. Whereas some marijuana plants are more delicate and require less marijuana fertilizer.
WARNING: Some Grow Bloomers and advanced feeding products on the market today may actually produce higher yields but greatly lower the potency of your bud and produce an awkward taste. Experiment with them in order to achieve the optimal effect for your specific strains.
During the vegetative phase marijuana plants will dramatically increase their growth by using the correct amount of marijuana fertilizers. Not all marijuana fertilizers are made the same. Nirvana potassium based suspension or Wet Betty (an organic marijuana fertilizer) are excellent at increasing marijuana yield by building a strong healthy plant during vegetative phase. Both these marijuana
fertilizers can be used to spray on cannabis plants just before the lights go out. They will increase marijuana growth.
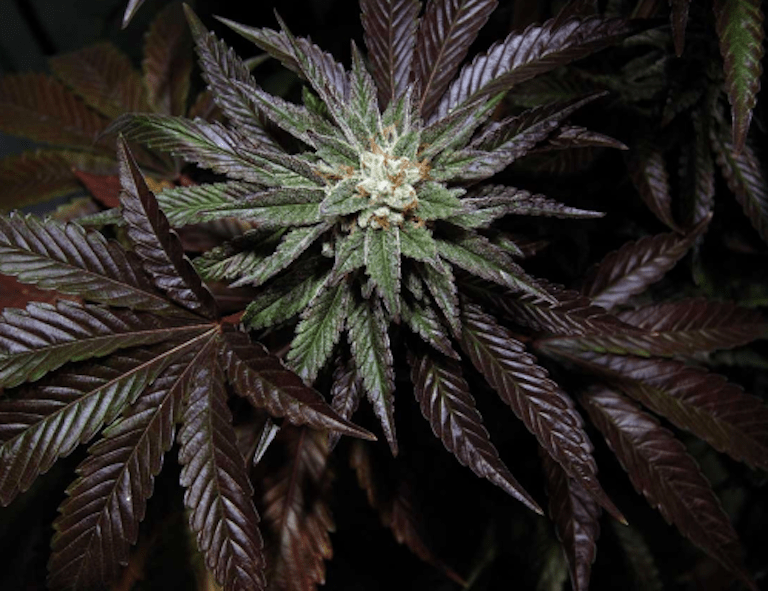
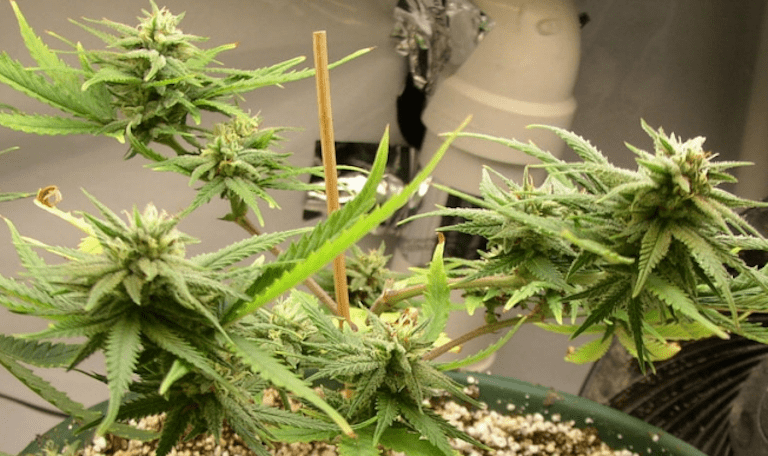
There are all sorts of way to implement fertilizers for increasing harvest and potency. For example, Dr. Hornby’s Organic Iguano Juice is a liquid organic marijuana fertilizer that is applied during watering. This marijuana fertilizer increases root production, creating the foundation to increase frosty marijuana yield.
Inexperienced marijuana growers often use too much Dr. Hornby Big Bud when they begin to see the results during the cannabis flowering phase though. Just a little Big Bud marijuana fertilizer is needed to increase marijuana yields. This powder is added during regular watering at the start of the marijuana flowering phase. Add Big Bud to increase marijuana yield, but never during the last two weeks of flowering. Do not use Big Bud (or any other fert) during the last two weeks of marijuana flowering as it will greatly effect marijuana taste. Flushing is critical if you want incredible tasting buds.

When achieving increased marijuana yields many marijuana growers make the mistake of using too much marijuana fertilizer. This can have a negative impact on the marijuana plant.
During the final weeks of marijuana flower it’s critical to use clean water to flush the marijuana plant of all remaining fertilizers. The best marijuana growers won’t harvest their marijuana plant until all the fertilizers have been cleansed from the plant.
Grower’s skill/Advanced Feeding: Growers can add yield by: using additives (like B1, kelp, enzymes), foliar feeding, and topping/FIM.
Foliage Production
Grow for the most amount of foliage you can going into the flowering response. Maintain those leaves in a green and healthy condition up until harvest, even if it means switching fertilizer to a high N value, like a 9-3-6.
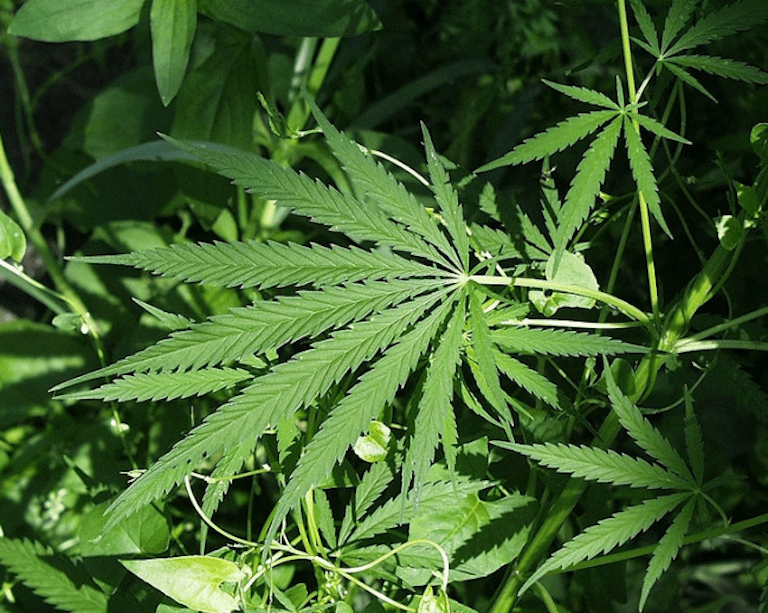
Use Molasses
 Molasses is equivalent to the carbohydrate loading products sold in the hydro stores. They help add bud mass during flowering, feed the good bacteria, add beneficial micro-nutrients. Molasses is a syrupy, thick juice created by the processing of either sugar beets or the sugar cane plant. Molasses (average NPK 1-0-5) contains potash, sulfur, and many trace minerals, it can serve as a nutritious soil amendment. It is a good, quick source of energy for the various forms of microbes and soil life in a compost pile or good living soil.
Molasses is also an excellent chelating agent. A Chelating agent means that molasses is one of the substances that can convert some chemical nutrients into a form that’s easily available for critters and plants. Chelated minerals can be absorbed directly and remain available and stable in the soil. Any kind of molasses will work to provide benefit for soil and growing plants, but blackstrap molasses is the best choice because it contains the greatest concentration of sulfur, iron and micronutrients from the original cane material.
It’s a great source of carbohydrates to stimulate the growth of beneficial microorganisms. It simply is the best carbohydrate sugar for horticultural use and should be used by any grower serious about growing some serious weed.
Blackstrap Molasses is the best kind for supporting explosive growth and sparkling crystal buds.
Roots
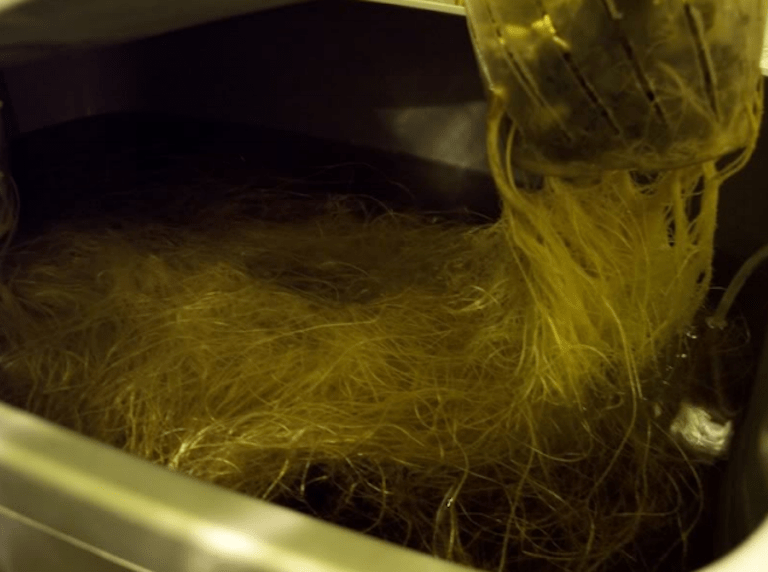
Anyone who has experience with plants knows that healthy and prolific root growth is crucial to a bountiful harvest. Plants with unhealthy root systems are going to yield less than plants with lots of space for root growth and healthy thriving roots.
Plant/Root/Container Size: The longer a plant is vegetated, the bigger it will get and the more it will yield. Almost always overlooked because unseen are the roots – root mass is directly related to bud production. Simply put, the more roots you have the more bud you will (potentially) have. Be sure to always allow plenty of space for the roots to grow and spread out, even more-so in soil. A general rule of thumb is 1 gallon of soil for every foot of plant height.
Upcanning(repotting): This is a cool little technique to explode root growth. Score the rootball – that is; pop the ball out and using a razor blade or sharp knife insert it about ½” into the rootball at the top and slice thru the exposed roots from top to bottom concentrating on any root spinout at the bottom. Rotate the rootball and do this about 4 times. Bury the “trunk” as deep as you can even if it means pulling off some of the lower leafsets. This will induce root output all along the buried trunk.
Strain Selection
For massive yields, purchasing marijuana seeds that are designated high yielding is the building block to increasing marijuana yield. Avoid Sativa marijuana strains as Sativa marijuana plants produce light fluffy(potent) marijuana buds. Sativa is an uplifting motivational marijuana high. For heavy yields purchase a pure Indica marijuana strain. These marijuana types produce dense heavy marijuana buds and couch lock marijuana high. Commercial marijuana growers always grow Indica marijuana because of increase marijuana yield versus Sativa.
Note: These tips outlined in this section will assist in producing maximum yields(pushing them to the max) for your Sativa plants as well though.
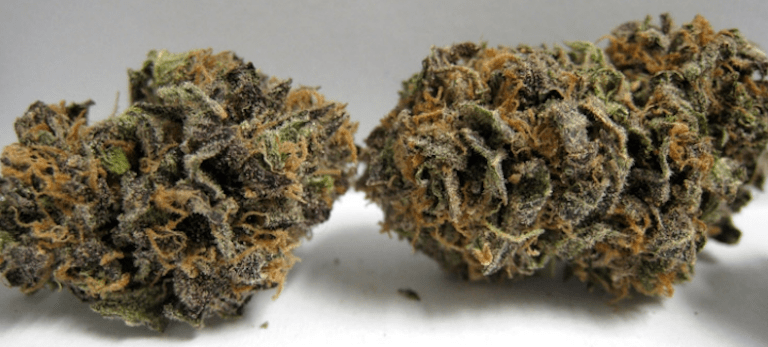
By choosing marijuana seeds suitable to your indoor marijuana grow conditions you will ensure a very good yield.
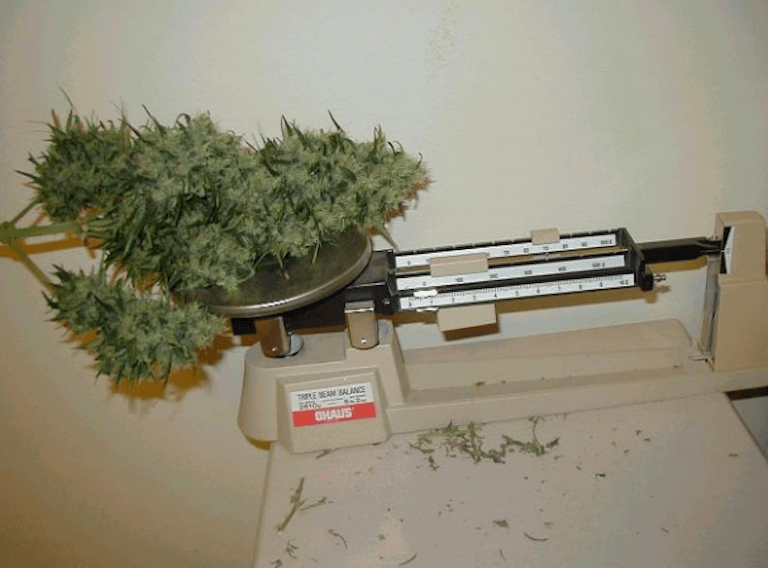
Some strains simply have the potential to yield more than others. Also keep in mind having a heavy-yielding strain doesn’t automatically equal big yields either. It only means that the potential for heavy yields is there. The grower must provide the optimum environment for that particular strain in order for it to be able to reach it’s yield potential, and each strain has slightly unique requirements. Also, within a strain there are usually several phenotypes, each of which will exhibit unique characteristics which is to say that some phenotypes of a particular strain will weigh more than others. Remember that selecting marijuana seeds for increasing marijuana yield doesn’t mean you have to sacrifice any other desirable phenotypes. With so many marijuana seeds to choose from a marijuana grower can find a marijuana type that is both heavy yielding, potent, and great tasting.
Depending on the marijuana growers preference some grow for marijuana high while others are looking for a great marijuana yield. Selecting marijuana seeds for increase marijuana yield doesn’t mean the marijuana grower has to sacrifice yield. With so many marijuana seeds to choose from a marijuana grower can find a marijuana type that is both heavy yielding and great tasting.
Pruning
One of the most effective ways to improve your harvest yield is by pruning your plants so that they produce fewer, but much bigger buds. The pruning section in this guidebook covers pretty much everything you need to know but we can go into more details here with specific techniques for increasing harvest yield.

Depending upon the genetics of your plants and your goals for harvest you should determine the type and style of the trim. A lot of hard work goes into pruning and stalking plants, but it results in bigger, higher grade buds that require less manicuring.
Before a serious pruning a marijuana plant might have 16 – 20 branches. When the prune is completed the cannabis plant will only four or six remaining branches that receive plenty of light. Clip any small buds and branches under the canopy, along with any less developed branches. Many of the undergrowth branches will only produce popcorn size marijuana buds. Instead cut these branches to create marijuana clones. These smaller cannabis buds will only zap energy from the cannabis plant. Buds under the canopy that are small do not mature well and leech energy from the upper buds. By removing them a marijuana grower will increase yields and quality of their harvest because the marijuana plant is focusing all its energy on a select few heavy producing branches.
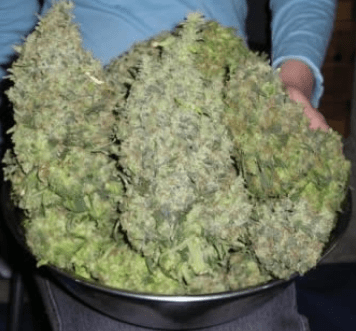
This branch’s top is less than half the way to the top, so it’s useless. First start at the bottom of the plant. Make sure that there’s nothing to stop airflow under the plant. Air flow is extremely important in getting healthy plants with good yields. As the leaves use up the CO2 and produce O2, small pockets of useless O2 are collecting under the leaves. If your garden has good circulation, this won’t be a problem, the air is constantly moving throughout the entire surface of every leaf, however gently. So start by cleaning up useless leaves and branches that are at the bottom four to five inches of the plant. NO GREEN will exist here except for the branches themselves. Snip right off any stray branches like the one in the picture above.
You can also start by pruning a leaf from each node in a staircase pattern, as soon as the first 5 bladed leaf appears. This will stimulate lateral growth and open the plant to more light.
Top around the 4-5 node, using the FIM technique, leaving about 20% of the growth tip intact. Topping will create at least 2 new budding sites, and with proper use of the FIM technique I have had as many as 5, and have heard of as many as 8. Topping will allow bottom branches time to grow and catch up, making them closer to the lights.

With proper training and manipulation, you can get these giant plants to grow horizontal, effectively reducing the overall height of your garden as much as 50%. This way you can lower the lights as close as possible to all budding sites. With many budding sites very close to the light, you will get a better yield of grade-A bud. As opposed to having smaller shaded buds trapped under an untrained canopy, which will never fully develop.
Scrog/Sog/Vertical Gardens: These systems have a higher g/w/time yield than comparable large plant system over the same time period. Many modern growers report yields increasing drastically once they started doing the ScrOG method and FIMming their girls.
Super Cropping: Cutting branches to create a plant that grows bigger buds is done according to the plant. Some marijuana plants can be topped, that is their top branch cut off, to produce two marijuana colas. But it is important to note; many marijuana types can’t be topped.
Pinching Leaf Tips
Another still-experimental process to increase the resin it to pinch off the leaf tips as soon as they appear from the time the plant is in the seedling stage on through its entire life-span. This produces a distorted, wrecked-looking plant which would be very difficulty to recognize as marijuana. Of course, there is less substance to this plant, but such wrecked creatures have been known to produce so much resin that is crystallizes a strong hash all over the surface of the plant – might be wise to try it on a plant or two and see what happens.
Bending & Training
Many growers like to bend their branches to ensure maximum light exposure which directly influences harvest yield.

A key example of this is bending the branches horizontally so that the buds grow vertically towards the light source. Because the buds all receive much more light, they will turn into a very generous top. This is one way to assist in generating massive yields.
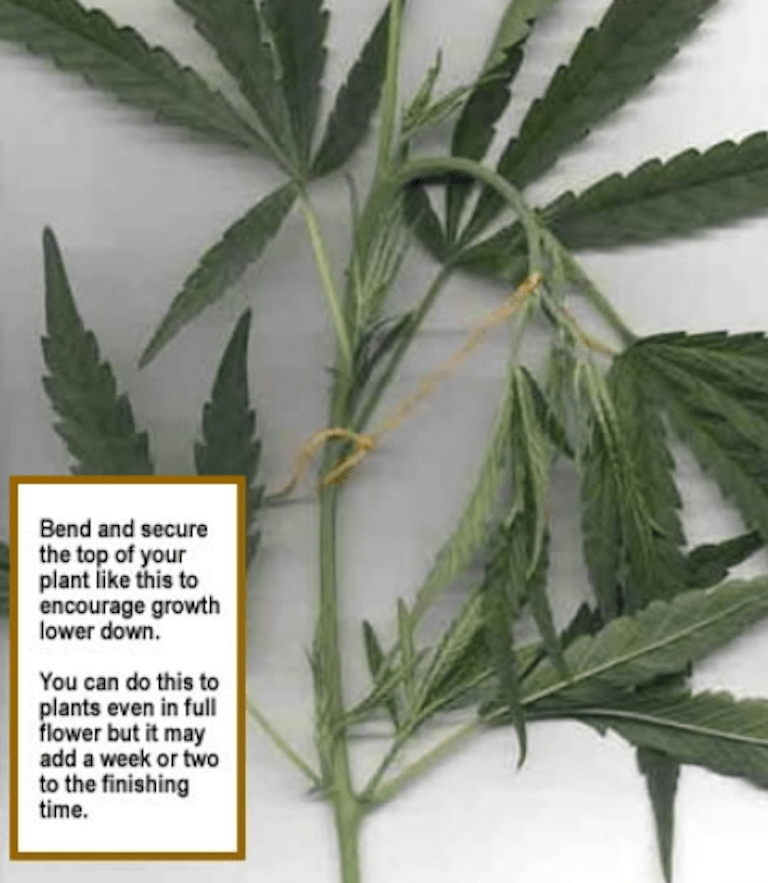
The fan leaves are necessary for the photosynthesis and stores a supply of sugar, which the plant needs to develop rich thriving flowers. In order to get more light to lower bud sites during flowering, bend and tie the fan leaves so that they don’t block the light from the other plants. You can also do this (only do the following if it’s REALLY necessary) cut away portions of the fan leaves located on the top of the plant, blocking the light. Cut away the fan leaves. If you remove too many fan leaves the plant will have no supply of sugar, so be very careful with this.
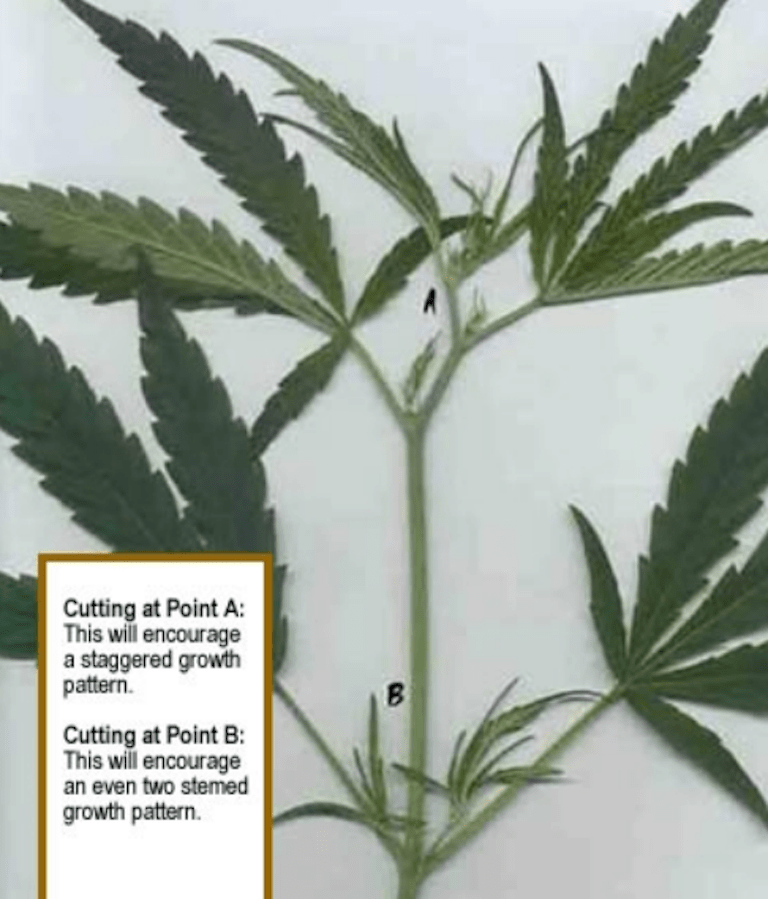
Crushing Buds
Mel Frank (an expert on growing quality cannabis) uses a secret tip: you should roll the new buds between finger and thumb hard enough to crush the tip. This will cause many more buds to start exploding at that site.
Seedlings
Do not plant young plants into systems unless they are showing good root development. If no roots are showing wait till there is before transplanting to your system. If you plant too soon, the rootball becomes saturated and this prohibits the plant’s growth.
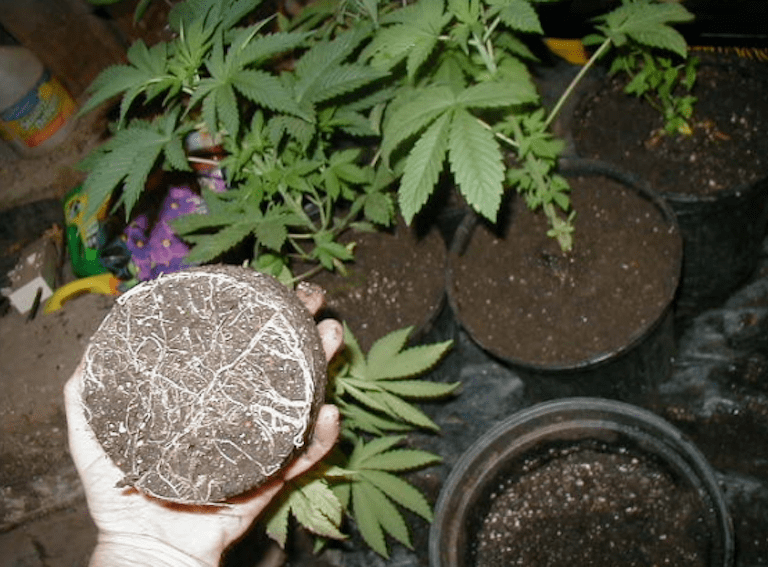
Control Water
Cannabis generally doesn’t like “wet feet”, or a soggy environment so it’s very important to have a fast draining soil/soil-less mix (or well aerated solution in a hydro garden). Excessively wet or damp conditions can also lead to mold problems during flowering.
Miscellaneous Tricks
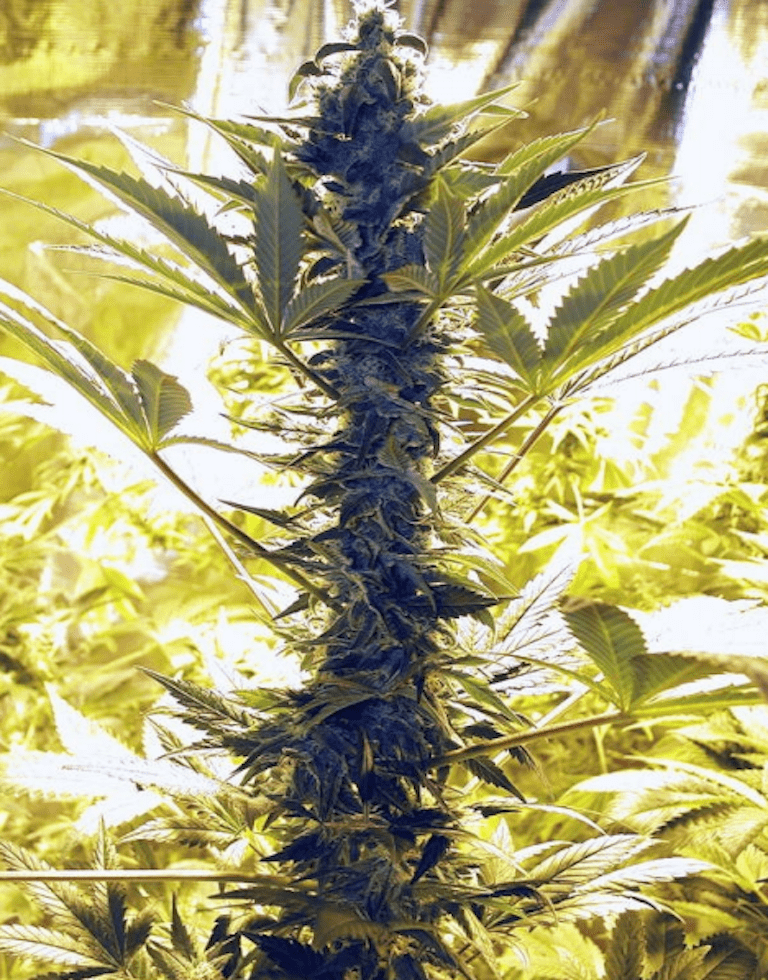
Tricks like keeping nutrients and the air temperatures warm during night cycle can help final yield. Although it’s a topic of hot debate, it is generally thought that any system that supplies the roots with maximum oxygen (aeroponics) would outperform a system that restricts 02 input (such as soil). So, as you can see there’s much more to yield than throwing some plants under tons of light with tons of nutrients. Before one becomes too concerned with yield, one must first learn how to grow plants well, learn how to “listen” to the plants and give them just what they need. It’s best to start with simpler methods, in fact, I think the simpler method is always the better one. Learn how to grow strong, healthy, fast-growing plants (master the basics) and the yields will come.
Cutting Off Watering: You can stop any watering as the plants begin to make the resin rise to the flowers. This increases the resin a little bit.
Sunlamps: You can use a sunlamp on the plants as they begin to develop flower stalks.
Bud Snipping: You can snip off the flower, right at the spot where it joins the plant,and a new flower will form in a couple of weeks. This can be repeated two or three times to get several times more flowers than usual.
Ethel: If the plants are sprayed with Ethel early in their growing stage, they will produce almost all female plants. This usually speeds up the flowering also, it may happen in as little as two weeks.
Experimental Colchicine: One recent method floating around out there to increase THC content greatly is by the use of colchicine. Colchicine is a highly poisonous alkaloid, originally extracted from plants of the genus Colchicum. Originally used to treat rheumatic complaints and especially gout, it was also prescribed for its cathartic and emetic effects. Its present medicinal use is mainly in the treatment of gout. It is being investigated for its potential use as an anti-cancer drug as well. It can also be used as initial treatment for pericarditis and preventing recurrences of the condition. When added to marijuana apparently the results are nothing short of awesome…
Note: I haven’t tried this myself so I can only report it to you here. Use at your own risk.
CO2 Generation

Through the process known as photosynthesis, plants thrive off of CO2 (carbon dioxide) intake. Plants require CO2. There is sufficient CO2 in our atmosphere to support massive bud growth, but when growing inside you must either have adequate ventilation (the volume of the room exhausted at least once/5 minutes) to ensure that there is a constant supply of fresh, CO2 enriched air. Plants can consume and benefit from up to as much as 5x the amount of CO2 that would normally occur in the air in nature.

One must have supplemental CO2, which requires higher temperatures and more nutrients to be utilized effectively. CO2 is a trade secret on how to generate big buds, to increase the CO2 levels in your grow areas environment the purchase of a CO2 generator is recommended. Under bright lights marijuana plants can greatly decrease the amount of CO2 in the marijuana grow room.
Normally the CO2 levels in the air of most grow rooms are quite low, so adding a CO2 tank on a timer will help your buds growth tremendously. Marijuana plants grow much faster, and produce heavier yields, when they receive CO2- enriched air right up until the last two weeks of marijuana flowering. Be careful with this one, as you may not know what to do with all the quality marijuana you will be producing!
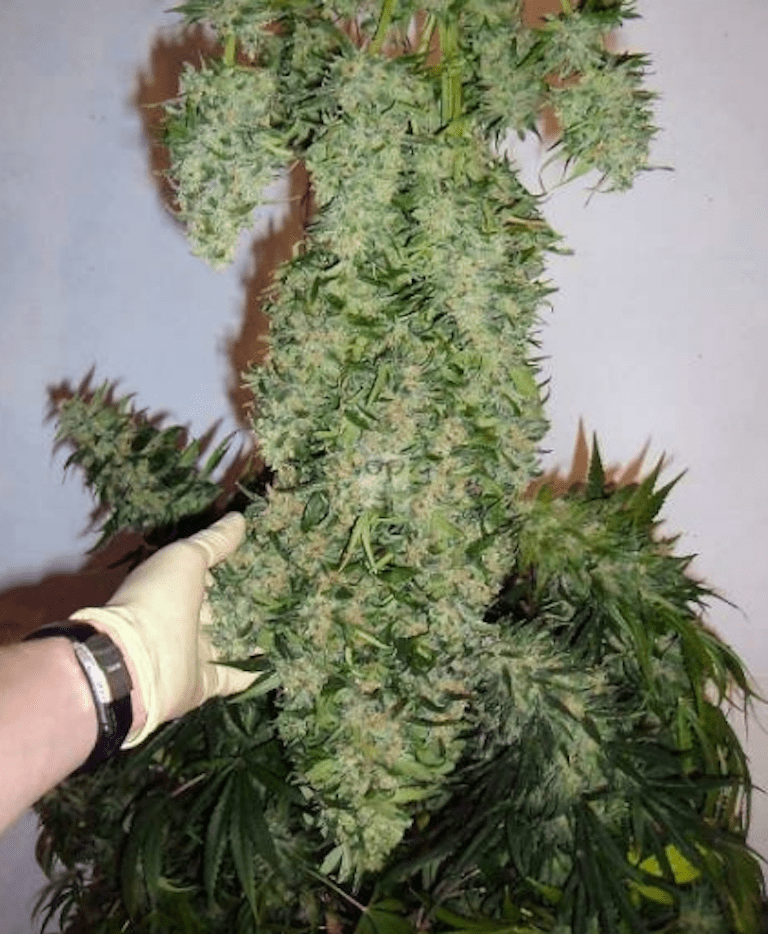
Elevating environmental carbon dioxide levels in your grow area can increase growth speeds tremendously, likely even doubling them!!! CO2 is a gas that make up approximately .03 ppm (parts per million) of our atmosphere. It is one of the basic raw materials used by plants in the process of photosynthesis.
When your plants are exposed to a CO2 rich environment, they grow like crazy!
Note: Check the below section on Calculating CO2 Requirements if you want to know how much to introduce into your grow room to ensure maximum growth.
Many growers boast about increased yield from providing a CO2 rich environment for their plants. Back before air pollution was a problem, the natural level of CO2 was much much higher in the natural environment. The plant uses CO2 for photo-synthesis to create sugars it uses to build up its plant tissues. Elevating the CO2 level will increase the plants ability to manufacture these glucose sugars and plant growth rate is enhanced considerably.
When plants are growing indoors in an enclosed area, there tends to be a limited amount of CO2 available in the air. Once the plants use up all the available CO2, photosynthesis stops. When .2 percent (2000ppm), or six times the amount usually found in the atmosphere is used it can increase your plant’s growth rate by up to a factor of five!
The downside is that CO2 can be a pain to manufacture cheaply, safely, and/or conveniently. It’s very expensive to set up if you use a CO2 tank system. CO2 is most usable for flowering, as this is when the plant is most dense and has the hardest time circulating air around its leaves. If you’re strictly growing vegetatively indoors (transferring your plants outdoors to flower), then CO2 will not be a major concern unless you have a sealed greenhouse, closet or bedroom, and wish to increase yield and decrease flowering time, as this is an awesome method of doing so.
The simplest way to create CO2 in your environment is to combine vinegar and baking soda. You can get creative here and design a mechanism where vinegar will drip into the baking soda at appropriate timed intervals, this will ensure CO2 to be created continuously. Another method is through sugar fermentation, but serious growers rely on more advanced methods.
For a medium sized indoor operation, one way is to use CO2 canisters from wielding supply houses. This method’s initial cost can be quite pricy, but fairly inexpensive in the long run. These canisters are good only if your area is not too big or too small.
Does light from a co2 generator interrupt the dark cycle?
Yes. Any light during the dark cycle should be completely eliminated. This is not difficult because co2 is not necessary during the dark cycle and will not increase the rate of photosynthesis – it should be turned off to conserve resources.
Basic CO2 Setup
 The basic CO2 tank system setup looks like this:
20 lb tank $100
Regulator $159
Timer or controller $10-125
Fill up $15-20
Total = $395 for a CO2 tank setup synced to a exhaust fan with a thermostat. CO2 is cheaply produced by burning Natural Gas. However, heat and Carbon Monoxide must be vented to the outside air. CO2 can be obtained by buying or leasing cylinders from local welding supply houses. If asked, you can say you have an old mig welder at home and need to patch up the lawnmower (trailer, car, etc.)
For a small closet, one tank could easily last 2 months. (All you would have to do is have it on a hose and surround your plants with the hose poking holes in it for maximum CO2 dispersion). This all depends on how much is released, how often the room is vented, hours of light cycle, room leaks, enrichment levels and dispersion methods. Keep in mind that this method might be overkill for your small closet. It is recommended to have a small constant flow of CO2 over the plants at all times the lights are on, dispersed directly over the plants during the time exhaust fans are off.
Many opportunities exist to conserve CO2, but this can cost money. When the light is off you don’t need CO2. So during Flowering, you will use half as much if you have the CO2 solenoid setup to your light timer. When the fan is on for venting, CO2 is shut off as well. This may be up to half the time the light is on, so this will affect the plants exposure times and amount of gas actually dispensed.
Environmentally, using bottled gas is better, since manufacturing it adds to greenhouse effect, and bottled CO2 is captured as part of the manufacturing process of many materials, and then recycled. Fermenting, CO2 generators, and baking soda and vinegar methods all generate new CO2 and add to greenhouse effect.
CO2 generation is all possible from fermentation. A simple CO2 generator would be a propane heater. This will work well, as long as the gases can be vented to the grow area, and a fan is used to keep the hot CO2 (that will rise) circulating and available below at the plants level. Fire and exhaust venting of the heat are issues as well. A room that must be vented 50% of the time to rid the environment of heat from a lamp and heater will not receive as much CO2 as a room that can be kept unvented for hours at a time. However, CO2 generators are the only way to go for large operations.
Fermentation or vinegar over baking soda will work if you don’t have many vent cycles, but if you have enough heat to make constant or regular venting necessary, these methods become impractical. Just pour the vinegar on baking soda and close the door, (you lose your CO2 as soon as the vent comes on). This method leaves a great deal to be desired, since it is not easy to regulate automatically, and requires daily attention. It is possible however, to create CO2 by fermentation, let the wine turn to vinegar, and pour this on baking soda. It’s the most cost-effective setup for most closet growers, for whom $400 in CO2 equipment is a bit too pricy.
In fermentation, yeast is constantly killing itself, it takes a lot of space. You need a big bin to constantly keep adding water to, so that the alcohol levels will not rise high enough to kill the yeast. Sugar is used quickly this way, and a 10 pound sack will run $3.50 or so and last about 2-3 weeks. This is also difficult to gauge what is happening as far as amounts actually released. A tube out the top going into a jar of water will bubble and demonstrate the amount of CO2 being produced.
You can try sodium bicarbonate mixed with vinegar, 1 tsp: ~30cc- this will gush up all frothy as it releases CO2. Do it just before you close the door on your plants. A MUCH cheaper way to provide CO2 is 2 Oz sugar in 2 liters of water in a bottle(sterilized 1st with bleach and water, then rinsed), plus a few cc of urine or if you insist, yeast nutrient from a home brewing supplier. Add a brewing
yeast, shake up and keep at ~70°F (21.1°C).
Over next 2 weeks or so it will brew up about 1/2 Oz CO2 for every Oz sugar used. Keep a few going at once, starting a new one every 3 days or so. With added CO2 growth is phenomenal!!! One grower reports measuring 38cm growth in 8 days under a 250watt HPS bulb[tubular clear, Horizontal mount.] A good container is a 1 gallon plastic milk jug, with a pin-hole in the cap. Also, the air-lock from a piece of clear tube running into a jar filled with water will keep microbes out and demonstrate the fermentation is working.
A variation of this method is to spray seltzer water on the plants twice a day. This is not recommended by some authorities, and receives great raves by people who seem to feel it has enhanced their crop. It stands to reason this would work for only a small unvented closet, but may be right for some situations.
It could get expensive with a lot of plants to spray. Use seltzer, not club soda, since it contains less sodium that could clog the plants stomata. Wash your plants with straight water after 2 or 3 seltzer sprays. It’s a lot of work, and you can’t automate it, but maybe that’s good! Remember, being with the plants is a beautiful experience, and brings you closer to your spiritual self and the earth. Seltzer is available at most grocery stores.
Club soda will work if seltzer water is not available; but it has twice as much sodium in it. A very diluted solution of Miracle Grow can be sprayed on the plant at the same time. One factor of using seltzer water is it raises humidity levels. Make sure your venting humidity during the dark cycle, or you could risk fungus and increased internode length. (Remember: an internode is the place on the
stem where the leaf (plus its stem) intersects the main stem.)
WARNING: Don’t spray too close to a hot bulb! Spray downward only, or turn off the lamp first.
Even though CO2 enrichment can mean 30-100% yield increases, the hassle, expense, space, danger, and time involved can make constant or near constant venting a desirable alternative to enrichment. As long as the plant has the opportunity to take in new CO2 at all times, from air that is over 200 ppm CO2, the plants will have the required nutrients for photo-synthesis. Most closets will need new CO2 coming in every two or three hours minimum. Most city”s will have high concentrations of CO2 in the air, and some growers find CO2 injection unnecessary in these circumstances.
Some growers have reported that high CO2 levels in the grow room near harvest time lower potency. In order to avoid this it is a good idea to turn off CO2 two weeks before harvesting.
Calculating CO2 Requirements
So you need to know how much CO2 to add?
- Measure and multiply: Length x Width x Height of your grow room to calculate the volume of cubic feet.
- Generally, the CO2 level in a grow room is 300 ppm. To bring your room to an optimum level of 1500 ppm, you will need to raise the c02 by 1200 ppm.
- Multiply your room volume by 0.0012 (1200 ppm = 0.0012) to determine how much c02 to add to your grow room.
EXAMPLE: a 10′ x 8′ x 10′ room:
- Volume= L x W x H
volume= 10 x 8 x 10 = 800 cubic feet - 800 cubic feet x 0.0012 =.96 cubic feet– you can round this to 1 cubic foot.
You will therefore need to add 1 cubic foot of c02 to a 10 x 8 x 10 grow room to bring the c02 level to 1 500 ppm.
Fermentation
This is done by fermenting sugars with yeast. Sometimes even basic sugar and water is used for this purpose. Others use a more sophisticated blend with nutrients for the yeast. You will need to use an airlock (tubing coming out of a sealed fermentation vessel or jug and placed in a cup of water so the CO2 has to bubble out through the water will work). This method is very cheap and easy to setup but while every bit helps this will not raise your CO2 levels to the ideal 1500-2000ppm.
Dry Ice
Another method to generate CO2 by simply melting dry ice (which is frozen CO2) but it is difficult to control the speed of release to precisely control the CO2 levels. Additionally you will need to add ice each day and the ice can not be kept in your freezer.
Vinegar and Baking Soda
When vinegar and baking soda react they release CO2. You can produce CO2 at a controlled rate by utilizing a drip system. You can make your own bottle.
Propane Burners
Propane burners generate lots of CO2 and can be controlled but they also generate lots of heat that must be exhausted.
Stored CO2 Canisters
As mentioned above; these can be purchased with cash at any gas supply shop. This is the least expensive and most controlled way to supply CO2. The only downside is that there is a high up front cost and a few calculations are required to determine how to setup the system and output CO2 at the proper rate. The details of the setup will vary based on your equipment but there are a few basic
components you will need to use this method. The first is a tank. Tanks must be refitted with new seals periodically. Generally a gas supply will exchange your canister with another that has a similar amount of time left on it rather than fill the canister on the spot.
In addition to the canister itself you will need a solenoid switch to allow you to use a timer to control when the tank releases gas and when it does not. A regulator is needed to regulate the pressure to a lower and fixed pressure that won’t damage your other equipment. To the output of the regulator you will need a flow meter with needle valve. Usually this will consist of a tube with increment markings and a little ball that raises to show you how much CO2 is flowing through the flowmeter. This allows you to fine tune the output of your CO2 system. Finally you will need plastic tubing with holes in it in order to actually distribute the CO2 around the grow area. Remember CO2 is heavier than air and will fall downward when released out of the tube. This means you should position the tubing above your plants.
You can purchase all of these components aside from the canister as kits sold for hydroponics. Follow the directions that come with the kit to set your timer, flowmeter, and regulator.
Creating Your Homemade CO2 Generator
Introducing your very own home-made CO2 generator; The Sugar Bucket.
Materials Required:
- 10lb. white sugar
- 5 gallon clean bucket W/lid
- 4 1/2 gallons of water
- A piece of toast browned and hard
A table spoon of dry active yeast (for baking bread)
First boil the water, (this will ensure clean water) remove from the heat and add the sugar. Stir until sugar dissolves. Let cool until water is room temperature (if you don’t let it cool down it won’t work).
After the sugar water has cooled, float the piece of toast on top of the water. Now, empty the tablespoon of yeast over the toast. After a few days, the yeast will take over the toast and start making bubbles (CO2) in the bucket. After a week, the amount of bubbling (CO2) will increase.
Keep the lid airtight on the bucket. CO2 travels up the dispersion tubing, and due to it being heavier than air, falls directly onto your plants. Timing your exhaust, is essential in maintaining an effective level of CO2.
Note: Use a CO2 analysis kit to help manage (exhaust timing etc), and maintain, an optimum level of around 1500PPM.
Bushier, More Productive Plants
A cool method to get bushier, more productive plants is to trim the uppermost growing tip of the plant after it has produced three sets of “true leaves.” True leaves are those that have the serated edges and overall growth patten characteristic of marijuana plants. Using a small pair of sterilized scissors, cut the uppermost growth tip. In a few days, a dual set of leaves will develop from the cut tip. To create even bushier growth, you can cut the tips of these two new sets.
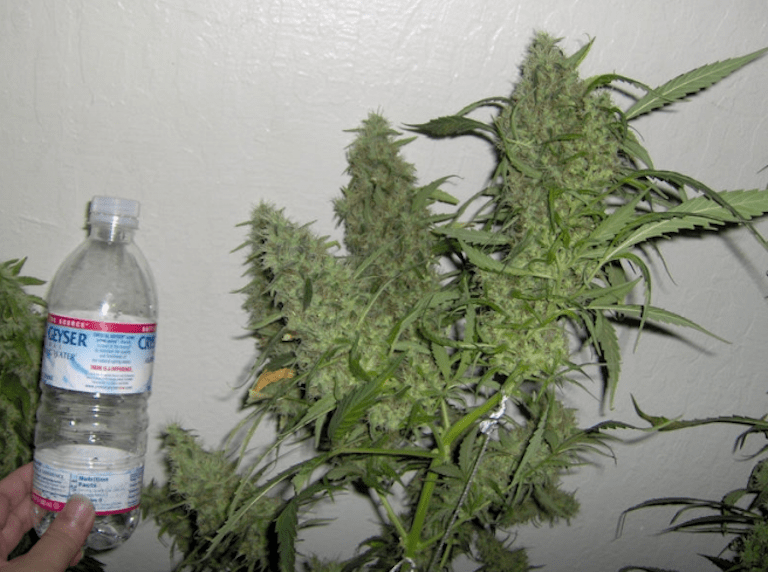
The result of these accumulated first and second rounds of cuts will be to produce four sub-main branches where only one vertical growing tip would have naturally otherwise been. This changes the shape of the plant from the natural Christmas tree shape with one main vertical stem and several side stems beneath it to a more horizontal shape that has several sub-main stems. Plants that are properly “topped” will be shorter, wider, and more productive than those that are untopped and left to grow in a natural way.
Healing Vibes & Music to Enhance Growth
In 2004 there was an American botonology researcher named Kathy Creath. Kathy published an article on a VERY interesting study she did. The study included her research on the effects of music on the germination of seeds. According to the article, Dr. Creath experimented by playing different genres of music in her research gardens where zucchini seeds and okra were being grown.
The research found that seeds had higher germination rates and germinated faster when “gentle flute music” was provided to the germinating seeds for a few hours a day, as compared to other tye of music or noise. We recommend you play some Bach, the plants love the soothing gentle vibes!
Recent research in a study done at the University of Arizona published by Dr. Creath also indicated that plants grow better and produce more when they are given “energy healing” techniques and other New Age type interventions along these lines. There was also a study done by a scientist over the course of a year. What he basically did was plant two trees in his yard. Every day the scientist
would wake up, go outside into his garden, and put his palms up to the plants. For the plant on the left (Plant #1) he would send it hate energy. He would think terrible dark, angry, negative, hateful toxic thoughts. For the plant on his right (Plant #2) he would love it with all his heart, sending it healing loving energy, thinking thoughts of adoration, praise, healing, love, light etc. After a few months of doing this the plant on the left (Plant #1) that had received the hateful negative energy withered and died, whereas the plant on the right (Plant #2) that received the loving healing energy FLOURSIHED. In fact it grew at an ALARMING rate.
There was also a similar study done on human babies(thank goodness cruel inhuman scientific studies cannot be done like this anymore). What basically occurred was they deprived babies of human affection, love, and touch, but supplied them with all the biological needs(air, warmth, water, nutrient rich food etc) in order to grow. What happened is the babies that were deprived of
human “love energy” literally shriveled up and died of grief! How terrible. On the other hand, the babies that received the loving energy from the female nurses / doctors and their own parents were cheerful, happy, and healthy and grew just fine.
So keep your plants away from that blaring punk rock, play some calming flute symphonies or Bach during germination, feed your seeds and seedlings the right formulas, and send some healing vibes to your plants to enjoy better germination rates, faster growth rates, and greater yields!
Silicon
Silicon is a cool little trick many growers implement. Although silicon has not been recognized as an essential element for higher plants, its beneficial effects have been shown in many plants. Silicon is abundant in all field grown plants, but it is not present in most hydroponic solutions. Silicon has long been recognized as particularly important to rice growth, but a recent study indicated that it may only be important during pollination in rice. The beneficial effects of silicon (Si) are twofold: 1) it protects against insect and disease attack, and 2) it protects against toxicity of metals. For these reasons, you can add silicon (about 0.1 mM) to nutrient solutions for all plants unless the added cost outweighs its advantages.
Organic Fertilizer Super Grow Tea
One great secret to explode growth and increase potency that is used by many elite growers today is to make an organic purified water fertilizer “tea”. To make a teabag fill a pillowcase with llama manure and sheep manure. This is an INCREDIBLE vegetative growth mix that will supercharge your plants with a whole range of essential enhancing nutrients.
Soak your tea bag inside a big container of water for several days, and the end result will be an organic super tea fertilizer water packed with nutrients for your plants.
For flowering you will use the same above method but this time use bat guano and llama manure. This will grow unbelievable buds like you have never seen before due to their high phosphorus and potassium content. You will want to purchase a pump that will keep your organic fertilizer tea wellmixed and emulsified during the entire process. This will plug into your garden hose and on the other end of it attach a water wand, this will add air to your water mix, oxygenating the water just before it is supplied to your plants.
Positive Pests
A really awesome classic grower trick is to introduce what is known as “positive pests” into your grow room. These buggers will only feast on known enemies of cannabis plants. The most useful commonly used positive pest is to release ladybugs into your environment. They will feast and be on the prowl for aphids. When ready to remove them, just vacuum them up and store them in the fridge in a plastic baggie! Don’t worry – it wont hurt them.
Folair Feeding
Folair feeding has to be one of the easiest ways of increasing yield, growth speed, and quality in a well vented grow space. As the plant ages it’s roots become less and less effective at bringing nutrients to the plant. You may decide to start foliar feeding at this time, that is, spraying a nutrient solution directly onto the leaves. The leaves can absorb nutrients just as well as the roots can. If you do desire to foliar feed than back off the fertilizer to half strength.

Plants need to be regularly sprayed and/or misted. Plants do and will feed off of nutrients supplied to their leaves with a nutrient solution mixture. Foliar feeding can give your plants a quick boost for a bigger, better, and overall higher yielding harvest. Foliar spraying will not replace your regular program of root feeding, but this technique will supply valuable supplementary nutrients to
plants quickly and efficiently. Foliar feeding is a process of spraying the fertilizer directly onto the plants leaves. Foliar Feeding provides nutrients through the foliage, or leaves of a plant. Growers, with the help of scientists, and researchers, have been studying foliar feeding and have incorporated it into their growing programs for many years.
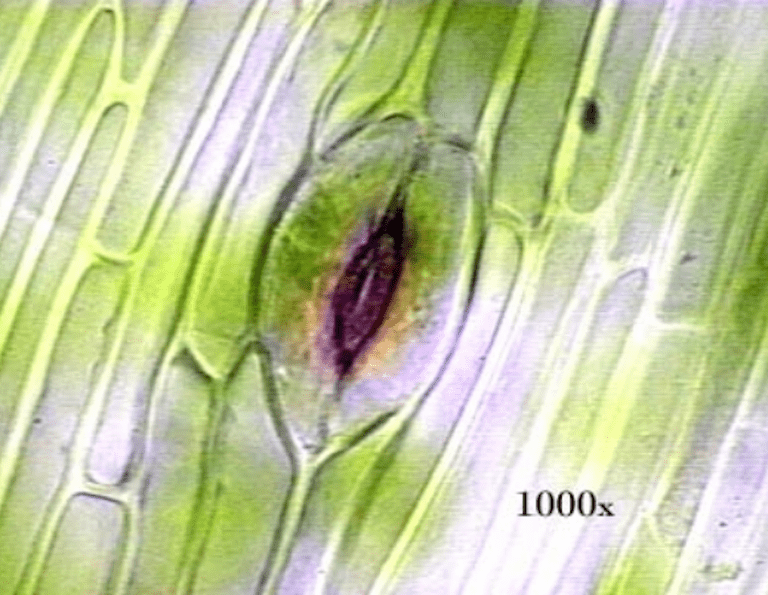
Regular spraying helps to feed the plant through its “stomata”, as well as feeding the plant with direct exposure to nutrients, regular spraying also help to keep these stomata clean and open. Stomatas are the microscopic openings between two adjacent guard plant cells. Changes in the water content of the guard and subsidiary cells cause the stomatas to open and close in response to changes in water status of the plant. Marijuana plants carry on the process of photosynthesis by combining together several ingredients in their leaves. Some of these materials are gaseous(carbon dioxide), some are liquid(water), and one is energy(light). If one were to look at the anatomy of a leaf, it would be easy to see how these materials are brought to the leaf so that they can form the food. The “stomata” play a very important role in allowing the gaseous materials to enter and leave the leaf. Think of a stomata as microscopic pores in your plant’s skin. When a plant needs more carbon dioxide for photosynthesis, it opens its stomata. When the leaves get too hot and want to release water during transpiration, the plant once again uses its stomata, this time to let something out. There are many advantages to foliar feeding. Foliar applied fertilizers are three to five times more effective than root nutrition and can successfully
reduce the nutritional stress situations of plants. Foliar applied nutrients can also make elements, such as iron, available to plants immediately when they are not available, or in low amounts in your soil, water, or hydroponic nutrient solution.
So then spraying is also useful in correcting plant deficiency problems, because of the very rapid absorption of plant nutrients through the leaves. Foliar spraying applications of fertilizer will provide almost instantaneous results. The best time to foliar spray is early in the morning for outdoor growers, and when the lights come on for indoor growers. This is the period when the stomatas are open. However, if the temperature is 80°F (26.6°C) or above, the spray will have less of a effect, as a lot of the stomatas are closed. Foliar feeding is extremely beneficial to clones, seedlings, young plants, and all plants while in the vegetative stage. Clones are not rooted so they need foliar feeding to develop roots, and prevent yellowing, a common problem among propagators (cloners). Once a Marijuana plant is put into flowering it is recommended that you eliminate foliar feeding for the remaining of its flowering stage.
When marijuana gets hot and dry it secretes resin as natural insulation from the harsh elements. They secrete this resinous insulation to naturally keep the plant cool. If foliar feeding is used in the flowering stage, we bring down the temperature of the plants, thusly resin secretion is less. Foliar feeding should only be done in the vegetative stage and ceased two weeks after flowering has began.
Foliar feeding should also stop in the flowering stage as nutrients can and will stay on your floral clusters. Not a good thing to be smoking once dried a heavy nutrient infested marijuana. All fertilizers made for soil or either hydroponics make great foliar sprays, especially the fertilizers that contain trace elements (micro-nutrients). Usually their mixed at half or reduced strength, to reduce the chances of fertilizer burn to leaves. A strongly mixed spray and close under high intensity or strong sunlight, can burn your leaves from light reflexion cause by the water droplets and/or common fertilizer burn. Foliar feeding is most efficiently achieved with mist-type sprayers. The smaller the particle size, the better the response and the less fertilizer is required to achieve the same end result.
An Overview:
- Use a fine misting spray bottle.
- Mist or spray once a day, early in the day, or when the lights come on.
- Mix root (nutrient) fertilizers half strength.
- Spray the whole plant.
- Foliar feed clones, seedlings, and vegetative plants.
- Cease foliar feeding two weeks into flowering.
- Use a specifically designed foliar spray with trace elements made for foliar feeding.
- The best temperature is about 72°F (22.2°C)(when stomata on the underside of the leaves are open); at over 80°F (26.6°C), they may not be open at all. So, find the cooler part of the day if it is hot and the warmer part of the day if it is cold out.
- Use a good quality sprayer — should atomise the solution to a very fine mist.
- Always be sure your light is off and cool before foliar feeding! For extra safety, wipe your bulb with a dry cloth after spraying and make sure H.I.D lights are raised to a safe distance (double the distance is a good rule of thumb) to prevent burning.
- Make sure the PH of your solution is between 7 and 6. 2.To prevent the water from beading up (acting as small prisms) and thereby burning the leaves, for each gallon made, add half of a teaspoon of liquid detergent (wetting agent).
- Spray leaf surface – the tops and the undersides – until the liquid begins to drip off the leaves. Stop spraying 2 weeks into flowering. Use sparingly on bud sites.
- Dispose of excess spray according to manufactures instructions – home made fertilizer sprays will be fine for at least 2 weeks.
- Spray one time a week every week, if any white residue is found, rinse the foliage with plain ph’d water to reduce salt build-up.
- Watch your growth explode!
The process in detail: Get a good spray bottle and set it to the finest spray. Foliar feeding should be done between 5 AM and 9 AM when the leaves stomata are open. If it is done later than this than the stomata may not be open at all. The leaves should be misted with the nutrient solution. Do not drench the leaves. It is better to feed twice a week than drench the plants once every two weeks. The day after foliar feeding the leaves should be sprayed with water to wash off any unabsorbed nutrients from the leaves.
Just prepare a tea of worm castings, fish emulsion, bat guano, or most any other plant food right for the job and feed in vegetative and early flowering stages. It is not recommended for late flowering, or you will be eating the sprayed-on material later. Stop foliar feeding 2-3 weeks before harvesting. Wash off the leaves with straight water every week to prevent clogging the stomata of the leaves. Feed daily or every other day. The best times of day to Foliar feed are 5 to 10 A.M. and after 5 P.M.
This is because due to the cycle of nature the stomata on the underside of the leaves open at these times. Also, the best temperature is about 72°F (22.2°C). If the temperature rises to over 80°F (26.6°C), they may not be open at all. So find the cooler part of the day if it’s hot, and the warmer part of the day if it’s cold out. You may need to spray at 2 A.M. if that’s the coolest time available. The sprayer used should atomize the solution to a very fine mist; find your best sprayer and use it for this. Make sure the pH is between 7 and 6.2. Use baking soda to make the solution higher pH, and vinegar to make the solution lower pH. It’s better to spray more often and use less, than to drench the plants infrequently. Use a wetting agent to prevent the water from beading up, and thereby burning the leaves as they act as small prisms. Make sure you don’t spray a hot bulb and better yet, spray only when the bulb has cooled. Perhaps the best foliar feeding includes using seltzer water and plant food at the same time. This way, CO2 and nutrients are feed directly to the leaves in the same spray.
Foliar feeding is recognized in most of the literature as being a good way to get nutrients to the plant later when nutrient lockup problems could start to reduce intake from the roots.
WARNING: It is important to wash leaves that are harvested before they are dried, if you intend to eat them, since they may have nitrate salts on them.
Observe extreme caution while foliar feeding any plants around exposed lamps. Turn off any fans and ventilation while spraying the plants, any water blown onto an exposed, burning lamp can cause it to explode in your face. Be safe.
Foliar Feeding Outdoor Plants
You can foliar feed outdoors, but go easy!
Into 20 gallons of water put:
- 1 cup ammonia, yep plain old household ammonia
- 1 cup alfalfa tea
- 1/4 cup Ivory liquid dish soap
- 16 Oz. apple juice
You can experiment with other things like fish emulsion, but this recipe is great because it’s so cheap and extremely effective.
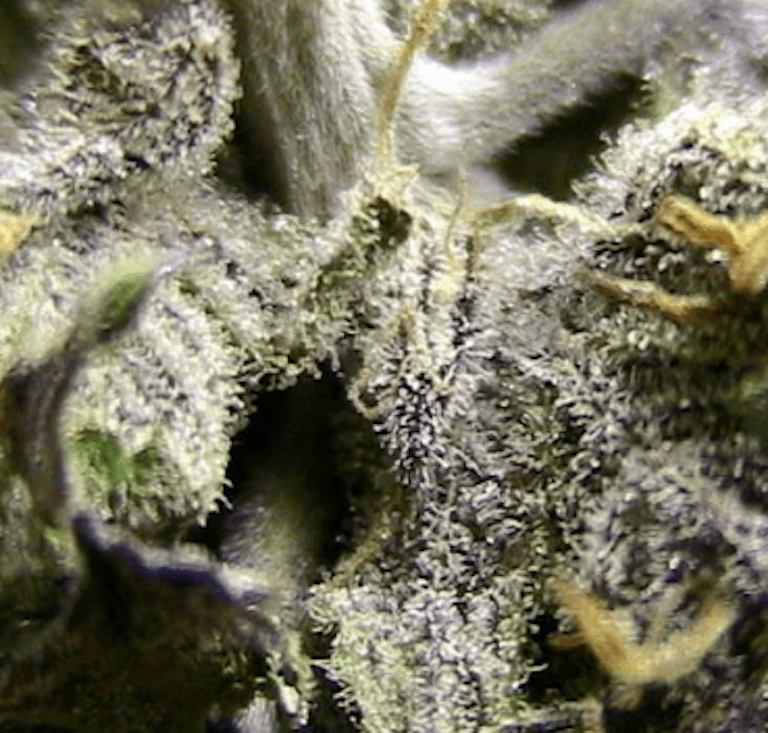 Allotropic Cell
Research conducted in the UK showed increases in yields. It is a colloidal silver rod that generates a quantum field which makes the nutrients more easily assimilated. How it works is basically this; water contains unpaired electrons available to bond. These electrons bond with the nutrients and the other hydrogen molecules in the water. The allotropic cell excites the H2O molecules causing the hydrogen bonds with oxygen to break, permitting it to attach to nutrient molecules making them more easily absorbed by the roots. This process is always occurring with the quantum field accelerating the process. Colloidal silver also helps inhibit bacterial growth.
Growth Hormones For Enhancing Growth
Hormones are organic molecules which can have influence on the physiology of plants and animals. Plants produce hormones themselves naturally, but when selected hormones are added in low concentrations, they can have a positive influence on the physiology of plants.
- Transport is not necessarily needed to let hormones work.
- The effect of hormones depends on concentration and sensitivity of the plants.
The best understood hormones are:
- Auxine
- Gibberellic acid
- Cytokinine
- Ethylene
- Abscisine
Auxine: The most important areas in a plant where they are produced are young leaves, young seeds, pre-flowering buds and the stem.
- Auxine has a positive influence on cell stretching, cambium activity, and bud formation.
- Auxine is transported to the lower parts of the plant by chlorophyll cells (parenchymcells).
- Auxin transport goes very slowly @ 1cm/hour.
- Transporting Auxine costs a lot of energy.
- Inactivation of Auxine happens when it binds with sugars and/or oxidation.
When you top your plant, the roots of your plant will grow a lot slower. When you add extra auxine, the roots will grow again and form new roots. This is why auxine is a major ingredient in root stimulators. Auxine works better in conjunction with Cytokinine.
Gibberellic Acid: Mostly produced in young leaves, but roots also produce it. It is transported from the roots to the leaves and branches. When Gibberellic acid is added to the roots, it will suppress the formation of lateral roots, but the cell stretching of the other parts of the plant will speed up and be more excessive. Gibberellic acid can germinate seeds faster, and a higher % of female seeds will
be produced (feminized seeds). Be careful though: too much Giberellic acid is not healthy.
Cytokinine: Concentration of Cytokinene is highest in young plant material (leaves and roots).
It activates cell stretching, triggers flowering and germination. Slows the aging of plants, and protects membranes against oxidation. When the concentration of Cytokinine and Auxine is high, it will develop buds, stems and leaves. If the concentration is low, complete plants will form. When there is less Cytokinine than auxine, roots will develop. High Cytokine concentrations will transport products of assimilation.
- Inactivation of this hormone happens when it binds with sugars or because of oxidation.
- The “glucosides” of Cytokinine could be a buffering and transportation form for the plant.
Ethylene: Formed within the plant, but is also produced by fungus and bacteria. Biological activity within the planting medium can regulate amounts of this hormone, and have an influence on your plants. Transport happens because of the intercellular spaces.
- Inactivation caused by oxidation.
- Ethylene can also be given to the atmosphere as a gas
- Normally, Ethylene production will slow down cell stretching and thicken the roots and stem (germination)
- Too much Ethylene can deform and even kill your plants. For instance, when the roots are in too much water, the production of Ethylene will almost stop, but so is the ability to gas it off to the atmosphere. If this happens, leaves will turn chlorotic (eventually leaf death), stems will stretch, and there will be an increased susceptibility to attack by diseases.
Abscisine Acid:
- Slows down cell dividing, cell stretching and bud formation.
- Abscisine acid is an antagonist of Gibberellic acid, Auxine and Cytokinine.
- Slows down the growing and flowering of plants.
- Produced in older leaves and chlorophyll.
Conclusion: Do not start experimenting with plain hormones unless you are very sure of what you are doing! Beneficial hormones / growth regulators are available in most grow shops.
Cutting The Shoot Open
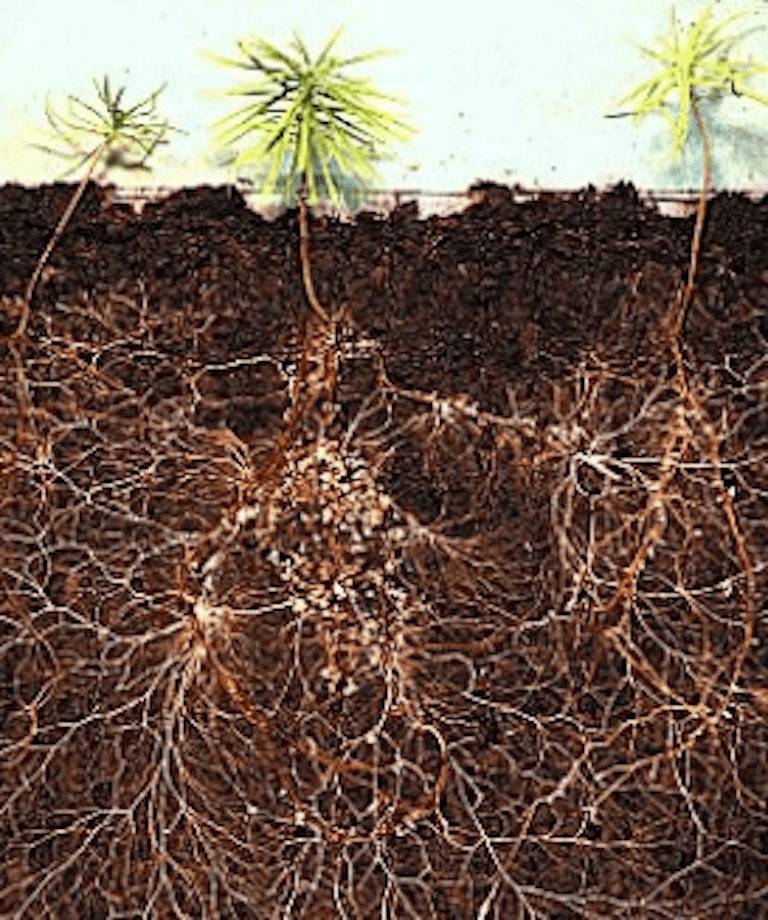 I hope you recall reading about the importance of roots and how they are critical elements to ensure thriving vigorous plant growth. Well put quite simply, more roots = more essential nutrients = bigger danker buds.
In order to make your plant grow more roots and EXPLODE your bud growth, cut the bottom of the shoot (the base stem where the roots split off) open. This technique works especially well with clones. You can do this by snipping vertically with a sterile pair of scissors, very carefully, a small vertical incision that splits the shoot in half. By exposing more surface area this will allow your plant to grow many more roots, allowing them to absorb even more nutrients. You see, there is a thin layer of skin under the outermost layer of the stem known as the cambium. The cambium layer is responsible for ALL root growth formation. When you split the shoot open via cutting it vertically, you are xposing the cambium layer to allow many many new roots to grow, enhancing your plants growth. Another wicked awesome technique is to lightly scrape away the outside layer off the stem to expose only the cambium. When cloning and you apply rooting hormone to concentrate here where the roots begin to form you greatly enhance your root system formation.
Note: Although this technique will vastly increase the number of healthy roots, rooting time will be a bit longer, typically a few days.
Use Seaweed For a Growth Surge
Seaweed extract is being marketed and supposedly has special benefits when supplied with iron. The following comments are extracted from a gardening article on use of seaweed(there are various species of seaweed which may differ in composition that influences biostimulation). Seaweed is a rootless plant in the Fucus family that floats freely or clings to rocks by holdfasts (root-like or disk shaped plant parts that attach seaweed to rocks but don’t absorb nutrients). Seaweed photosynthesizes the sunlight that reaches it through shallow water and it absorbs nutrients from sea water through its leaves. Since the ocean receives runoff from the entire earth, it contains all known minerals, trace elements, and vitamins. This primal supermarket supplies a more complete diet for sea plants than any plot of rich soil or fertilizer provides for land plants. Seaweed contains 60 or more minerals and several plant hormones. It is not however a complete fertilizer. It has a fair amount of nitrogen and potash, but very little phosphorus, a major plant nutrient.
Only a few seaweeds are harvested commercially. Norwegian kelp (Ascophyllum nodosum), a brown algae is the seaweed most used in gardening. Norwegian kelp is gathered off the coasts of England, Ireland, Norway, and both the Atlantic and Pacific coasts of North America where it is called rockweed. Gulfweed (Sargassum), a floating sea plant, is harvested off the coast of North Carolina. Giant kelp (Macrcystis) is collected in the Pacific Northwest.Seaweed is constantly worn down by tides and eaten by fish, so it must row rapidly to survive. Studies at the University of California showed that a frond of seaweed can grow a foot or more a day, given optimal conditions. The same growth hormones that prompt such rapid growth in seaweed, when applied to plants as a foliar spray, can increase the rate of cell division and elongation in those plants. The hormones also increase root growth when applied to the soil as meal or when seaweed extract is used as a root dip.
In recent turf tests at Virginia Polytechnic Institute in Blacksburg, plots sprayed with seaweed extract had 67% to 175% more roots than untreated plots. Plots treated in fall showed a 38% increase in spring growth over untreated plots and showed 52% more roots.
In tests at South Carolina’s Clemson University, seeds soaked in liquid seaweed extract showed rapid germination, and the resulting seedlings had increased root mass and stronger plant growth than seedlings from untreated seeds. They also had a higher survival rate. Soaking plant roots in seaweed extract reduces transplant shock and speeds root growth. Seaweed foliar sprays promote faster,
stronger stem and leaf growth, and earlier blossoming and fruit set when sprayed on leaves and flower buds.
Negative Ion Generator
Negative ion generators have been used for years now to cut down on odors in a grow room, but reports are coming in that a negative ion generator will increase growth speed and yield. No true evidence to support this, however it does make sense, due to the fact that people and animals seem to be altered in a positive way by negative ions in the air, so plants may “feel” better too. Try putting one in the grow room. You may notice the buds don’t have as much scent when picked, but that may be desirable in some cases.
A negative ion generator can be purchased for $15 to $100 depending on the type and power involved. Some have reversed cycles that collect the dust to a charged plate.
Another method is also possible by using grounded aluminum foil on the wall and shelf where the ionizer sits, in order to collect these particles. Just wipe the foil clean once a month. It should be grounded to an electrical outlets ground wire. If you don’t cover the wall and shelf with paper or foil, the wall will turn dark with dust taken from the air, and you will have to repaint that wall at a later date.
Odor Elimination
Growing and smoking marijuana will produce odors. These odors can be strong enough to attract attention, so it is important to learn how to eliminate them if you don’t want your grow area to get discovered. Simple handheld sprays are available, they are cheap and effective, but for larger gardens one may have to take bigger steps for odor prevention.You can also buy a dispenser that will spray a dose in timed intervals.
Another easy method for odor elimination is to purchase some in gel form. These products evaporate into the air and neutralize smell. You can also use filters, carbon being the best, on your rooms outtake to prevent unwanted odors from escaping. But as said before, for larger gardens more drastic measures may be required. Harvesting is when the marijuana will stink up the place the most.
In some indoor set-ups a fan can be used to extract any unwanted smell away from the corridor outside. It can be pumped through a window or filter to another area where the smell will not be noticed. Not only that but plants love fresh air and wind, so the fan can do two things at once for you. An Ozone generator is a device that can be purchased from most grow shops. It helps to get rid of cannabis odor problems.
Potpourri in electric crock pots works well also. Add scented oils, scented beads, potpourri mixes, spices, you can make it as strong as you like. Fill it up once or twice and it lasts all day.
Place a small fan with a Bounce dryer sheet laying on the back of the fan, place the fan near your grow. The air is filtered by the scent of the sheet. Many of you may know already how well dryer sheets work.
ONA gel/liquid. Open container and let sit. Removes mild smell for up to two weeks before refilling with ONA liquid is required. The gel can also be placed near a fan. ONA Pro Gel is the choice of professionals for maximum odor control! Not a cover-up or perfume, this standalone smell stopper has almost no scent of it’s own; all it leaves behind is fresh air. Even when used in extremely odorous conditions, ONA Pro Gel removes almost all traces of unpleasant smells. Glade plug-ins (or other electronic plug-in scent expulsion devices). They work okay, but won’t be enough to cover the pungent marijuana smell alone. A few around the house can’t hurt, just change them monthly. Hang some car fresheners all over the place.
The best defense is fresh air. ALWAYS crack a window during the day, even in the winter.
Carpet sprinkle and vacuum products. You will smell it at for at least a few hours, good to use when company is coming over. Also, charcoal for use on the bottom of soil, to absorb plant odors. Use an inch or so on the bottom of your soil to neutralize plant odors.
Some other quick smell-busting remedies:
- Cook something.
- Pine Sol.
- Paint something.
- Brew some strong coffee.
- Incense, scented candles.
- Spray air fresheners.
Add some of the above to your central AC filter, or furnace air intake. Also, dryer sheets work well in a window AC unit’s filter. Try these things in combinations and use often for the best results.
Ozone
 Ozone is a sensible addition to any large garden. Ozone is one of the most powerful sterilents known to Man. It’s sole purpose is to kill bacteria, odors, and viruses. Most people learned about the atmospheric layer, the “Ozone Layer” that circles our planet protecting it from harmful UV rays from the sun. Ozone is abundant in nature. It’s purpose when it comes to growing marijuana is to eliminate the strong marijuana smell in a grow room or where it is being smoked.
Ozone is extremely powerful, but it has a very short lifespan. As soon as it comes into contact with the odor, bacteria, virus etc, they are both destroyed in a process called oxidation. Both the ozone atoms and the bacteria atoms are destroyed, leaving in their place
pure O2, or Oxygen. Aka clean air. Ozone, once airborne lasts at the most 30 minutes. If there is an excess amount of pollutants in the air it will degrade at an even more rapid rate.
Ozone generators are the most effective odor control devices available. Odor is caused by airborne pathogens which float freely and come in contact with our nasal passages. When generated ozone, or 0³ comes in contact with these pathogens one of the oxygen atoms detaches from the ozone molecule, attaching itself to the odor-causing pollutant. This process, in essence, inactivates the odor causing particles in the air, leaving clean, fresh smelling air. Growers report that a good ozone generator will completely eliminate airborne odors from the most pungent crops, but will not affect the dried bouquet of the flowers.
Ozone Production
So you’re probably wondering how the heck you can produce ozone in your grow room. This is accomplished by using a device known as an Ozone Generator. An Ozone Generator is the most effective odor control device available today. The gist of it is, how our noses pick up smells is when our nasal passages come into contact with airborne pathogens. The ozone will attach itself to these airborne pathogens and destroy them, leaving in their place fresh, clean smelling air. A good ozone generator will completely eliminate airborne
odors from the most pungent crops.
Note: Safety concerns about the effect ozone has on human beings has long been a debated issue. But fear not! The EPA, USDA and OSHA have approved the use of ozone at concentrations of 0.1 Parts Per Million, for an exposure period of eight hours, without any side effects. Most ozone generators will produce .05 PPM, with minimal exposure time. Ozone generation is a safe and effective method of odor control.
You can either buy an ozone generator or make one yourself.

Dangers of Ozone
At low concentrations, ozone is harmless, but at high concentrations it can cause problems in certain situations. Car exhaust is the main producer of ozone at ground level. It’s molecular structure is similar to that of oxygen, but the third oxygen atom is unstable, and readily detaches from the ozone molecule and ‘attack’s any structure that will accept an oxygen atom. This can be harmful to some organic substances. It’s not only organic substances that are affected by ozone. Nearly everything that gets in its way will be destroyed! It is highly corrosive, and can affect everything from metals to rubber. If this gas is so toxic that it corrodes metals and rubbers, just imagine what it does to your lungs!
Ozone Facts:
- Ozone is a colorless gas.
- It is a naturally occurring gas.
- It does not have an obvious odor (although some say it smells like fresh rain, or purified air).
- Ozone is a toxic gas.
Short exposures of relatively high amounts of ozone (found in some grow rooms) can cause problems such as:
- Pains in the chest.
- Throat irritation.
- Coughing.
- Shortness of breath.
Although short exposures to ozone may cause problems, these should clear up over time. Prolonged exposure to high concentrations of ozone can cause severe damage to the lungs and other parts of the respiratory system, and over time may have irreversible effects. The more ozone a person inhales, the more damage is done to their system, and the less chance there is of recovery.
People with asthma are advised to avoid prolonged exposure to ozone, as it may cause an ‘asthma attack’ or flare up problems with their respiratory system. As an example to the severity of ozone ‘poisoning’, the New York State Ozone Advisory will issue a warning to people if the level of ozone is above 0.08 ppm for more than 8 hours at a time. 0.15 ppm is intolerable for even short periods.
Preventing Over-exposure: Your ozone generator should not be pumping ozone directly into the room. If you are using an ozone generator, us it in conjunction with your ventilation system. This way, no concentrated amounts of ozone are present in the grow room, but instead having all the ozone flow in the exhaust tubing to clean the air as it leaves the grow room. Put your ozone generator inside your exhaust ducting – most generators are round tubes with 4/6/8″ diameters, designed to work inline with your grow room air exhaust system. Some generators have a control that regulates the output levels (The generator functions at 100% output, but this rheostat cycles the on/off cycles, much like a microwave).
This method is the safest and most effective way to use your ozone generator, but for added advantages, if you divert some ozone back into the grow room it will help kill airborne substances such as spores, moulds, etc to help keep your grow sterile and clean. If your generator is pumping ozone directly into your grow room you will need to have a strong ventilation system to help keep the levels of ozone from building up to dangerous levels. Having the exhaust air vented outside is the best solution. Avoid spending excess amounts of time in your grow area if you are using an ozone generator.
Concentrations (according to various controlling bodies) should not exceed concentrations of 0.10 ppm for more than a few hours at a time. It is also understood that these concentrations and below are not suitable for controlling odors. This means that if your grow room has an odor problem, and you are using an ozone generator, it is highly likely that you are exposing yourself to harmful levels of ozone. If you run your ozone generator on HIGH in a relatively unventilated area, you can easily reach levels of 1ppm, which is 10 times higher than the maximum recommended level.
Active Carbon Filtration
This technique involves forcing exhaust air through active carbon in order to filter out odors. This method is highly effective and very popular and can also be used in combination with the other methods. These filters can be purchased or you can find plans to construct them online. Ideally, you would use your exhaust fan to pull the air through the filter rather than push air through it.