
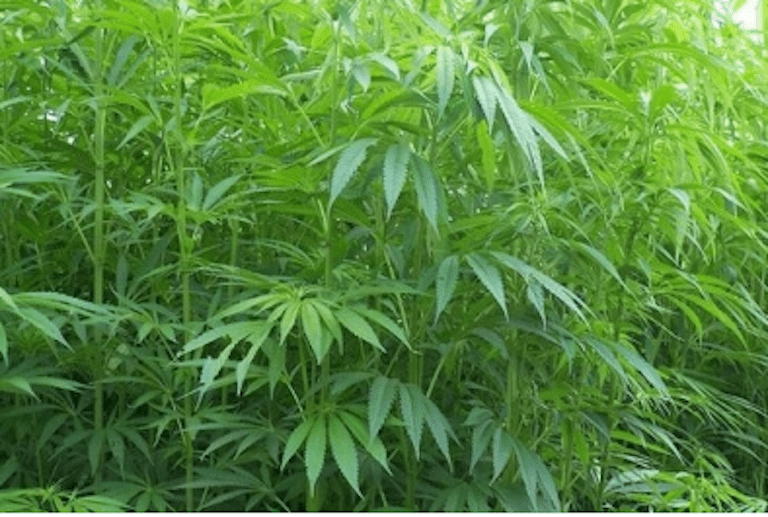
Growing Marijuana Outdoors
To help you out, here are the best usa seed banks for you that work
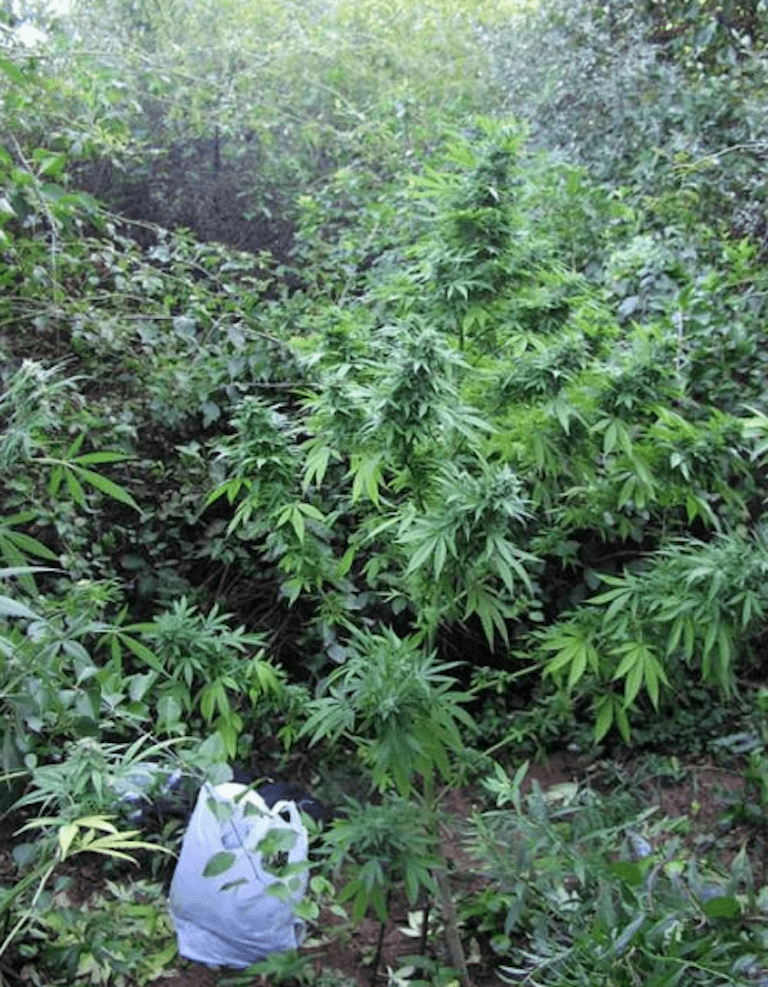
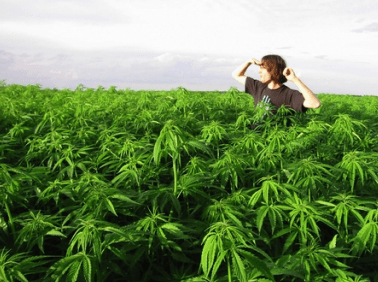
Growing marijuana outdoors can grant you MASSIVE yields (some plants can reach up to 20 feet tall!), but it can also be quite risky depending on your grow area. Natural sunlight and fresh air does wonders for cannabis plants. The male dies around the 12th week of growing and the female will live another additional 3 to 5 weeks. Females can weigh twice as much as males when they are fully mature.
The cool thing about cultivating cannabis outdoors is that you save tons of money on lighting – natural sunlight is available year round and is free! And outdoor plants do not require ventilation systems.
Outdoor growing can be risky because of thieves, pests, and other factors that can ruin your dreams. Tight security and privacy is essential to general outdoor growing success. If you’re contemplating whether or not your climate is sufficient to grow good weed in, don’t worry as long as it is a fairly warm climate that you could grow small fruits or vegetables in you should be alright.
There are two types of outdoor growing methods known as Outdoor Growing and Guerrilla Outdoor Growing. Outdoor Growing is when you grow on your own property. Guerrilla Growing is when you grow on someone else’s or public property. Guerrilla Growing has advantages if you don’t want to get identified with marijuana growing on your property then it’s a satisfactory option. Regular outdoor growing is the method used when you have your own plot of land to grow on.
Guerilla growing is when you grow on property that is not your own (usually somewhere out in the wild). When guerilla growing the most important thing is to have a cover story. Take along with you a bird watching book and binoculars, or a fishing pole and fishing license etc so if stopped by any nosy people asking what you are doing out there, you will be safe.
Note: If you were hoping to just plop your seeds in the soil and come back 3 months later then sorry to disappoint you but some maintenance is required in order to get outstanding yields from your crop.
 Outdoor pot tends to be the strongest, since it gets more light. Growing outdoors means no light leak problems. No dark periods that keep you out of your grow room. No high electricity bills. Sunlight tends to reach more of the plant, that is, if you are growing marijuana in the direct sun. The bottom of the plant will be almost as developed as the top.
There are disadvantages to cultivating cannabis outdoors however; there are many factors that can kill your crop. Deer will try to eat them, and rodents too. Nasty bugs will inhabit them. The wind and rain can tear your little buds to shreds if they are exposed to strong storms. Due to these harsh external conditions many outdoor cultivators turn to a greenhouse, or choose to grow indoors.
This is why it is imperative you buy an outdoor marijuana seeds strain. Those specific cannabis seeds are breed especially for difficult outside weather conditions, optimum natural sunlight absorption, increased pest resistance, and much more bushy plants. It is important to start your outdoor garden with quality genetics, preferably high yielding cannabis seeds strain, pest and cold resistant if you plan to plant early in the season. Most reputable seedbanks carry marijuana seeds strains for early spring outdoor growing.
Try a few different outdoor marijuana seeds strains during the first year of your outdoor cultivation, compare growing properties and the yields of your cannabis seeds strains to find the one that suits you, your climate and location as well as security circumstances. If you are growing in your back yard avoid high Sativa marijuana seeds strains that could grow higher than your fence. For higher marijuana seeds germination rate, do not plant the cannabis seeds directly in soil. Germinate your seeds at home using the paper towel germination method. After the white roots can be seen coming out the marijuana seeds move them to small pots and grow the seedling indoors until they have 2 adult leaves. Replant outdoors, avoid indoor / outdoor temperature shock. More on this “starting indoors” method later.
Put up a fence and make sure it stays up. Visit your plot at least once every two weeks, and preferably more often if water needs demand.
You may want to keep outdoor plants in pots so they can be easily moved. A big hole will allow the pot to be place in it, thus reducing the height of the plant, if fence level is an issue. Many growers find pots have saved a crop that had to be moved for some unexpected reason (repairman, appraiser, fire, etc.). It’s a good idea to use soil if you don’t have a green house, since hydroponics will be less reliable outside in the open air (due mostly to evaporation).
Light Exposure
When growing outdoors it is critical you plan BEFORE you plant. The first important major factor to take into consideration is the angle of the sun over the entire year aka the light exposure your plant’s are getting.
In order to grow a successful bountiful outdoor harvest with the best plants you are going to need a minimum of 5 hours of mid-day sun. An easy way to do this is go out in the Spring to the area where you wish to plant and see what the angle of the sun is at different times throughout the day. As the seasons change the suns orbit will change slightly as the planet rotates. Go out in midday and follow the sun around in a 360 degree circle. Imagine its rotation being in this spot at different times of the year. It sounds complicated but it is really simple, just make sure your plants are in a good spot and no light is blocked from them from any possible angle the sun may take on during the year later.
Light exposure is all important when locating a site for a greenhouse or outdoor plot. A backyard grower will need to know where the sun shines for the longest period; privacy and other factors will enter in as well. Try to find an secluded spot that gets full winter sun from mid morning to mid afternoon, at least from 10-4, preferably 8-5. This will be really asking for a lot if you live north of 30 degrees latitude since days are short in winter. Since most gardeners will not want to use the greenhouse in the middle of the winter, you can still use winter sun as an indicator of good spring and fall lighting exposures. Usually the south side of a hill gets the most sun. Also, large areas open to the sun on the north side of the property will get good southern exposures. East and West exposures can be good if they get the full morning/afternoon sun and mid-day sun as well. Some books say the plants respond better to morning-only sun, verses afternoon-only sun, so if you have to choose between the two, morning sun may be better.
Another great tip is if your plants are near any kind of wall to paint it a flat white. This will help greatly with reflecting light onto your precious buds (this single tip alone is said to help increase yields by up to 10%!)
Frost
See also:
Frost occurs when air temperatures drop below 32°F (0°C) and ice crystals form on leaves, injuring, and sometimes killing, tender plants.
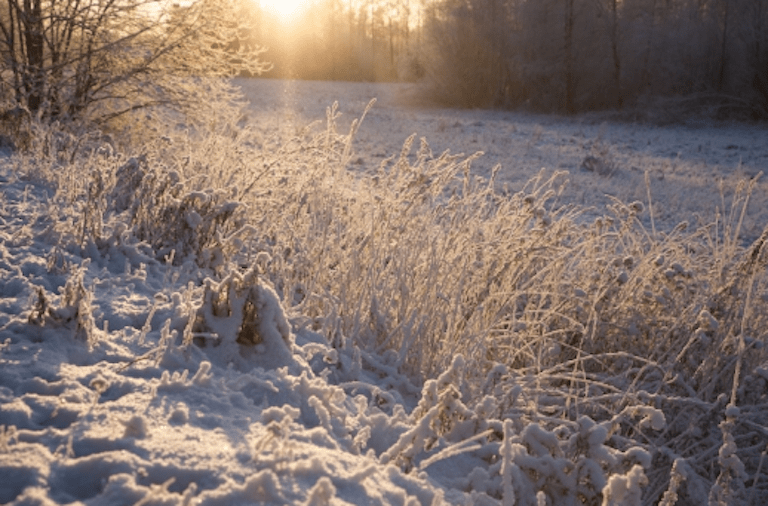
Clear, calm skies and falling afternoon temperatures are usually the perfect conditions for frost. If the temperatures are falling fast under clear, windy skiesespecially when the wind is out of the northwest-it may indicate the approach of a mass of polar air and a hard freeze. A hard or killing frost is based on movements of large, cold air masses. The result is below-freezing temperatures that generally kill all but the most cold-tolerant plants.
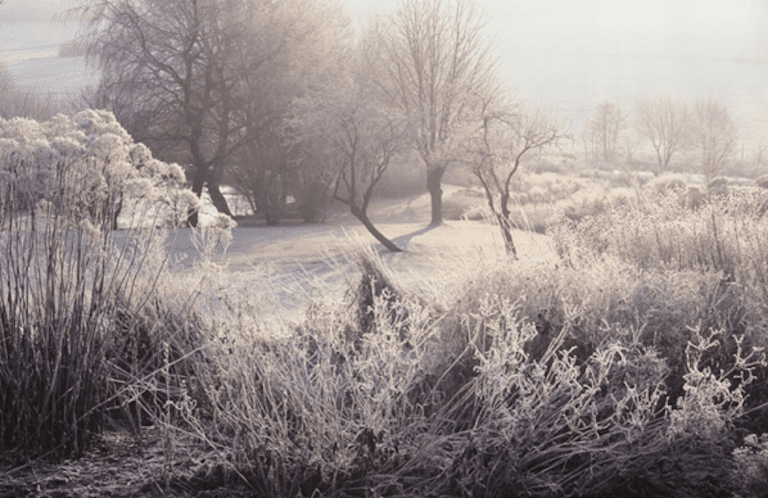
Cloudy Skies: If the temperature is cool, but clouds are visible, your plants may be protected. During the day, the sun’s radiant heat warms the earth. After the sun sets, the heat radiates upward, which lowers the temperatures at or near the ground. However, if the night sky has clouds, these clouds will trap the heat and keep the warmer temperatures lower, closer to your plants, preventing a frost.
Wind: Wind also influences frost. If the air is still and windless, the coldest air settles to the ground. The temperature at plant level may be freezing, even though at eye level it isn’t. A gentle breeze, however, will prevent the cold air from settling and keep temperatures higher, protecting your plants. If the wind itself is below freezing, frost may be very damaging.
Moisture: Humidity and moisture are good things when talking frost. When moisture condenses out of humid air, it releases enough heat to sometimes save your plants. When the air is dry, the moisture in the soil will evaporate. Evaporation requires heat, which removes warmth that could save your vegetables.
Location: The location of your garden can have a tremendous influence on whether or not an early frost could wipe out your garden, but leave your neighbor’s alone. As a general rule, the temperature drops 3-5°F (-16.1 to -15°C) with every 1,000-foot increase in altitude. The higher your garden the colder the average air temperature and the more likely your plants will be hit by an early freeze.
However, lower isn’t always better. Cold air is heavier than warm air and tends to sink to the lowest areas, causing frost damage. The best location for an annual garden is on a gentle, south-facing slope that’s well heated by lateafternoon sun and protected from blustery north winds. A garden surrounded by buildings or trees or one near a body of water is also less likely to become frost covered.
Soil: The type of soil your garden is growing in also affects the amount of moisture it holds. Deep, loose, heavy, fertile soil releases more moisture into the surrounding air than thin, sandy, or nutrient-poor soil. The more humid the air is, the higher the dew point will be, and the less likely that frost will form on those plants. Heavily mulched plants are more likely to become frosted since the mulch prevents moisture and heat from escaping out of the soil and warming the surrounding air.
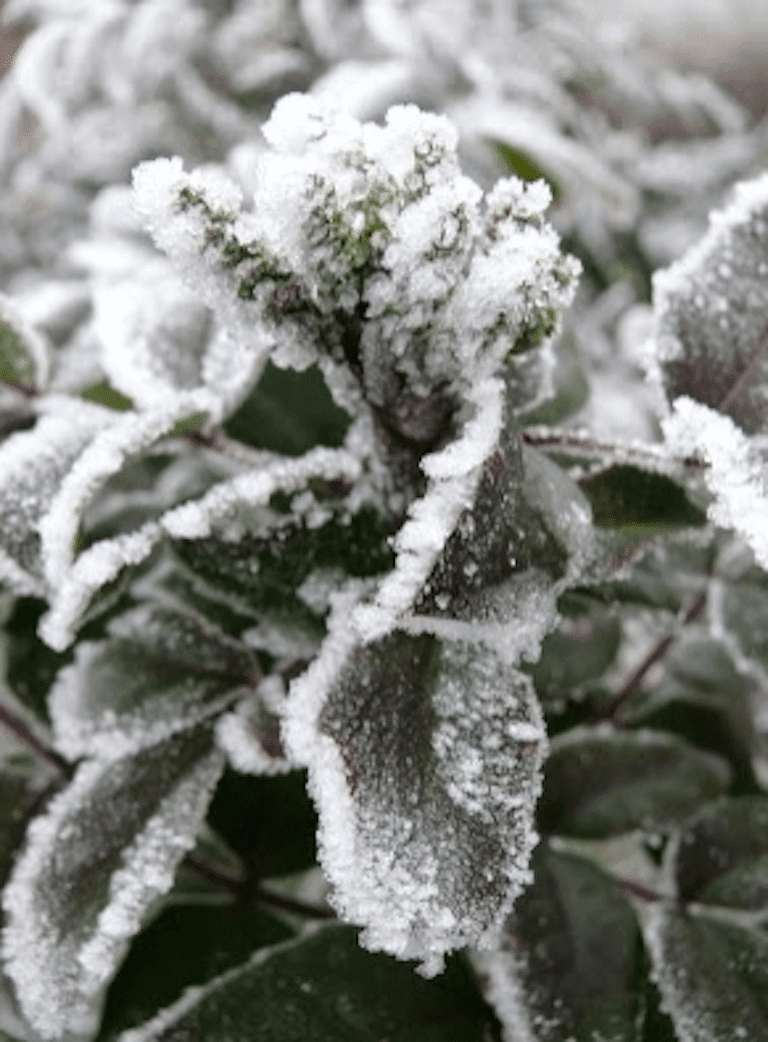
Know your plants: The plant itself determines its likelihood of frost damage. Immature plants still sporting new growth into the fall are most susceptible- especially the new growth. Frost tolerance tends to be higher in plants with maroon or bronze leaves, because such leaves absorb and retain heat. Downyor hairy-leaved plants also retain heat. Compact plants expose a smaller proportion of their leaves to cold and drying winds. By the same token, closely spaced plants protect each other.
If frost is on its way: If a frost is predicted, cover your plants, both to retain as much soil heat and moisture as possible and to protect them against strong winds, which can hasten drying and cooling. You can use newspapers, baskets, tarps, straw, and other materials to cover your plants. Cover the whole plant before sunset to trap any remaining heat. Be sure to anchor lightweight coverings to prevent them from blowing away.
Keep the soil moist by watering your plants the day a frost is predicted. Commercial fruit and vegetable growers leave sprinklers on all night to cover plants with water. As the water freezes, it releases heat, protecting the plants, even though they’re covered by ice. To prevent damage, the sprinklers need to run continuously as long as temperatures remain below freezing.
Cold Temperature Effects On Plants & Vegetation
Frost Damage: Depends upon length of frost duration.
Light Freeze: 29-32°F (-2 to 0°C). Tender plants killed with little destructive effect on other vegetation.
Moderate Freeze: 25-28°F (-4 to -2°C). Wide destruction on most vegetation with heavy damage to fruit blossoms and tender semi-hardy plants.
Severe Freeze: 24°F (-4°C) and colder. Heavy damage to most plants.
Color Changes: Cold temperatures can cause your plant to turn purple/red.
Whens the best time to Grow?
Marijuana plants can grow anywhere corn can grow. All it needs is about three growing months – from seed to harvest. Two if started indoors! Many seasoned (no pun intended) growers agree, an ideal time to start growing your plants is the months of March and April/early May. The reason is your plants start to mature and flower around August & September, which is when daylight hours begin to decrease. If you live in the Northern Hemisphere be sure to ask growers around you when the last frost is. Anytime after the last frost is OK.
Definitely plant them after the last frost of the year. If the cold climate is a concern you could start them inside, and put them outside during the day, then bring them in at night. If you start a plant indoors you should do this anyway, because the plant needs to “harden off”, or in other words get used to the elements. If you just toss an indoor plant outside it will suffer some shock. Giving it a few hours of outside a day will ease it into the outdoors.
Remember that starting your plants off indoors is probably the easiest way to begin. The plant’s initial growth can be spurred by utilizing a CO2 enriched atmosphere and by using metal halides.
Starting Indoors
Do not plant your precious marijuana seeds directly in soil. Germinate the cannabis seeds at home and replant seedlings outdoors. One popular method of doing this is to start off by planting your seeds in small plastic pots indoors (or by using clones). Once the seedlings have been allowed to develop for a little bit, you then cut off the plastic bottoms and tape a small piece of shoebox or cardboard to the bottoms. Then go to your grow patch to transplant them. Start off by digging a little hole, remove the cardboard, and carefully set your plant in. This method is liked by many because you don’t have to worry about germinating (since it is already taken care of indoors). You can also clone all females and do the above method to have all female outdoor plants.
Pretty rad, yeah?
Note: You can use a commercially-available transplant chemical in order to help them overcome the initial environmental shock.
Transporting vegetative stars to the growing area is a most tricky aspect of growing outdoors, but germinating your marijuana seeds in spot is out of the question. Usually, you will want to germinate the cannabis seeds at home, keep seedlings indoors, or outside in your garden, then transport them to the grow site once they are firmly established. It may be desirable to first detect and separate males from females so that no effort of transporting / transplanting / watering males is incurred. Male or female plants cannot be identified by looking at the cannabis seeds, so you have to wait for seedlings to show sex signs.
Another method is to use 3″ rockwool cubes to start seedlings in, then put 20 of them in a litter pan, cover it with another pan, and transport this to the grow site. The cubes can be planted directly into soil.
Guerilla Growing
Guerrilla growing basically means farming outdoors, away from your own property, or in a remote location of your property where people seldom roam around. It is possible to find locations that for one reason or another are not easily accessible or are privately owned.
Security: When guerilla growing it is critical to make sure your cannabis plants are out of sight. Take a different route to get to them if they are not in a secure part of your property, and cover the trail to make it look as if there is no trail. Make cut backs in the trail, so that people on the main trail will tend to miss the cut-back to the grow area. Don’t park on the main road, always find a place to park that will not arouse suspicion by people that pass on the road. Always have a good reason for being in the area and have the necessary items to make your claim believable.
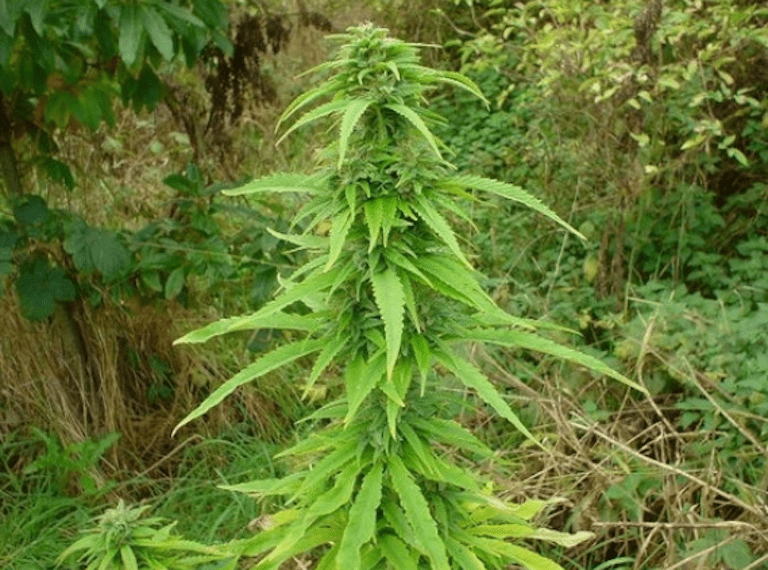
When planting, try to plant under trees, next to bushes and keep only a few plants in any one spot. Train or top the plants to grow sideways, or do something to prevent the classic Christmas tree look of most plants left to grow untrained. Tying the top down to the ground will make the plants branches grow up toward the sun, and increase yield, given a long enough growing season. Plants can be grown under trees if the sun comes in at an angle and lights the area for several hours every day. Use shoes that you can dispose of later and cover your foot prints.
Fencing: Put up a fence, or the chipmunks, squirrels and deer will nibble on your crops until there is nothing left (mmm…cannabis). Green wire mesh and nylon chicken fencing net work great and can be wrapped around trees to create a strong barrier. Always check it and repair every visit you make to th garden. A barrier of fishing line, one at 18″ and another at 3′ will keep most deer away from your crop. The best fence in the world will not keep rats away from your plants! Put the poison grain in a feeder than only small rodents can enter, so that birds and deer can’t eat it. Set out poison early, before actual planting. The rats must eat the grain for several days before it will have any effect on them. Ultimately, you may find it’s easier to grow in a greenhouse shed in your own backyard rather than try to keep the rats from eating your outdoor plot.
Water: When growing away from the house, in the wild, water is the biggest determining factor, after security. The amount you can grow is directly proportional to the water available. If you must pack-in water, carry it in a backpack in case your seen in-route to your garden; you will appear to be merely a hiker, not a grower. Water must be close by, or close to the soil surface, or you will have to pack water in. Water is heavy and this is very hard work. Try to find an area close to a source of water if possible, and keep a bucket nearby to carry water to your plot.
A good idea is to find high water in the mountains, at altitude, and then route it down to a lower spot close by. It is possible to create water pressure in a hose this way, and route it to a drip system that feeds water to your plants continuously. Take a 5 gallon gas can, and punch small holes in it. Run a hose out of the main orifice and secure it somehow. Bury the can in a river or stream under rocks, so that it is hidden and submerged. Bury the hose coming out of it, and run it down hill to your garden area. A little engineering can save you a lot of work, and this rig can be used year after year.
Harvesting: When it’s time to travel back to your home with your rewards, be sure to do it very early in the morning (preferably before the sun rises) in order to avoid unwanted attention.
Choosing A Grow Site
Before you can sow your marijuana seeds you must find a suitable location to grow your plants. The garden should be located in an area where people are unlikely to stumble across it.

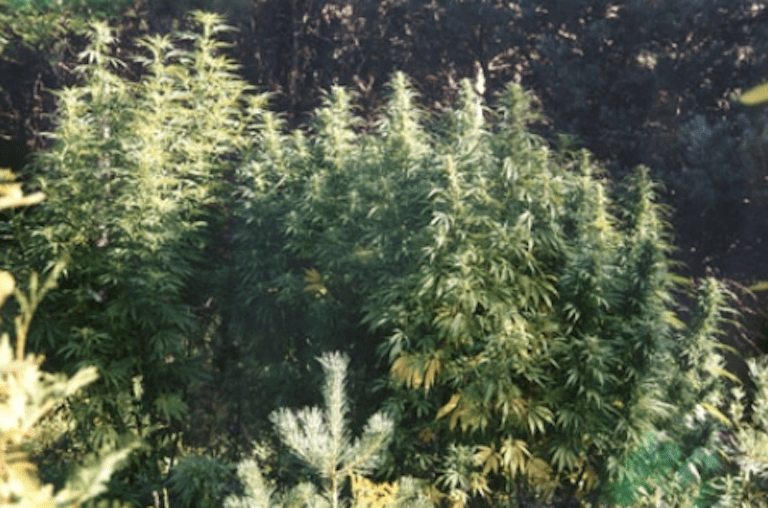
Try to grow away from roads, trails, railroad tracks, power lines and any man made structures. Pricker bushes, mud, water and steep hills are all people deterrents. Growing near small pine trees also helps hide your plants in the fall when other plants are turning brown and marijuana remains green. Also, find out when and where hunters start to roam the woods in your area.
Light: A very important consideration when making your choice is sun exposure. The more direct sunlight the better (preferably a southern facing slope). North facing slopes are also a good choice. Marijuana likes a lot of sunlight. Your grow site should have at least three hours of direct sun every day. Marijuana will grow the fastest with around five hours of light every day. The less light the plant receives the slower the growth and smaller the yield. If there is less than three hours of direct light at the grow site then tin foil can be put around the plants to reflect more light on the leaves. If you are in a low light area this will make a big difference. Marijuana also seems to respond better to morning sunlight than afternoon sunlight. Keep this in mind when selecting a site.
Soil: Soil is obviously an important factor when determining a grow site. Marijuana likes a soil that drains well and has a pH of about 6.5. Marijuana soil should compact when you squeeze it and break apart easily when you poke it. Sand, perlite or vermiculite can be added to soils that drain poorly. The pH of the soil must also be kept around 6.5. If the pH is too extreme then the plant will not be able to absorb nutrients properly. Low pH also causes more males to develop. The pH can be raised by adding hydrated lime. The lime is slow acting so add it during the fall or at least one month before planting. pH can be lowered by adding sodium bicarbonate to the soil.
The level of the water table at the grow site is also important. If the water table is too high and the soil is too wet the roots will not receive enough oxygen and die. If the water table is too low then the soil will dry out quickly and you will have to water often. If the ground is too wet then the plants must be grown in pots. The larger the better. The pot should have a one inch layer of gravel for good drainage. The rest of the pot should be filled with potting soil.
Water Source: A nearby source of fresh clean water is also helpful. If no water is available in the area for watering then large buckets or barrels should be partially buried. These will collect enough rainwater for watering. If you have to bring water to the grow site then do it at night and water the following morning. Watering at night or late evening will increase the chance of developing a mold problem. Any equipment needed for watering or garden maintenance should be left hidden at the site.
Choosing a marijuana grow site near a water source saves the major hassle of having to haul water in by hand. A nearby water source allows irrigation (with pumps and hoses), making watering easy. A drawback is that people are also attracted to rivers, streams, etc and may be nearby. Having a water source near by is great, as it usually means the tap roots of the plant will penetrate deep enough though the last 1/2 or 1/3 of the season and will not require much, if any, supplemental watering.
Marijuana fertilizing will still be required periodically.
Pests: Wild animals love to eat young marijuana plants and if you don’t want your plants to be food then you must keep them away. Human hair and blood works well. Hair from predator animals such as bears, foxes, lions and wolves also works well. If you would rather put up a fence then fishing line hung at eight inches and 3 feet off the ground will stop deer. When the plants are small a drinking glass can be placed over them to act as a humidity tent and to keep rodents and deer out.
Security: Do not grow marijuana outdoors on your own land(unless it is remote), so that you can show that someone could have easily trespassed on your property, and violated your land by planting marijuana. A few marijuana plants should be fine, but be careful. There is a constant threat of suspicious neighbors, hunters/hikers when growing weed.
Find a secure location where your marijuana plants won’t be stolen by rippers/hunters/hikers. Avoid heavy traffic areas, popular hiking trails, and recreational roads.
At all costs, avoid making paths to your outdoor marijuana grow location. What seems invisible on the ground may be very apparent from the air.
Try a new path each time you enter or exit your marijuana site; walking along fallen logs, in dense areas and through streams, etc.
Heck, wear snowshoes.
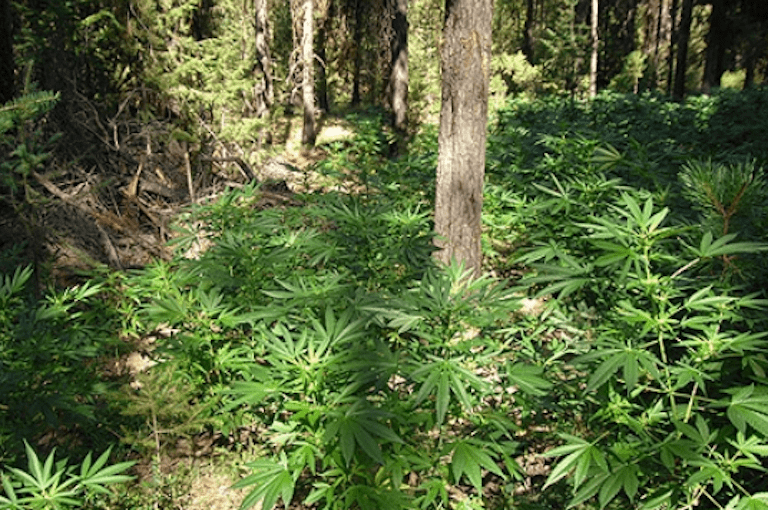
Try to have several outdoor marijuana grow locations. Do not plant all your marijuana plants in one spot. If your cannabis plants do get eaten, ripped off, or destroyed it is nice to have marijuana plants in other locations to fall back on. These separate marijuana grow spots can be close (5-20 min hike away) or distant (completely different areas in driving distance). Planting inside a dense field of brush is very stealthy.
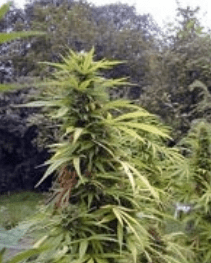
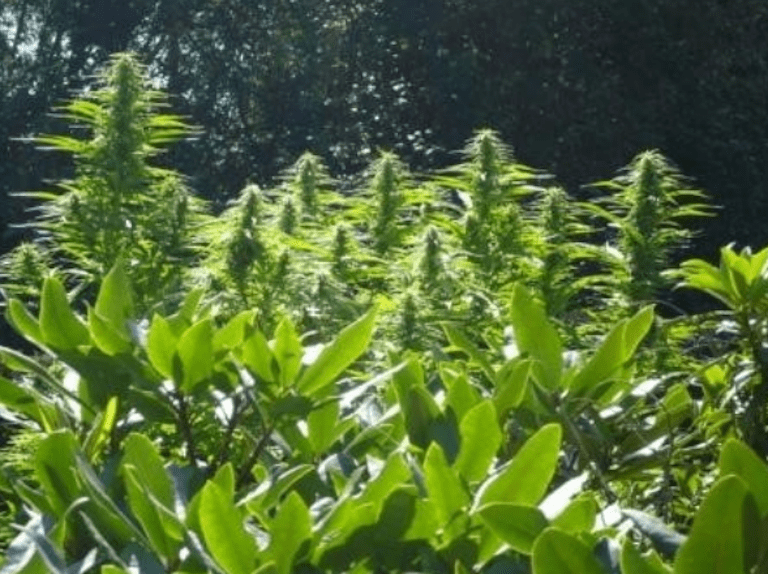
Camouflage: Pot plants tend to blend in with other plants to the point that they are unidentifiable by all except those actively looking for them (and even then it’s still tough!). Plants started outdoors late in the season never get very big and never attract the least bit of attention when placed next to plants of similar or taller stature. Even tall plants grown among several trees will be almost invisible in their camouflage.
Outdoors the object is to control access to an area, and not to arouse suspicion. Tuck them here and there, never in a recognizable pattern. Space them out, and fit them in to the existing landscape such that they get full sun, but their hidden or blend in. Fence lines and groups of several together are best. Try to find strains that seem to match the surrounding plants.
Feed nitrogen to your plants if they need to be greener to blend in. Some growers even use plastic red flowers, pinned to a plant, disguising it as a flower bush. Visit the plants at night on full moons, and if your visible to neighbours, appear to be pruning a tree, mowing the lawn, or doing something in the yard that makes you invisible. Dig a hole and put a potted plant in it. The plant’s height will be reduced by at least a foot. Some growers top the plant when it is 12″ high, and grow the 2 tops horizontally along a trellis. The plant will never be over 3 feet tall, and never arouses suspicion from neighbours. This type of plant can even be grown in your yard in full view.
Fertility & Sun Exposure: Once you have chosen a secure location, check the area is fertile, with lots of green vegetation. Dark or black topsoil with lots of bugs/worms within the first few inches of soil is an indication of a healthy location. Be prepared to prepare the soil before planting. This would include hauling in marijuana fertilizers to improve the soil conditions. Use marijuana fertilizers throughout the marijuana growth cycle for optimum growth.
Valley bottoms tend to be ideal locations for marijuana plants because rich topsoil often washes downwards and accumulates. It can be challenging to find good sun exposure at the bottom of a valley. Valley bottoms are also the first areas to have frost in the fall.
Note: Scout a marijuana grow location during the summer and fall to prepare for planting the following spring. The site needs to have brush removed, and a suitably sized area needs to be cleared for cannabis planting. Preparing the holes the previous fall allows soil time to compost and grow beneficial bacteria. Add valuable compost and return in the spring to healthy enriched soil ready for marijuana plants.
Preparing Your Grow Spot
Once you have found a suitable safe location to grow your outdoor stalks of delicious greens, you must prepare your grow spot. First things first, make sure you remove as many weeds as you possibly can. The best method to remove those pesky weeds is by hand.
WARNING: Do not use generic weed killer!
Stay away from commercial weed killers. Some weed killers react very negatively to marijuana plants. If you are adamant on using a weed killer, then I suggest you test it on a clone first to make sure it doesn’t hurt your plant’s growth in ANY WAY. It is ideal to find one that reacts with cannabis plants in a favorable way, or if you can find a specific cannabis-friendly weed killer all the better. If you want to be safe, do all your weeding by hand.
Preparing Soil
Dig a big hole, don’t depend on the plant to be able to penetrate the clay and rubble unless your sure of the quality of topsoil in the area. Grassy fields would have good top soil, but your back yard may not. This alone can make the difference between an average 5′ tall plant, and a 10′ monster by harvest time. Growing in the ground will always beat a pot, since the plant will never become root bound in the ground. Plants grown in the ground should grow much larger, but will need more space for each plant, so plan accordingly, you can’t move them once they’re in!
#1 (Editor’s Choice – Best Organic Nutrients) General Hydroponics General Organics Go Box
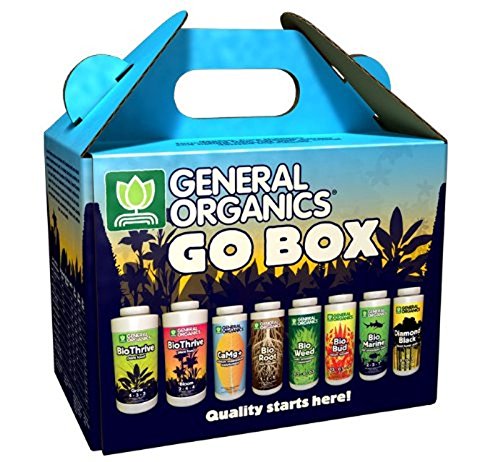
https://420bigbud.com/best-nutrients-for-outdoor-cannabis/
(Editor’s Choice) Black Gold 1311002 8-Quart Seedling Mix (2 Pack)
https://420bigbud.com/best-soil-for-outdoor-cannabis/
Preparing your soil and the spot you are going to plant in is very important. The first step is to dig a hole. About 1.5ft x 1.5ft deep is fine. Next, fill it with water and time how long it takes the mud to drain the water out.
If it…
- Drains in 10 minutes or less add coco, peat, compost etc to hold water.
- Drains in 10-30 minutes add peat, compost, coco etc to improve texture.
- Drains in 30-60 minutes add peat, compost, coco etc to improve texture.
- Drains in 60 minutes+ add sand, coco, perlite, to improve drainage.
Also be sure to remove any rocks or roots inside your hole as best you can. Now fill your hole with your mix. Your soil is incredibly important. Once you put it in that’s that. It is the BASE of your entire garden. Mix a good soil and you will save yourself plenty of time, money, frustration, energy AND you will reap the benefits of MASSIVE yields and quality outdoor plants.
If using a clone, just simply drop your seedling in and surround the rockwool cube or other grow medium with your mix. You can add rougher objects like rocks on the surface around your leaves to act as a mulch. This will help retain water better. Fill up your mix up to your leaves.
A lot of growers like to add pre-made soil to their grow patch. This is fine, but make sure you only use a soil that has an N-P-K ratio containing higher levels of N (Nitrogen) than P (Phosphorus) or K (Potassium). Adding pre-made soil is a good idea. Even if you treat your patch it probably still contains seeds and spores of weeds and other wildlife that will leech your cannabis plant’s nutrients, water, and most importantly – LIGHT. Make sure your plant has littleto ideally NO competition.
Note: A premium potting soil works fine for our purposes here. Stay away from soils with a lot of bark dust in them as these tend to be way too acidic. Also stay away from anything that is a heavy clay. A nice, light potting mix is what you are going for. Ideally you should mix your own though.
One secret trick used by growers that will tremendously help in increasing outdoor plant growth during the early stages is to spray the plants with carbonated water several times a day. DO NOT use club soda or anything like that as those products contain salt. Make your own with a home soda maker which used CO2 cartridges, or you can buy seltzer. These have zero salt added.
If the young plants are sprayed several times a day, it will speed up their growth considerably. You can continue this method to receive benefit throughout the plant’s life cycle but it costs a lot of money.
If you are planting in a very dry climate, make sure to create a deep bowl shape so water is retained better.
Maintenance
First thing you will want to do on a regular basis is remove any of the leaves that aren’t getting any sunlight as well as old leaves. Next shake off any excess water gathering on your buds.
Any time there is a heavy rain storm go out and shake your buds. This will prevent mold from forming.
Be sure to weed your outdoor grow area at least once a week after the initial weeding. Keep this up for the first 3 weeks, then only about once a month will be needed. But sometimes weeds here and there will pop up. Make it a habit each time you visit your plants to pull up a few weeds.
Planting Your Seeds
Before planting soak your seeds in distilled water overnight. There is no need to bury them too deep in Mother Earth, 1” is perfect. When you plant them, be sure to plant in the ground with the pointy end facing UP. Also note that the plants should be planted at LEAST three feet apart, do not get greedy and stack them too close. Stacking your plants too close will result in stunted growth.
A healthy seed will sprout in about five days. After planting your seeds sprinkle some water over them. That’s all you need to do for now. There is no need to adjust the soil’s pH level or feed your soil just yet. This is all that needs to be done to start your seedlings if you decide to take the root of planting them directly in soil. For another awesome method for starting off your outdoor cannabis plants right(indoors first), check the Guerilla Outdoor Growing section.
Watering Your Outdoor Plants
Most the water you will need will come from clean fresh rainwater. The plants enjoy some water during their growing season, but not too much or you can rot the root system. If no rain or any other natural source of water will get to your plants, then you will need to water and feed your plants when they need it. Be very careful during warm long summer dry spells, try to get water to your plants whenever you can. If your Guerilla Growing and have to travel over a long distance then you can get a backpack or duffle bag and fill it with water bottles. Another option if you own your own property is to use a sprinkler system.
Remember, the bigger your plant is, the more water it needs. Some large plants require a minimum of 1 gallon of water per day. Some factors to consider when watering your plants; sometimes deep pockets of water will be held inside the earth under your plants. The best method to determine if your plant needs water or not is by it’s appearance. If it is wilting it needs water. If not, you’re fine. Keep in mind some plants tend to wilt a little bit during hot summer months, not to worry as this is completely normal.
Note: When watering your guerilla grown plants a useful strategy is to take a large water bottle (about a gallon or two) and poke a hole in it. What you want is for the water to SLOWLY drip out. Then place it so it drips near your plant’s soil, about 3 inches away.
In the hot summer water at least twice a week for the first two weeks. After that once a week checkups to see how it is doing is fine. If you get about 1 inch of rain a week you wont need to water at all.
Security
Keeping your cannabis plant safe is very important. There are several effective precautions we can implement to ensure a safe bountiful harvest.
Pests
You will encounter many outdoor pests that love to feast on cannabis and destroy your precious crops.
Tying Down Outdoor Plants
Tying down your outdoor plants offers many benefits. For one thing it vastly improves air exposure and sun, which reduce chances of mold and increase harvest yield weight.

The Benefits of Tying Down:
- Increases yield.
- More sun coverage.
- Greater air exposure(reduces chance of mold).
- Promotes branching(increases bud sites).
- Security
These are awesome benefits for such a simple practice. Tying down in the long run will distribute light to your plant/plants evenly(Instead of one side receiving morning light, and the other receiving the afternoon light). As you will observe – this will dramatically enhance growth.
The Procedure
 The method is very simple and can be used whenever you want. It doesn’t matter if you do it during vegetative growth or during flowering. It is dependent on the lower branches that you’ll need to spread out. When tying the lower branches down you will get a better air circulation and that will reduce the chance for mold, also the yield will increase because the sun can penetrate the canopy better.
You can use strings or ropes or whatever you want to tie the branches. Don’t tie them too hard because they could easily snap. Also, don’t bend the branches all at once in one day, bend it more and more, day by day, this way the branch wont snap. After doing this you will notice a very large open area, Because all the lower branches have been spread open, don’t worry, in a couple of days the improved sunlight penetration will fill it up again. Using this method, you will create a wider plant which will have several more productive bud sites and heavier branches than any plant that wasn’t trained in this way. It’s like ScrOG without topping the plant, but instead of doing it to a tiny indoor plant, you do it to a big tree.
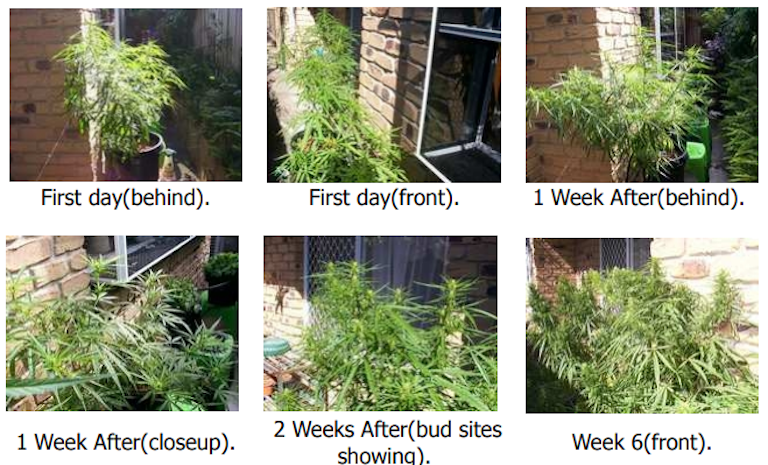
Week 1: Start Lightly. Tie string or fish line approximately 1/3rd down from the top. Tie the other end of the line to an obstacle on the ground, making sure your plant isn’t straining
After 5 Days: Inspect Growth. By now if your plant has received quality amounts of light, you will notice your leaves facing upwards (reaching for the sun). Your plants will try to receive as much sunlight as possible. Obviously it would have grown a certain amount as well; this is why you will need to attach more line to the middle of your plant, tying the rope down more than you did previously.
Several Weeks Later: Keep tying your plant down as necessary until branches start to pierce the canopy. Leave these branches to grow. When branches start to flower, you will have to be cautious. Branches that get too long will not be able to support the heavy bud it is producing. This is when you will have to start tying the branches either down, or pulling them up, depending on the circumstances.
Suggestions: Make sure you determine if your plant is female before you commence tying down! Figure out where the sun is casting its shadows before commencing. Remembering to tie down in the direction the sun is mostly cast upon through out the day.
Tying down has about the same effect as topping, although with much less stress on the plant. That said, tying down can be done during early flowering, but if you can you might want to do most of your tying during vegetative growth, and when you get to flowering, you can do some minor adjustments.
When you tie down, the growth hormones are relocated to lower branches, so you probably don’t want to be doing too much to change the plant’s focus during flowering. That said, I don’t think it’s going to change all that much, but in general, trying to keep your plants as unstressed as possible is always good for maximum bud size and quality.
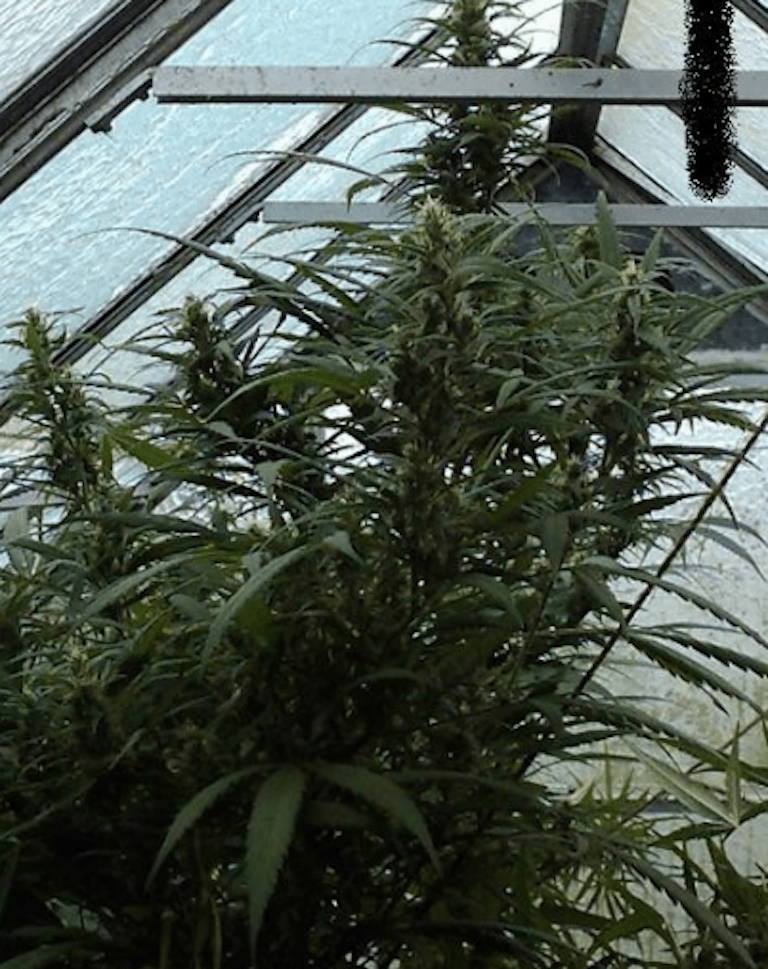
Greenhouse Growing
A greenhouse is any structure with a covering (usually glass) which is used to control temperature and humidity in the cultivation and protection of plants. When you have a greenhouse, you effectively have your own little micro-environment that is totally in your control.
The Advantages of Greenhouse Growing
 Greenhouse growing is like a “hybrid” between indoor and outdoor growing. There are many benefits to growing cannabis inside a decentlyconstructed greenhouse.
Temperature Control: The greenhouse design lets light in; and when this light is absorbed by objects inside the greenhouse and turns to heat energy, it is not permitted to escape. The air temperature in the greenhouse will exceed the outside temperature. If it gets too hot, all you have to do is open up some of the ventilation panels (or just open the door, depending on the design) and the temperature will drop. Greenhouses are able to regulate temperatures – temperature fluctuations can stress plants and slow growth.
Pest Control: As most greenhouses have a pretty good covering over all the structure, pests can’t get in as easily as they could if your plants were just out in the open. This also applies to seeds and even pollen from unwanted plants (such as weeds).
Ability to control humidity: The air-tight covering on a greenhouse causes it to become quite hot and humid inside during the day time. The moisture evaporating from the soil, and the moisture given off by photosynthesizing plants (transpiration) fills the air. Once the air is very humid, it becomes harder for plants to lose water through evaporation, and likewise with the soil. This helps to keep everything from drying out on a hot sunny day. Therefore, it is essential to have air circulation to exhaust excessive humidity and regulate air exchange.
 Stealth: Nosey neighbors will have their view obstructed by your greenhouse if you choose to use slightly shaded glass/plastic, which still lets enough light through for strong plant growth, but is opaque enough as to obscure vision from the outside.
Protects your plants from adverse weather conditions: Storms can’t blow your plants over and tear them to shreds when they’re safely inside your greenhouse! Also helps protect plants in areas where frosts are common. Excessive rain can cause powdery mildew and mold that can affect the final crop.
Other Advantages: Every plant is made up of cells. Every cell has hundreds of chemical reactions taking place inside it at every moment of the day. These reactions would be very slow, if it wasn’t for enzymes. Enzymes act as catalysts for all the chemical reactions taking place in cells (including photosynthesis).
Best Stealth Grow Box: Dealzer Grandma’s Secret Garden 3.0
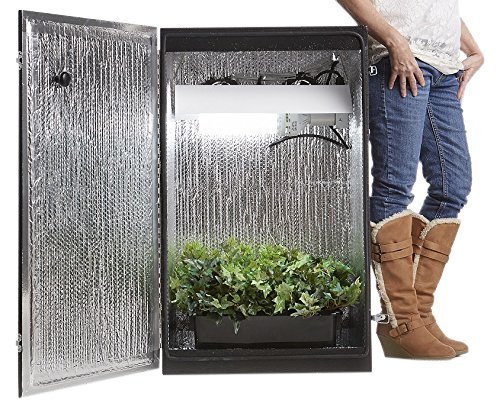
https://420bigbud.com/best-grow-box/
Enzymes work best in certain pH’s and temperature ranges, depending on the type of enzyme. Too high or low pH, and the enzymes will work slower than normal, or might even denature (die). Too low a temp, and the enzymes will also not function to capacity, and too high results in them being denatured. Warm, but not hot temperatures, usually result in maximum enzyme efficiency (which means faster plant growth). Having perfect temperatures is like super-charging your plants!
Higher humidity helps slow the rate of evaporation from soil and plants, as the air already has a large amount of water suspended in it. Plants use water during photosynthesis; so they need a constant water supply during sunlight hours. Having to battle with high evaporation rates is something they don’t want! By lowering this, it enables the plants to photosynthesize more without losing water to the point of their leaves wilting.
A greenhouse is a great idea for outdoor growers who live in cold climates, or areas where pests and security are major concerns. It also helps hide your crops from anyone who may be having a quick look over their fence. If you want maximum control of your outdoor grow, a greenhouse is an absolute essential part of your garden!
The Disadvantages of Greenhouse Growing
This is actually a trick section – there really aren’t any disadvantages to greenhouse growing! Growing in a greenhouse is just like a regular outdoor grow, except you have much more control over it. The one thing I would say might be a bit disadvantaging would be the humidity. It may increase the risk of mold on your buds. This is easily fixed by opening the greenhouse up a bit and letting some more fresh air in. If you’re paranoid about mold attacking your plants in a greenhouse, you can use Potassium Silicate to protect your plants, which is easily available at most gardening/hydroponic shops.
Greenhouse Construction
Greenhouses don’t always have to be made out of glass. Many modern greenhouses are made of plastic, or specialized materials. These materials come in a variety of color, size and thickness. Choosing materials carefully will ensure you have the best greenhouse for your situation.
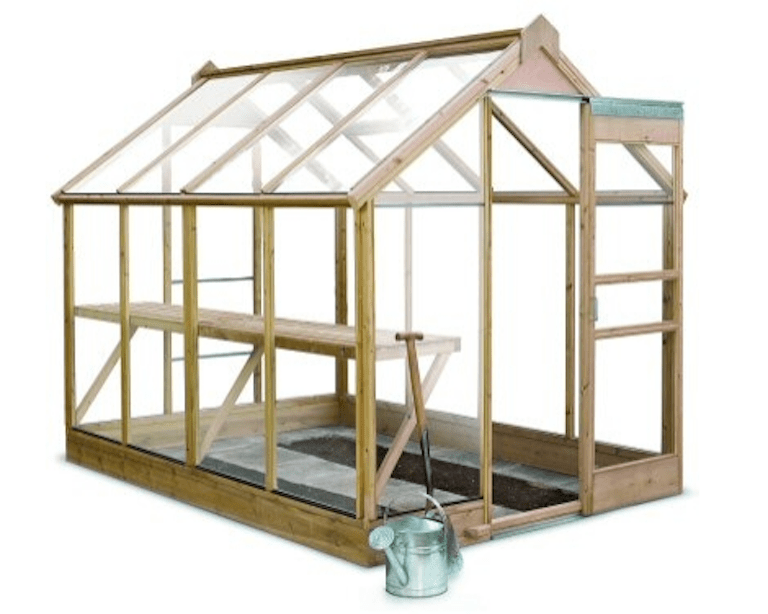
Greenhouses can be simple do-it-yourself jobs using some timber and a drill, or poly tunnels using poly tubing and some polythene sheets. They can also be large custom built structures, using metal and concrete. For most people, a small DIY greenhouse (about 10-20 square meters) will do just fine.
When growing in a green house it is important to conceal it. Disguise your greenhouse as a tool shed, or similar structure, by using only one wall and a roof of white opaqued plastic, PVC, Filon, or glass, and using a similar colored material for the rest of the shed, or painting it white or silvery, to look like metal. Try to make it appear as if it has always been there, with plants and trees that grow around it and mask it from view while allowing sun to reach it.
Note: Depending on the size, and construction of the greenhouse, you may or may not need permission from local authorities.
Filon (corrugated fiberglass) or PVC plastic sheets can be used outside to cover young plants grown together in a garden. You can buy the clear greenhouse sheets, and opaque them with white wash (made from lime) or epoxy resin tinted white or gray and painted on in a thin layer. This will pass more sun than white PVC or Filon, and still hide the plants. Epoxy resin coats will preserve the Filon for many more seasons than it would otherwise last. It will also allow you to disguise the shed as metal, if you paint the clear filon sheets with a thin layer of resin tinted light gray. Paint will work as well, but may not protect as much. Be careful to use only as much as needed, to reduce sun blockage to a minimum.
Final Words
With adequate sunlight, sufficient watering, pest protection, proper feeding, a secure grow area, and plenty of fresh air; your cannabis plants will grow through their entire life cycle beautifully with an abundant quality harvest. Once you reach the end of your plant’s flowering season you will be ready to harvest your plant and enjoy it’s tasty rewards.