Category: Indoor

  • How to Repot a Plant: 8 simple steps re-pot your cannabis plant? (Updated for 2023)

    What is repotting & Why is it necessary?

    Repotting does not simply cover the aspects of changing a plant container but also handles the phenomenon of transplants, adaptation of the new plants to the local or artificial environment or providing these plants with the conditions that suit them well for their optimum growth. It also involves changing the size of the containers as per their growing needs along with the potting medium, growing mixtures and fresh nutrients to maintain smooth growing in your garden. Generally, plant seedlings need congested environment and little inputs while you are growing to raise nursery through seeds but they need more efficient growing medium, spacing, light, water and nutrients as they grow older due to competition within the plants and they need to be transplanted or repotting to the new environment that fulfills their increasing needs of space, light, water, and nutrients to grow and develop successfully.
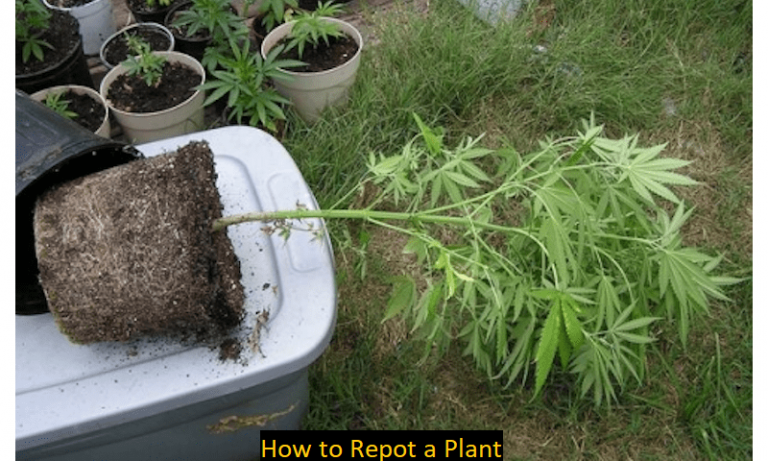
    Usually, gardeners need nursery trays when they are supposed to make a start while growing from the seeds. Success depends on the type of conditions and practices adopted during growing. After it is done, they need to be shifted to new pots and ultimately transplanted into the garden soil or grow room when they are mature enough to bear the stress and climatic conditions of the open gardens.

    Why do pots need to be changed?

    If you notice one of these symptoms in your potted plants, then they are in the position that their pots may be changed with the relevant size.

    • Roots of the potted plants are emerging out of the drainage hole located in the basement of the pot or container whereas your plant remains root-bound.
    • Roots are seen near the stem of the plant and are in a position to push up the plant, out of the container is another case of root-bound plants.
    • The growth of the potted plant is below the average level.
    • The top of the plant grows so heavy that there are chances to fall the plant along with potter.
    • The plant doesn’t retain moisture and dries out in the quick successions.
    • Plant growth has exceeded the three folds more than the height of the pot.
    • The deposition of salts or minerals takes place on the surface of the growing media or on the stem of the potted plants.

    Repotting is required every year in the perennials while some slow-growing plants may spend the entire life cycle in the same container or pots such as Bromeliads in the indoor environment. Early spring is always the preferred time to repot Plants in the tropical strains while late autumn is best for the evergreen plants and shrubs if you want to grow them indoor.

    When to re-pot your Cannabis plants?

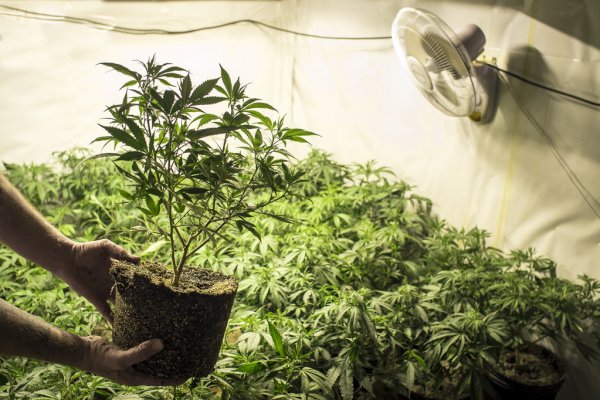
    The best repotting and transplanting time in the Cannabis is also early spring prior to starting new growth. Starting with the seeds and gradually exposing the seedling and plants to the bigger pots and severe climate is more beneficial than starting the seeds in the bigger containers, right away. Complete darkness favors maximum sprouts and root development due to geotropism. The main root also gives rise to fibrous roots and tertiary roots that absorb water and nutrients from the media for the growth and development of the entire plant. The problem arises with the small containers that roots are exposed to absorb air and light from their naked portions and move to a new direction to form a new root system that expands to form the root ball while on touching the base of the pot or wall it gets the shape of the container and becomes root bound. Rootball may sit into the base of the pot and adopt its shape limiting the absorption of moisture and nutrients necessary for plant growth and development. The roots and of the Cannabis stop growth and uptake of the nutrients become deficient that triggers the plant to become root-bound. Now the question arises when Is the Right Time to re-pot a plant? This is the exactly before your Cannabis plants are feared to be root bound and there are chances that they may stop further growth & development in an old pot. Transplant them or repot your Cannabis plants into the bigger pots, they were already growing. If you want your Cannabis to be happy and start its growth vigorously, move your rooted plants to the 3 times bigger pots they were growing already. This may increase the chances of survival and let the roots and foliage develop to its maximum potential by absorbing much-needed moisture and nutrients from the bigger area. Root hair will develop more quickly and your Cannabis plant will adopt the new growing medium and space to establish, shortly. Providing Cannabis more space to grow, maybe more rewarding to encourage the health and vigor of the transplanted plant in the shortest possible time. New-season will allow your plant to perform much better than in the root-bound space.

    How to Choose the Best Pot for Plant?

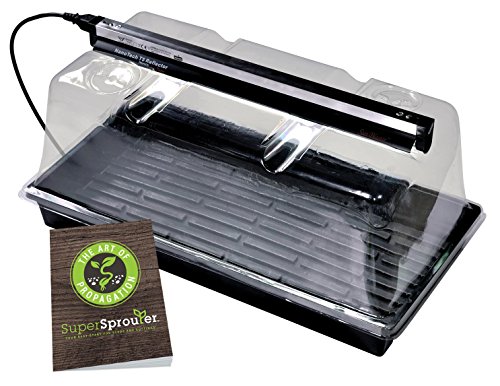
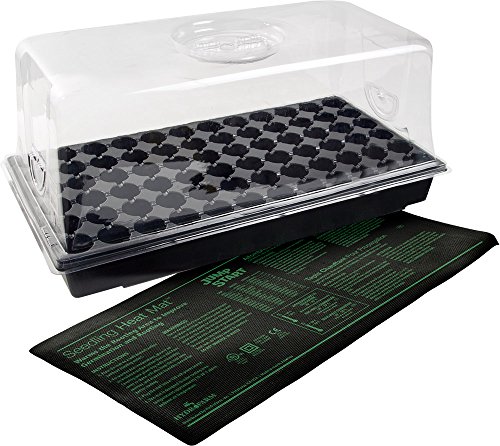
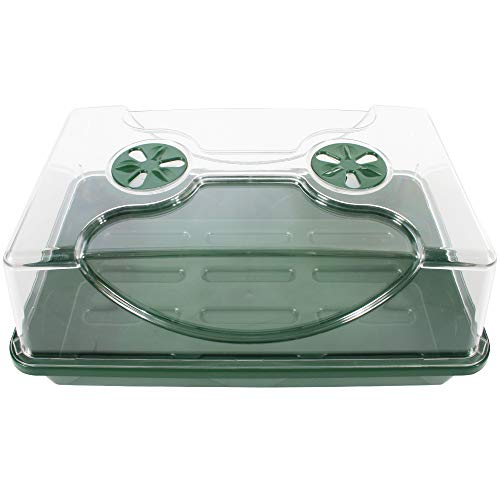
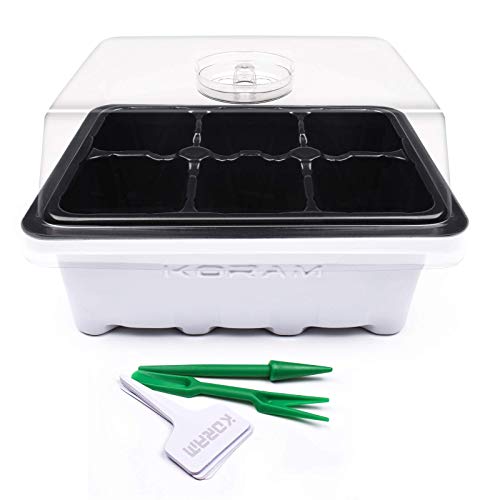
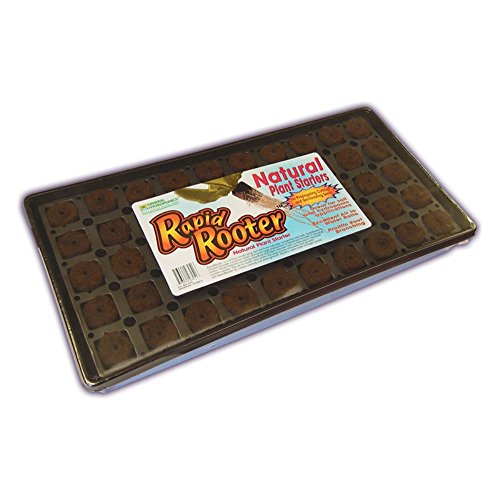
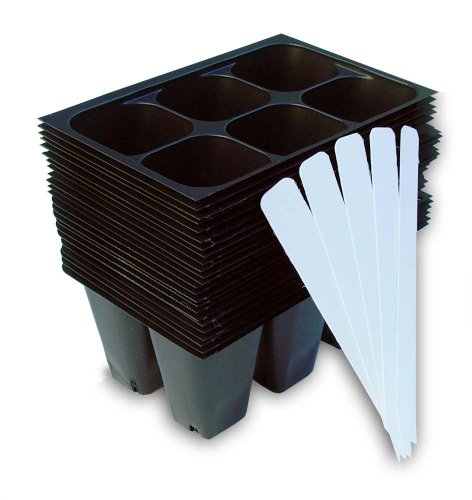
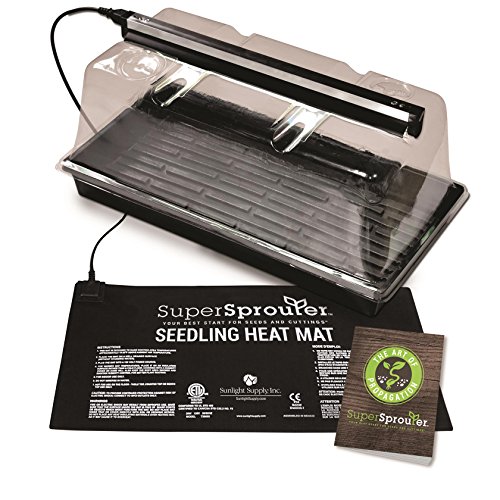
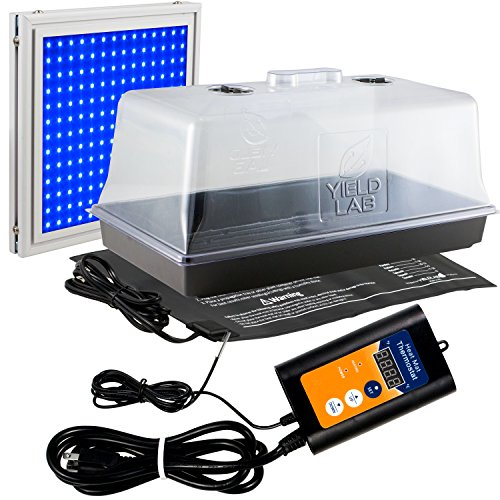
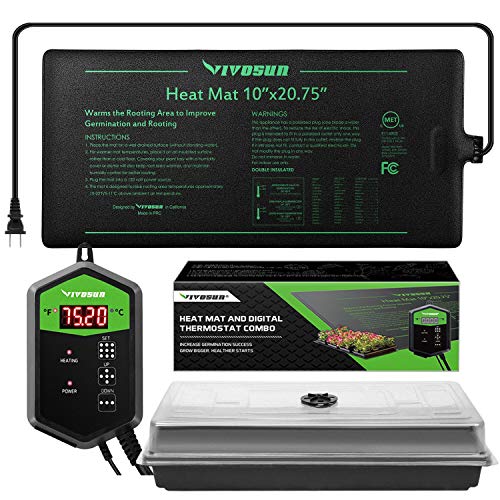
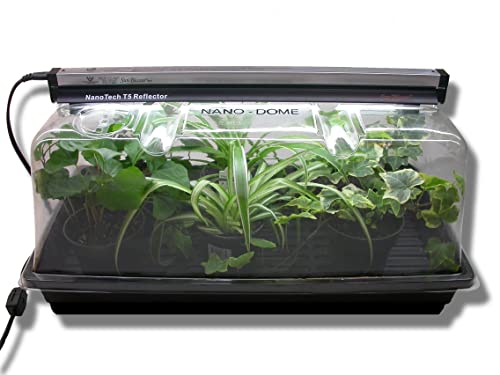
    You need to select 3 different types of pots in the growing process. Starting with the seeds, they must be sowed in the seedling trays or Solo cup that can keep plants erect and provide the basic essential nutrients until plants grow to the 5-leaf stage. The cup must be capable of holding the newly emerged plants even if the transplanting is delayed for a couple of days. Mini Propagator Plant Grow Kit looks ideal for this purpose.
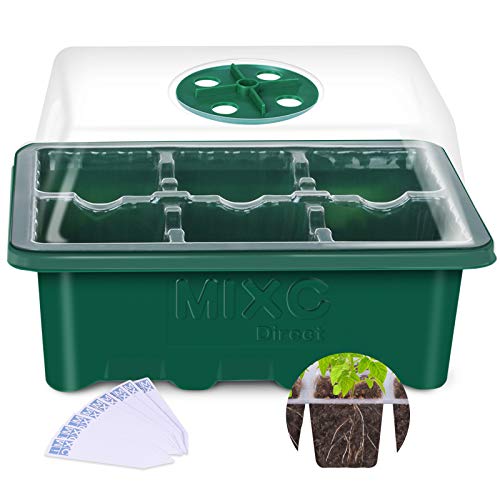
    while for the Solo cups.
    This 4 to 5th leaf stage seedling must go into a bigger pot probably 1-gallon size where it should grow up to 20-25 leaves for further transplant into the bigger containers depending on the variety and conditions available. It is worth remembering that the Cannabis plant needs 2 gallons of potting soil for vegetative growth of 12 inches approximately. For premium 1-gallon & 2-gallon pots on amazon.
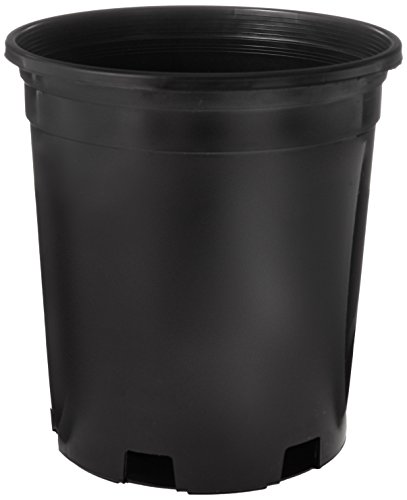
    And 2-gallon pots.
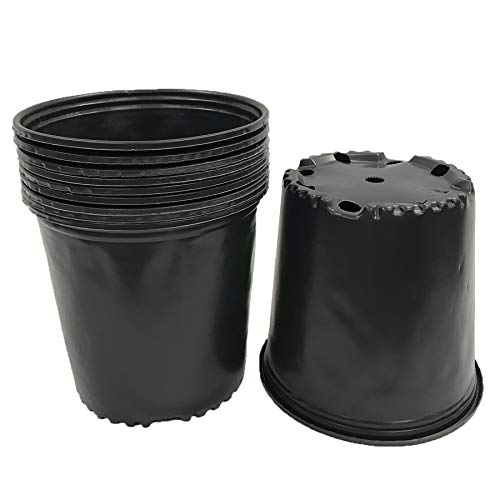
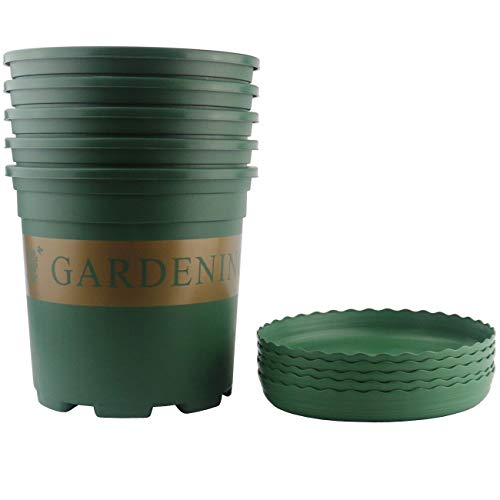
    Generally, the third container or pot is the final place that holds the plant until it matures and shows it bloom. These pots are usually bigger in size (up to 5 gallons) indoors and even bigger if you are supposed to place it outdoor or other options include to transplant the ready plant direct into the well-prepared garden soil. Ogrmar 5 Gallon Durable Nursery Pot/Garden Planter Pots may be the best choice in the bigger pot category.
    How to Re-pot a Plant (step-by-step)

    #1 Step 1

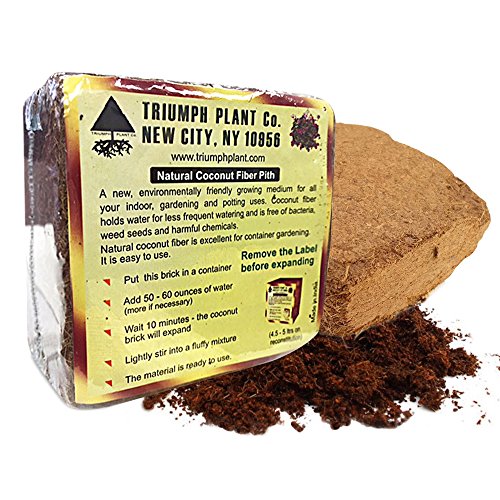
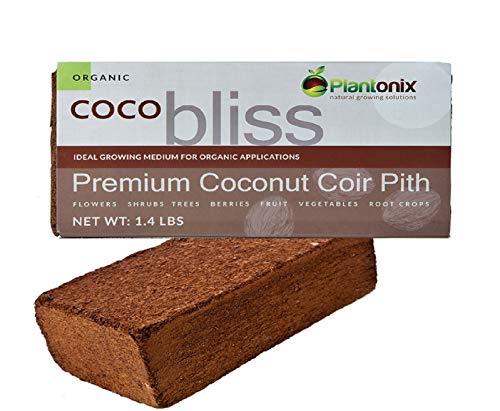
    Initially make holes in the bottom of Solo cups, otherwise, nursery trays have already few holes underneath. Select a growing medium such as coco peat, coco coir or potting mix and fill your grow cups with a suitable mix. Plantonix Coco Coir Brick would be a better choice for organic Cannabis growers.
    #2 Step 2

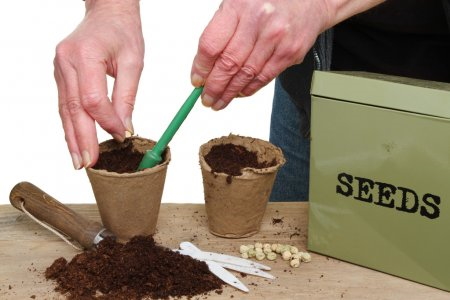
    Start seeds directly into the nursery trays or use a Solo cup to sow 1 seed per cup. If you are using a nursery tray then place 1 seed per hole into the potting mix about 0.5 inches deep in the growing media and push gently after putting growing mix to the upper surface of seeds.
    #3 Step 3

    Place Solo cups under shade or in a dark place that maintains the temperature between 71.0 °F to 80.0°F and keep it soggy till the germination starts. The germination site must be fully ventilated as well.
    #4 Step 4

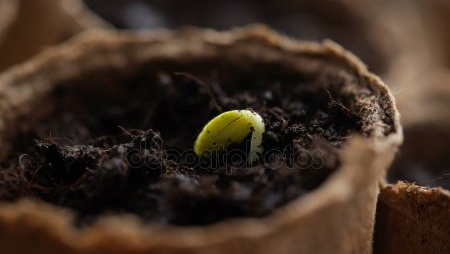
    Seed germination is initiated on 3rd day while they must complete the germination process in about 5 days if the seeds were viable and healthy.

    #5 Step 5

    Don’t water until the germination is fully completed.

    #6 Step 6

    Apply very little watering and Let the sprouts reach 4-5 leaf stage.

    #7 Step 7

    Transfer seedlings into a bigger pot (1 gallon) that would hold them further until they reach 25 leaf stage and gain some reasonable height for out planting or moving into the final stage containers. Keep them watering following regular intervals along with applying essential nutrients needed for their speedy growth.
    #8 Step 8

    Select a suitable indoor location and move into the final pots with a bigger size around 5 gallons for the indoor plants, 10-15 days ahead of the flowering stage. In the case of outdoor planting, choose a well-drained sunny location in the garden.
    Repotting a cannabis plant (step-by-step):

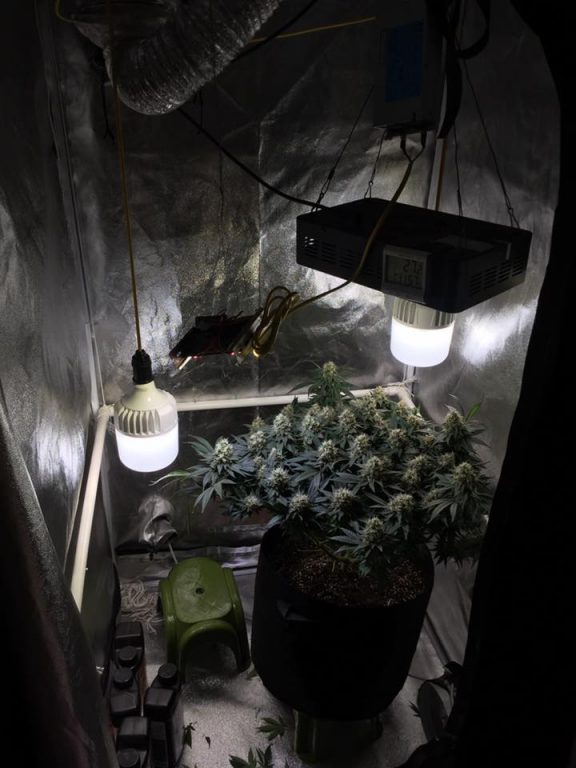
    Flowering starts in around 2 weeks after you are done with the final transplant and time to be patient and take care of your plants by giving them well-suited nutrients and watering them as and when needed.

    How to take care of a cannabis plant after repotting?

    There are several factors that work side by for the successful growth of the Cannabis plants indoors and in the out gardens that include temperature, moisture, oxygen along with nutrients and a balanced pH. Under ideal conditions, Cannabis will grow vigorously to yield awesome harvests for you while you are in charge of yourself to handle and monitor these factors if you are growing indoors.

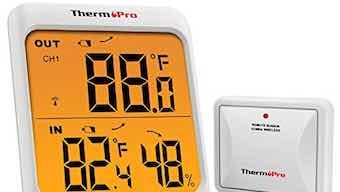
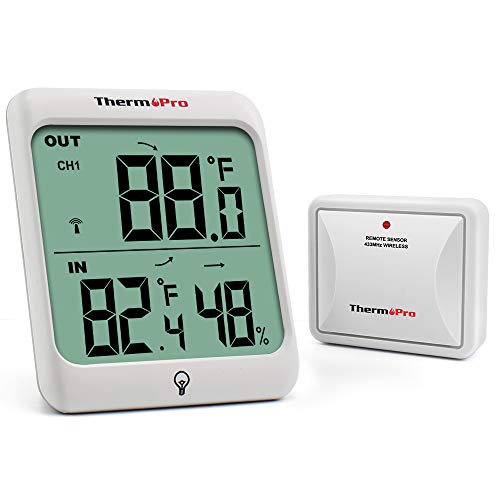
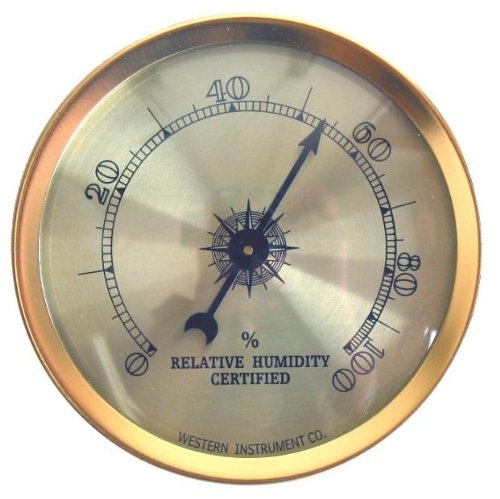
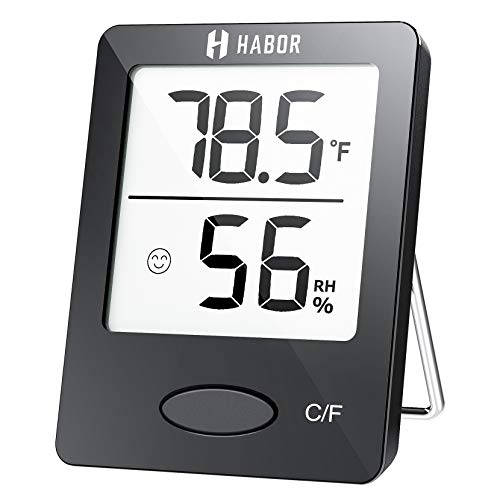
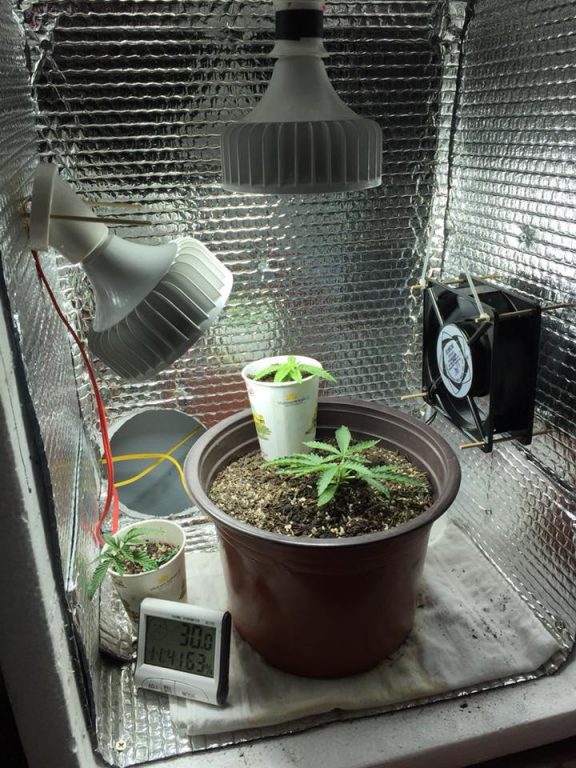
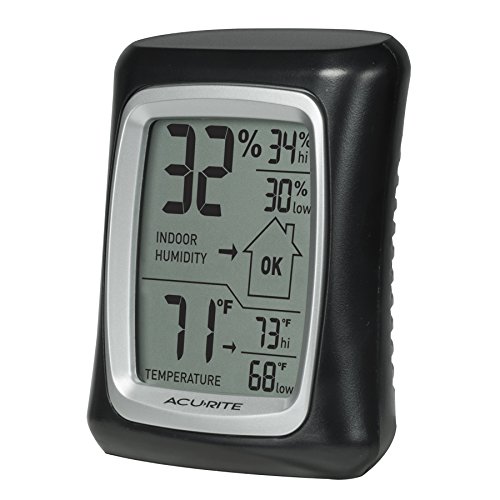
    • Cannabis plants are adaptable to grow between the temperature ranges of 68–86°F during its life cycle while a slightly low temperature is favorable during the flowering stage. You can have a portable single device that measures both temperature and humidity like AcuRite 00325 Indoor Thermometer & Hygrometer with Humidity Gauge.
    • Cannabis plants love hot, humid conditions that’s why they need to be continuously watered for the good harvest. Roots are prone to injury when they don’t have sufficient moisture to absorb nutrients and convey them to the parts of the plants where needed. Good moisture is the guarantee that the plant will keep on growing smoothly and perform better.
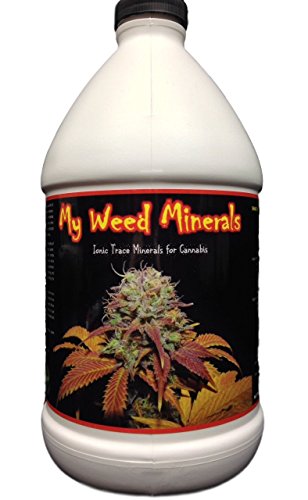
    • Nutrients are the next that are derived from the potting mix or soil in the presence of good moisture and conveyed to the different parts of the plants. Apply suitable nutrients that plant absorbs instantly and reflects towards its growth. Vegetative growth and budding are dependent on the availability of nutrients in the root zone. My Weed Minerals would be the best micronutrient for root growth and successful budding.
    • Oxygenate roots by using permeable growing media that provides maximum Oxygen to the root zone for rapid and smooth growth.
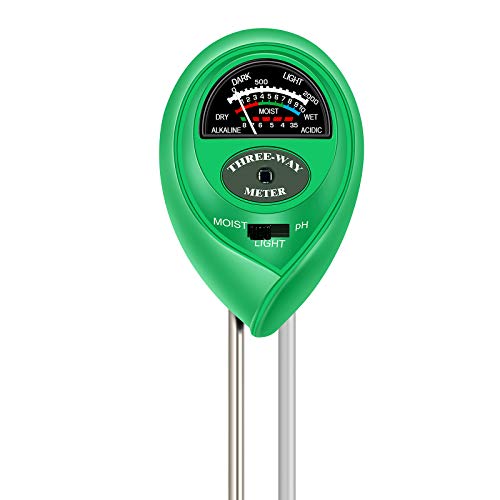
    • A pH of growing media is as important as all the above 4 factors because the actual uptake of water and nutrients takes place only if the pH of the growing media or soil is optimum. Cannabis does well in slightly acidic media in the range of 6 to 6.9. Correct the pH of the growing media from time to time and enjoy lovely sprouts and healthy plants indoor and outdoor.

    Atree Soil pH Meter, 3-in-1 stay no.1 gardeners’ choice for indoor & outdoor pH measurements.
    Benefits of repotting plants

    The process of repotting gives a new life to the microclimate and the plants that enjoy the luxury of having new potting mixtures, more space to grow, more oxygen to absorb for their roots system along with ample supply of moisture for the longer periods and added nutrients to grow successfully. They enjoy colossal health and protection from the root borne diseases and pest attacks. Poor media is replaced while they get fresh nutrients and microclimate for further growing into that media without the addition of extra nutrients. Do remember that the Cannabis plant needs heavy feeding along with abundant moisture supplies throughout their growing period that can be applied through slow-release water-soluble fertilizers and micronutrients to the growing media.

    Is a root-bound cannabis plant always unhealthy?

    Root-binding could be a serious issue before or during flowering as it may decrease your yield drastically. Buds, leaves and stem growth may become distorted that may lead to Cannabis death. Roots do not simply anchor plants but root hairs absorb nutrients and moisture from the growing media that adds into the vegetative growth of the Cannabis plants. When plants become round bound, an immediate transplant becomes necessary to keep your plant growing in the bigger media where they would increase their fibrous root system to provide nutrients supply to the plant foliage. Things will improve while plats come out of the round bound effect once you have moved your Cannabis plants to the bigger pots with fresh nutrients supply and provided them more space to grow.

    How do cannabis plant roots grow?

    After the germination starts, roots are the first part of the plant that comes intact with the potting mixtures and start searching for food through absorption. The expansion in the roots is directly related to the vegetative growth of the plant that is dependent on the conditions to which roots are exposed in any growing media and their capacity to absorb water and nutrients that are in turn transported for the vegetative growth of the plants while the root expansion takes place by developing secondary and tertiary root system. Whenever there is some hindrance in further development in the roots due to space or limitation of moisture, nutrients, oxygen, and imbalance in the pH of the growing media the Cannabis plants become root-bound and stop further growth that decreases the bud formation and retards flowering resulting in the bad harvests.
  • Top 5 Portable Air Conditioner for Grow Room: Best Window AC 2023

    With the legalization of the Cannabis industry to grow it for medicinal and recreational purposes, its cultivation without the sunlight in the indoor environment gets popular among home growers and hobbyists in the world. No doubt, cannabis was under cultivation for thousands of years as a fabric crop which, now emerges in its new form as a stable, recreational, and medicinal crop. Growing cannabis indoor emerges as a phenomenon during the last two decades where growers need to regulate several factors for establishing a good crop stands.

    Several indoor growers keep their efforts to regulate humidity and temperature in the growing environment where they install several heating devices, ventilation, and air conditioning systems without integrating with the required conditions that suit plants\’ growth. Plants need variable temperature and humidity during different stages of the growth, where conventional air conditioning equipment couldn\’t manage to regulate indoor moisture needs, and they additionally install dehumidifiers to evaporate moisture load.

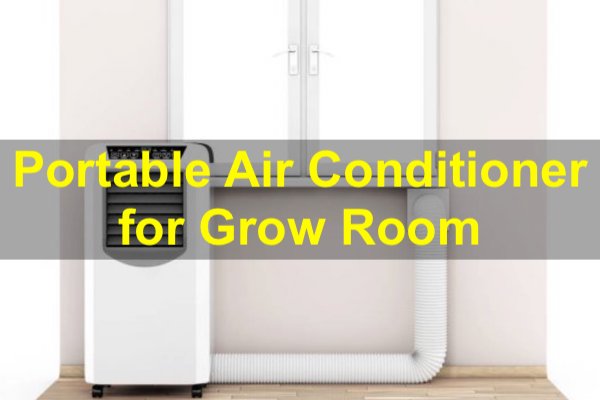
    Installing a small grow room air conditioner is also a common practice for indoor cannabis cultivation. Initially, such practice fails to regulate the precise humidity and temperature and become a burden in the shape of maximized electricity bills due to a lack of information on the power consumption and the area which grow room air conditioning cover.
    Indoor environment regulation only suits well if it could minimize the power consumption of all operating systems. Which, in turn, provides an optimal growth environment for indoor plants, especially cannabis.

    The confusion while installing an HVAC or only a portable air conditioner for the grow room arises when the growers have limited information about such systems, their electricity consumption, and the growing conditions and agronomy that cannabis needs for its growth and development. Since the growing practices continue in the tight spaces in urban areas, it becomes important to know the right growing conditions besides knowing the cooling equipment that suit to all sort of indoor growing spaces of varying capacity.

    Only a well-balanced equation on both cannabis potential growth and the systems that help us to regulate indoor growth environment is important. The grow room air conditioners could lower heat, ultimately reducing the humidity, which is an outcome of heat produced by the lights installed to keep up cannabis physiological processes. Here are a few features that every grower needs to check before buying a grow room ac unit or a portable ac for the grow room.

    Features to Study When Buying Air Conditioner for Grow Room

    #1 Air Conditioner Types

    If your grow room measures around 500 square feet, then it is advisable to install a split type air conditioner as a permanent fixture. Window ac for grow room is also another option for a permanent fixture. But, a portable ac for grow tent or small grow room meets the entire humidity and temperature needs for growing cannabis.

    #2 Cooling Vs. Coverage

    The cooling power of the air conditioner measures in BTUs. The higher the BTU\’s more area it will cover and the more power it consumes.

    #3 Weight & Size

    Whatever the type of your air conditioner is, it should meet the growing requirements of your cannabis. Moreover, mounting at a suitable location according to weight and size is also preferred.

    #4 Energy Efficiency

    Also, consider the Energy Efficiency of your grows room ac units. Air conditioning units with greater EER are more prolific and efficient.

    #5 Hot Air Exhaust

    Often, air conditioners release hot air during the cooling process. Look for the proper air exhaust arrangements so that the hot air gets out of the grow room sufficiently. Air conditioners with dehumidifying features could keep the grow room cooler compared to the conventional AC\’s.

    #6 Voltage

    Check electricity volts that your power distributor supplies to your site. There might be a regulator to switch between the volts supplied.

    #7 Performance

    Be sure that the selected air conditioner holds the following additional features for your ease and plants\’ comfort. Heating options for winter, a switch for regulating grow room temperature and humidity, remote control, multiple fan speeds, and a timer to run the system for desired intervals.

    #8 Easy to Install

    Grow room air conditioners need periodic air filter cleaning and draining, in case you install a portable air conditioner. Be sure that the selected units are easy to install, mount, and maintain.

    #9 Warranty

    Check both compressor and parts warranty. Usually, the manufacturers offer 3 to 5 years\’ compressor and 1-year parts warranty. A long-yearly warranty could save you from the repeated expense.

    Best Portable Air Conditioner for Grow Room

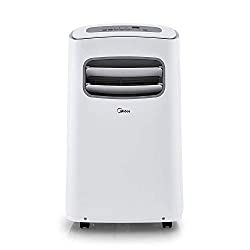
    #1 Midea-EasyCool Portable Air Conditioner 12000 BTU

    Midea Air Conditioner serves all three purposes in a grow room measuring up to 300 square feet. It has excellent cooling, heating, and dehumidification features. It easily adjusts temperature between 62 and 82 °F that appears on display. Midea air conditioner incorporates three fan speeds that could easily from the remote control. An auto button allows you to adjust the desired temperature range and its wheels allow you to move this unit easily anywhere in the grow room. Moreover, it shows an indication when the filter needs changing. Here is a link to check the detailed specs of this air conditioner;

    #2 Whynter-ARC-14S with Activated Carbon Filter (14000 BTU)

    The Whynter ARC-14S comes with an activated carbon filter and dual hose and is typically designed for small grow spaces of about 500 square feet. Its auto drain technique permits it to cool the environment with recycled water, and the dual hose triggers cooling in this process. It also works as an air conditioner, fan, and dehumidifier. Washable pre-filter and activated carbon filters improve the air quality of the grow room. It allows the programming of the entire features for the next 24 hours. The thermostat could adjust the temperature between 61– 89°F whereas, the exhaust hose could extend up to 60 inches. Its dehumidification feature could transpire 71 pints of water a day if run on full capacity.

    This link allows you access to full features of ARC-14S;

    #3 Pioneer-WYS Series 19 SEER Inverter (9000 BTU)

    WYS 19 Inverter is highly efficient, and its performance is superb. It\’s a perfect choice for a 200-350 square feet grow room where it could cool, heat, dehumidify and ventilate efficiently.

    WYS 19 Inverter System contains an indoor unit (Ductless), outdoor unit, installation kit, and remote control and manage to get a temperature range between 62-90°F. Pioneer also offers remote access and programming option via the internet but, that sells separately. Pioneer is an ideal system for installing into a small grow room with higher efficiency. It operates on multiple voltages and SEER rates between 18-19.5. Additionally, an auto-switch mode makes its operation automatically through an onboard system. Overall, WYS 19 Inverter weighs only 120 pounds.
    Here is the link to see rating and customer’s reviews;

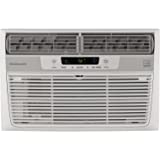
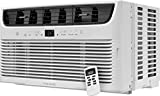
    #4 Frigidaire-Window-Mounted Mini-Compact Air Conditioner (5000 BTU)

    A system for clean and cold air for 150 square feet grow room as it uses antibacterial mesh in the filter to clean air by removing all harmful bacteria and fungi from a grow room. It operates smoothly without making any noise using dual directional air control. It could easily mount on the window. Mini compact AC holds a rotary process and a washable filter. It comes with remote control and two fans, and two cooling speeds. A user manual contains complete installation and operating procedures. It could suit a grow tent of a similar size as well. Detailed specifications are available on this link;

    #5 JHS-small Portable Air Conditioner (8000 BTU)

    It\’s another small portable AC that covers 200 square feet of grow space in a small grow room or grow tent. It hardly weighs 44 pounds with all its accessories, including unit weight, exhaust hose, window kit, remote control, owners\’ manual, and a drainage kit. It also allows 24 hours\’ advance adjustment along with several advanced features at an economic price. Its filter could wash easily using water and a cloth. JHS offers a one-year warranty on compressors and other body parts.

    More features and customer\’s reviews are available online through this link;

    #6 Best AC for Grow Tent (6000 BTU)

    BLACK DECKER – Best Portable AC for 4×4 Grow Tent
    It\’s an ideal cooling system for a 4×4 grow tent and provides efficient cooling between 100 to 150 square feet area. It weighs only 53 pounds that contains a complete unit, remote control, and other accessories, including a user\’s manual. It\’s a small unit that will keep your cannabis plants dry and cool. It would keep your grow tent temperature between the desired ranges of 55 to 81°F. It\’s also quite efficient in reducing grow tent humidity, while filter could wash with water, twice a month for better performance and moisture control. BLACK DECKER combines four features in one place in this unit. i.e., cooling, fan, heating, and humidity control.

    Here is a link for a complete product description and customer\’s reviews;

    Top Sales Product Link Price
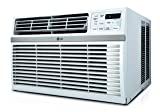
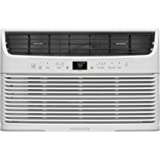
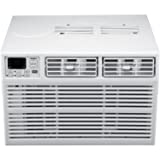
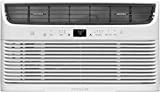
    Top 5 Portable Air Conditioner for Grow Room: Best Window AC 2023 Frigidaire FFRE0833S1 8,000 BTU 115V Window-Mounted Mini-Compact Air Conditioner with Temperature-Sensing Remote Control from $319.00
    Top 5 Portable Air Conditioner for Grow Room: Best Window AC 2023 LG LW6017R 6,000 BTU 115V Window Air Conditioner, White from $239.00
    Top 5 Portable Air Conditioner for Grow Room: Best Window AC 2023 Koldfront WAC10003WCO 10000 BTU 115V Window Air Conditioner with Dehumidifier and Remote Control from $419.00
    Top 5 Portable Air Conditioner for Grow Room: Best Window AC 2023 Koldfront WAC8003WCO 8000 BTU 115V Window Air Conditioner with Dehumidifier and Remote Control from $375.00
    Top 5 Portable Air Conditioner for Grow Room: Best Window AC 2023 LG LW8016ER 8,000 BTU 115V Window-Mounted Remote Control Air Conditioner, White from $239.00
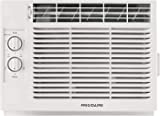
    Top 5 Portable Air Conditioner for Grow Room: Best Window AC 2023 FRIGIDAIRE White FFRA051ZA1 17″” Window Air Conditioner with 5000 BTU Cooling Capacity-115V from $249.95
    Top 5 Portable Air Conditioner for Grow Room: Best Window AC 2023 LG LW1817IVSM 18,000 BTU Dual Inverter Window Air Conditioner, 230V, Remote Control, White from $744.00
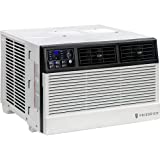
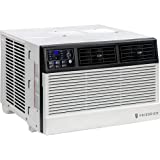
    Top 5 Portable Air Conditioner for Grow Room: Best Window AC 2023 Friedrich Chill Premier 8,000 BTU Smart Window Air Conditioner with Built-in WiFi, 8000, White from $329.00
    Top 5 Portable Air Conditioner for Grow Room: Best Window AC 2023 Frigidaire FFRE0633U1 6,000 BTU Window-Mounted Room Air Conditioner, White from $437.99
    Top 5 Portable Air Conditioner for Grow Room: Best Window AC 2023 Frigidaire FGRC1044T1 10000 BTU Cool Connect Smart Window Air Conditioner with Wifi Control from $409.99
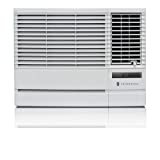
    Top 5 Portable Air Conditioner for Grow Room: Best Window AC 2023 Friedrich Air Conditioning Co. Chill Series, CP08G10B Air Conditioner 8,000 BTU Air Conditioner, White from $469.99
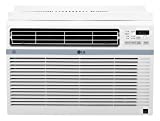
    Top 5 Portable Air Conditioner for Grow Room: Best Window AC 2023 LG LW8017ERSM Smart Window Air Conditioner (Wi-Fi), 8,000 BTU 115V, White from $319.85
    Top 5 Portable Air Conditioner for Grow Room: Best Window AC 2023 Whirlpool Energy Star 6,000 BTU 115V Window-Mounted Air Conditioner with Remote Control from $289.99
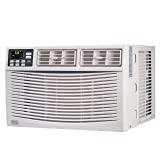
    Top 5 Portable Air Conditioner for Grow Room: Best Window AC 2023 BLACK+DECKER BWAC08WT 8,000 BTU Energy Star Electronic Window Air Conditioner with Remote,White from $294.64
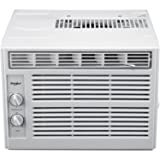
    Top 5 Portable Air Conditioner for Grow Room: Best Window AC 2023 Whirlpool 5,000 BTU 115V Window-Mounted Air Conditioner with Mechanical Controls from $159.99
    Top 5 Portable Air Conditioner for Grow Room: Best Window AC 2023 Frigidaire FFRE083ZA1 19″” Energy Star Window Mounted Air Conditioner with 8000 BTU Cooling Capacity 115 Volts in White from $317.00
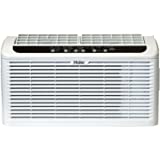
    Top 5 Portable Air Conditioner for Grow Room: Best Window AC 2023 Haier ESAQ406T 22″” Window Air Conditioner Serenity Series with 6,000 BTU 115V W/ LED remote control in White from $299.95
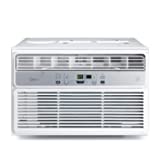
    Top 5 Portable Air Conditioner for Grow Room: Best Window AC 2023 MIDEA EasyCool Window Air Conditioner – Cooling, Dehumidifier, Fan with remote control – 12,000 BTU, Rooms up to 550 Sq… from $359.00
    Top 5 Portable Air Conditioner for Grow Room: Best Window AC 2023 Friedrich CCF05A10A 16″” Air Conditioner with 5000 BTU Cooling Capacity 115V in White from $269.00
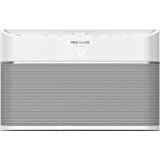
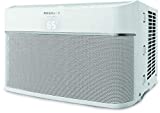
    Top 5 Portable Air Conditioner for Grow Room: Best Window AC 2023 Frigidaire Gallery 8,000 BTU Cool Connect Smart Room Air Conditioner with Wi-Fi Control from $289.95
    Top 5 Portable Air Conditioner for Grow Room: Best Window AC 2023 Friedrich Chill Premier 6,000 BTU Smart Window Air Conditioner with Built-in WIFI from $295.00
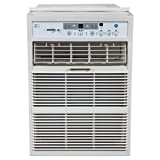
    Top 5 Portable Air Conditioner for Grow Room: Best Window AC 2023 PerfectAire 10,000 BTU Slider Air Conditioner Window A/C – Casement, 10000, Gray from $522.64
    Top 5 Portable Air Conditioner for Grow Room: Best Window AC 2023 Friedrich Chill Series CP15G10B Room Air Conditioner, 15,500 BTU, 115v, Energy Star from $1,099.99
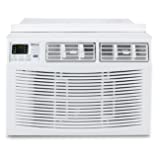
    Top 5 Portable Air Conditioner for Grow Room: Best Window AC 2023 Della 10000 BTU Window Air Conditioner 1050W, 110V/60Hz, 12.1 (EER) Energy Star Efficient Cooling Rooms up to 450 Sq. Ft… from $349.96
    Top 5 Portable Air Conditioner for Grow Room: Best Window AC 2023 LG LW1016ER 10,000 BTU 115V Window-Mounted AIR Conditioner with Remote Control from $602.94
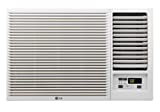
    Top 5 Portable Air Conditioner for Grow Room: Best Window AC 2023 LG 12,000 BTU 230V Window-Mounted AIR Conditioner with 11,200 BTU Heat Function from $581.03
    Top 5 Portable Air Conditioner for Grow Room: Best Window AC 2023 FRIGIDAIRE FFRE063ZA1 Window-Mounted Room AC, White from $254.55
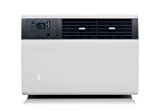
    Top 5 Portable Air Conditioner for Grow Room: Best Window AC 2023 Friedrich Kühl Series SQ06N10C Room Air Conditioner, 5,800 BTU, 115v, Energy Star from $1,011.71
    Top 5 Portable Air Conditioner for Grow Room: Best Window AC 2023 Frigidaire 5,000 BTU 115V Window-Mounted Mini-Compact Full-Function Remote Control Air Conditioner, 5000, White from $229.00
    Top 5 Portable Air Conditioner for Grow Room: Best Window AC 2023 Whirlpool Energy Star 10,000 BTU 115V Window-Mounted Air Conditioner with Remote Control from $361.99
  • Best Organic Soils 2023: Top 10 Best Organic Potting Soil for Weed

    Potting Soil is used to grow pants in pots or container. It is designed to hole and release water, nutrients, maintain chemically balanced condition that required by plants and weed. Potting soil also provide a reliable and suitable ground for flora to physically anchor themselves. Potting soil is necessary for all potted and container plants, whether they are kept indoors or outdoors.

    Product Name BEST FOR
    1. Burpee Organic Premium Potting Mix Overall Pick
    2. Canna Terra Weedness Canna Terra Erde (Professionell) for Weed
    3. Miracle-Gro Potting Mix for Ph Level
    4. Miracle-Gro Indoor Potting Mix 6 qt., Grows beautiful Houseplants
    for Indoor Weeds
    5. Espoma Seed Starter Potting Mix, Natural & Organic
    for Weed Seed Starting
    6. Espoma Organic Potting Mix for Vegetables
    7. Westland Cacti/Succulent Potting Compost Mix for Succulents
    8. Baccto Lite Premium Potting Mix for Tomatoes
    9. Proven Winners Premium All Purpose Potting Soil for Flowers
    10. Perfect Plant Organic Potting Mix for Herbs

    Although the components of organic potting soil are quite the same across all the types, it doesn’t mean that all the potting soils are created equal. For various growth circumstances and plant types, the organic potting soil manufacturers create particular ingredient combinations and ratios. Fertilizer and other additives have a significant impact on overall efficiency and functionality of the soils. Because of the wide range of factors, finding high-quality organic potting soil can be a difficult task.

    There are several varieties of organic potting soil, and the one you choose is primarily determined by the particular types of plant you want to cultivate as well as the location where you place your pots or containers. For any people who are new to cultivate potted plants and indoor weed, here are my top 10 for the best organic potting soils, analyses of major qualities, which types of plants they are ideally suited for as well as some information that can help you pick the appropriate potting soil.

    Organic vs Non-Organic Potting Soil

    There are organic and non-organic options when it comes to potting soil. The following are the primary distinctions between these two types of potting soils:

    Organic

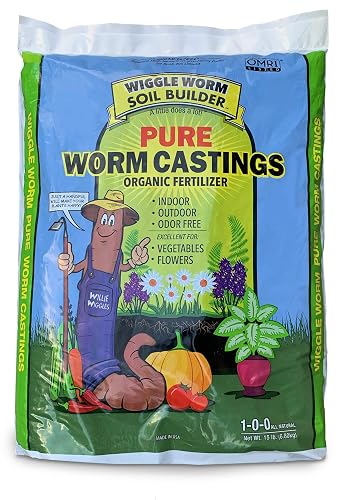
    Organic potting soil is the most common pick for most home-gardeners. This is because it is free from harmful chemicals that might harm your plants. Furthermore, the nutrients in organic blends remain intact, which means they have not been broken down or combined or added with something else, so you can totally rest that your plants can optimum absorb the critical nourishment that they require to flourish from 100% natural components. Organic potting soil mixtures frequently contain the following ingredients: Worm castings, Natural compost, Mushroom compost, etc.

    Non-organic

    Non-organic potting soils are based on a range of components, many ingredients in this are natural and others that are not. Non-organic potting soils often contain the following ingredients: Perlite, Bark, Vermiculite, Peat moss (a kind of moss) etc.

    Furthermore, some non-organic potting soils contain tiny particles of Styrofoam, this ingredient is mixed in to provide to add softness, spongy texture and more space for water and air. While Styrofoam may be successful at this, it contains chemicals that can be detrimental for your plants.

    While organic potting soil is definitely better for growing plants, there is one downside that it is significantly more costly than non-organic soils. While non-organic soils are affordable, please note that the components in them may produce toxic that are hazardous to the development and health of plants.

    Multi-purpose vs specific potting soil: Which is better for potted plants?

    There are the potting soil products that may be used on a broad variety of plants, and these products can typically be used both outside and inside. As they can see in their package, they are usually known as multi-purpose or all-purpose potting soil. They are an excellent choice for those who are a newbie in gardening and if you do not know what potting soil will work with your plants, the multiple-purpose one must be the best option.

    This type of soil also great for large gardens, so you can buy it with a large amount to save money and use for all the type of plants. And in the case when you want to grow a diversity of plants, multi-purpose potting soils will satisfy the nutrition, moisture, and aeration demands of many plant types.

    Some soil products are created with specific goals in mind. Succulents, for example, require light, drainage soil, which can help them maintain the ideal moisture condition. But if the soil is too heavy and holds water too much, it may harm the root network of the succulents overflowed with water and your plants may die. In this case, you will want to use a soil prepared specifically for certain sorts of plants rather than an all-purpose one.

    Some types of plant require specific nutritional, oxygenation, and hydration. As a result, it is critical that you examine the exact sorts of plants you intend to cultivate.

    What makes a Good Potting Soil for Weed?

    Most gardeners would agree that the best soil for potted weed should be dark color, contains proper nutrients, aeration, with a loose texture for drainage but still holds the moisture well without becoming waterlogged.

    When looking for potting soil for weed development, there are some crucial aspects to consider. The products available in the market may be overwhelming, but here are some tips for you to choose the best potting soils that has the proper components.

    One of the most crucial things to remember is that make sure the soil you are purchasing is organic. Once you’ve determined the texture of the soil and the organic product from a reliable brand, check to see if the product has all of the necessary components for both the soil and the weed or not.

    There are some ingredients that organic soil appropriate for weed development comprises: Pest moss, Perlite, Coconut Coir, Sandy Loam, Worm Castings, Dolomite Lime, Fishmeal, Compost, Bat Guano, Plant Food, and so on. Each organic potting soil product have their own ingredients, some will contain most ingredient above and more. The potting soil products I am going to introduce you below are includes most of these beneficial ingredients.

    You should use these potted soils to guarantee an ideal moisture condition and that the soil receives all of the nutrients it requires for continuous growth. Most of these potting soils are adaptable and may be used in green houses, potted plants, and even hydroponics systems.

    Best Organic Potting Soils for Weed

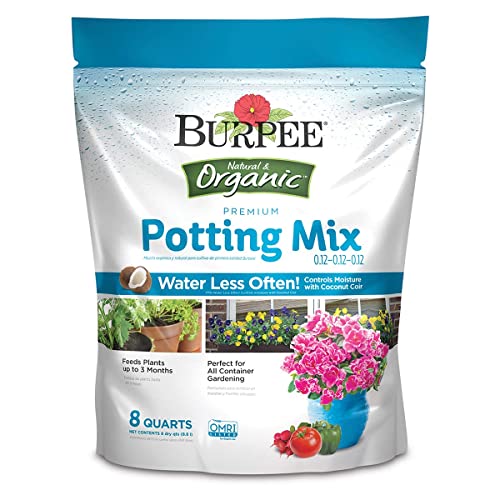
    #1 Best Overall pick: Burpee Organic Premium Potting Mix

    Burpee is well-known as one of the most reliable brands in the gardening industry, and their Premium Organic Potting Soil is proof of that. This potting soil is carefully added with Burpee’s high quality plant food to nourish all species of plants and weed. It provides all necessary nutrients that the weed requires to grow, resulting incredibly magnificent yield as well as tasty, healthy weeds, vegetables and herbs.

    This 100% organic growing soil is loaded with many nutrients vitamins and minerals, as well as coconut coir. Moisture and water is maintained due to the highly absorbent construction, so the soil will always be hydrated and you won’t need to water the plants as frequently. The amount of water retained will be used to nourish the roots, ensuring that the plants grow appropriately. Burpee’s Premium Organic Potting Soil also get rid of bothersome pest.

    Slow-release feeding properties has also been included to help with growth. The nutrients and food are slowly releases to feed your plants and ensure that the plant just receives the quantity it requires to grow. The growing process is accelerated for up to three months, this is also the times that one bag lasts for. The only thing you have to consider is that it is a bit costly than other options.

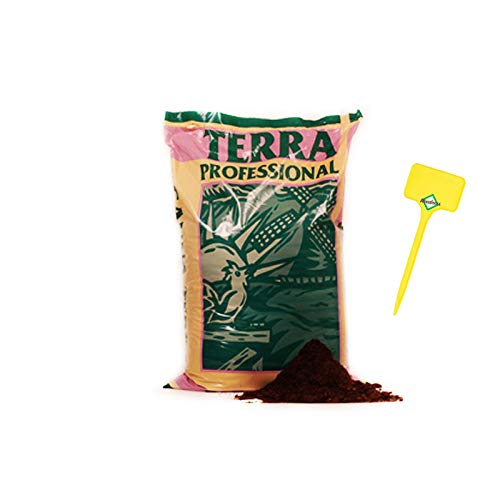
    #2 Best Organic Soil for Weed: Canna Terra Weedness Canna Terra Erde (Professionell)

    CANNA Terra Professional soil is absolutely one of the best organic potting soils for weed. Although it is not commonly accessible in the United States or Canada, growers in the United Kingdom are likely to be more familiar with this potting soil.

    This potting mix contains a rich source of nitrogen, this what make it is well regarded, it is also extremely affordable. Canna Terra has many years of experiences in the industry and they understand very wells about the gardening domain, with thousands of satisfied clients across the UK. They provide many products that you need for grow plants from potting soil to plant fertilizers.

    The organic rich components are what make CANNA Terra Professional potting soil outstanding from other soils for weed. The ingredients of it includes sphagnum moss peat, compost, worm castings, perlite, and natural ingredients to boost plant growth.

    Canna Terra’s potting mix is marketed as the best soil for both indoor and outdoor growing. The high-quality organic components used by CANNA Terra, like airy peat moss, assist to avoid infections and encourage excellent root growth, resulting in stronger stems and better harvests. It also decreases the illness risks and a quicker metabolism contribute to greater output. Due to these above features, many gardener use CANNA Terra Professional Soil Mix for cultivating weed as well as broad variety of other plant types. CANNA Terra Professional Mix is an outstanding bed improver that suitable for almost any type of growth.

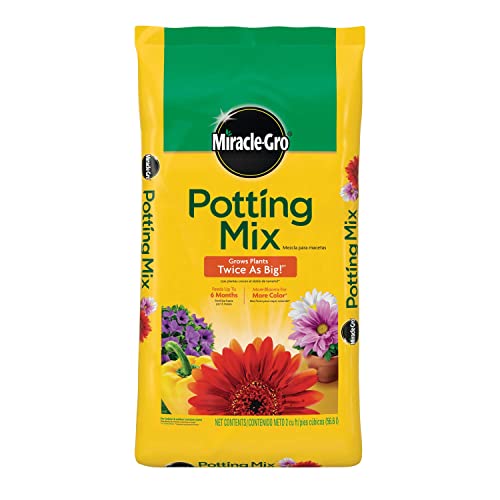
    #3 Best pH level potting soil for weed: Miracle-Gro Potting Mix

    The Miracle-Gro is an extremely popular gardening brands with good reputation that provides potting mixes and other garden goods. You can easy look for their different gardening supplies at Home Depot, Lowes, and Walmart. This Miracle Gro potting mix is a wonderful choice as it’s inexpensive, and suitable for various type of indoor and outdoor plants and weed as well. Its formula is designed for cannabis plants, vegetables and herbs, etc.

    This Miracle-Gro Potting Mix will guarantee that your weed has a good place to anchor the roots, provides enough water and nutrients to thrive and healthy grow. The potting mix features a one-of-a-kind composition and ideal pH levels that the weed needs to grow healthy. This potting soil is a combination of composted softwood bark, Canadian sphagnum peat moss, and perlite.

    Another excellent advantage of this soil mix is that it contains enough fertilizer to feed your plants for up to 6 months, this is long enough for many veggies to mature. One more outstanding features is this potting soil has 16% potassium, 21% nitrogen, and 11% phosphate, which are the major nutrients for growing plants.

    Some customers claimed that when this soil was mix to their current potting soil, their weed increased three times in size. However, some users have also reported that they didn’t like the fertilizer in potting soil because they want to add as their preferences. The drawback of this potting soil is that this is not 100% organic.

    #4 Best Potting Soil for Indoor Weeds: Miracle-Gro Indoor Potting Mix 6 qt., Grows beautiful Houseplants

    Indoor weeds, especially those are place in low sunlight, require light, soft, well-drained soil. Miracle-Gro Indoor Potting Mix is the ideal option for these indoor plants to provide your cannabis with all they need for growth. The soil does not contain bark and compost in the formula, what makes it drains quickly. It also won’t retain much of moisture and reduce the risk of pesky gnats as well. Many customers repost that that notice an improvement in the wellness of their indoor weeds after converting to this soil.

    This potting soil is made up of 60-70% sphagnum peat moss, perlite, fertilizer and coir, all of these make a great base that is water retention, aeration, and well-drained for most indoor plants. Additionally, this product allows you to increase the quality by adding other necessary elements for cannabis plant development. The con of Miracle-Gro Indoor Potting Soil is that this is not organic products as it contains chemical

    #5 Best potting soil for Weed seed starting: Espoma Seed Starter Potting Mix, Natural & Organic

    This is a fantastic organic potting soil that is light, aerated, and suitable for a wide range of plant requirements. This premium blend Espoma Seed Starter potting soil includes sphagnum peat moss, peat humus, and perlite ingredients which enhance healthy growing root. Besides, it is added Myco-tone, which allow the weeds absorb nutrient and water more effective. The foliage of plants becomes more lush, bright colour, and robust.

    Though this seed starter is very costly, it done the great job for multiple tasks. It can be used for a variety of purposes but it is best suited for sprouting cannabis seeds. This implies that plants, cuttings, and transplants are carefully cared for throughout time. Your plants will grow fast without much of attention from the grower.

    Best organic potting soils for other plant types

    #1 Best potting soil for vegetables: Espoma Organic Potting Mix

    This potting soil mix is ideal for producing potted vegetables as it is made entirely of organic components. The soil has a soft and airy texture thanks to its components of sphagnum peat moss and perlite. Healthy root growth is encouraged by excellent structure, ventilation, and well-drained.

    This potting mix will maintain the pH level of between 6 and 7, which is the ideal environment for vegetables growing. A tiny quantity of limestone is added to retain the pH level at the optimal level for nutrient absorption. It won’t include any salts that might harm the plant’s growth.

    The potting soil also contains Espoma’s exclusive Myco-tone composition, which promotes healthy growth and improved vegetable harvests. Myco-tone retain water very well. It implies that you can save much more water when compared to other soil types. However, a few customers claim that this soil hold water so well, so keep in mind to not overwater it.
    #2 Best potting soil for Succulents: Westland Cacti/Succulent Potting Compost Mix

    Each component in this Westland cacti/succulent potting mix contributes in terms of fostering strong roots and improving robust succulent plants. The additional advantage of this potting mix is that aside form succulents, it also can be used wide range of plants like orchids and citrus trees.

    Westland’s feature additional sand and grit, as well as clay Seramis granules, which help release excess water and well-drained, while still providing adequate moisture level for succulents. It provides fantastic value for the price and quality. It is recommended to be mix with perlite or grit for optimum drainage, this is not a big problem. However, this is also considered as one of the best and widely accessible succulent soil mixtures, as long as it is combined with perlite of grits, it works very well.

    #3 Best potting soil for Tomatoes: Baccto Lite Premium Potting Mix

    Baccto Potting Soil is an excellent potting soil. It comprises a mild combination of pre-moistened sphagnum peat moss and other high-quality components to aid in plant growth.

    Baccto potting soil is ideal for both indoor and outdoor condition. It is appropriate for pot and container planting. You can rest that your plant will healthy grow in this special combination of naturally nourishing dark reed sedge peat, perlite, and sand.

    The amount of water this soil can retain is many times much more its weight. It releases water slowly but enough as the plants needed. The high moisture content is ideal for quickly growing. It also retains nutrients, preventing them from being washed out of the soil when the plant is watered.

    This soil mix contains a starter and slow-release fertilizer to guarantee quick seedling development after germination. When using indoor, you can use this product right after take it out from the bag as this soil require no extra mixing or preparation. For outdoor growing, you can blend it with compost and soil for optimum result.

    #4 Best Potting Soil for Flowers: Proven Winners Premium All Purpose Potting Soil

    Most blooming plants prefer to live in an all-purpose soil that comprises a great balanced combination of Canadian sphagnum peat moss, softwood bark, and perlite like this one from Proven Winners. Sphagnum peat moss is excellent component to maintain high moisture contents. Whether in pots or hanging baskets, containers or raised beds, you will get beautiful and vibrant flowers with this soil.

    This potting soil has a great porosity and drainage texture. It’s designed specifically for producing beautiful blooming plants. It’s an all-purpose potting soil that can be used inside or outdoors, and it’s also do the great job of growing houseplants and veggies. It’s an ideal soil that very effective in patio pots and hanging baskets to grow perennial flowers.

    The soil is mixed with dolomite lime, which act to balance the pH of the soil and reduce acidity. One more thing I love about this soil is that it is very affordable as you can get a 1.5-cubic-foot bag with about $20 and this is enough to fill many containers. However, the downside here is this soil slightly heavier and less appealing than others lightweight, airy products, so it may need further attention.

    #5 Best Potting Soil for Herbs: Perfect Plant Organic Potting Mix

    The Perfect Plant Organic Potting Mix contains only natural components to improve growing conditions for optimal nutrient uptake. The soil will maintain the proper moisture contents for varieties type of plants due to its excellent texture and appropriate softness.

    It includes mycorrhizal fungus in the ingredients, which provides several functions, including protecting the root from expansion damage. Not only that, this biologically active growth ingredient also promotes root establishment and nutrition levels without the need of synthetic fertilizers. All these advantages eventually lead to increased plant yield.

    There is a good amount of worm castings are included in this potting soil, which promotes lush, green foliage and stronger root network. Furthermore, they perform an important function in removing pollutants from the soil. The coconut coir particles make up an airy, fluffy structure for the soil. Due to this, the soil is well-drained but still keep the balance pH level. The only thing I dislike about this product is the packaging is not close tightly.

    #6 Best Organic Potting Soil: Green Brokers Organic All Purpose Potting Compost

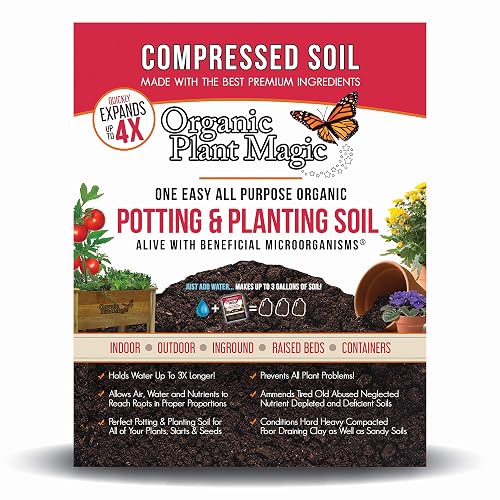
    People are more and more ecologically conscious, and as a result, many people are now looking for an entirely organic compost like this one from Green Brokers. This brick may look small but it can expand to offer you 10 litres of high quality potting soil if it is added with water. If you use it for a big garden, this potting soil is also available in several sizes: 20, 40, and 75 litres.

    This is an organic potting soil but it also has also been fortified with added nutrients and essential minerals to guarantee your plants are received enough to grow and healthy develop. Its texture provides an aeration and well-drained environment for enhance strong root development. When being used outside, this potting soil maybe dried up faster than normal soil, so you should pay a little more attention for it. Indoors, however, it required watering approximately as frequently as usual.

    Conclusion

    If you’re having trouble deciding on the best potting soil for plants, hoping that this list can help you get the best one that meet the specific need of your plants. My top pick is Burpee Organic Premium Potting Mix. It is an excellent base for both indoor and outdoor gardening

    It allows the plant to grow healthier, faster, produces more flowering and vibrantly colored blooms. It also contains slow-release fertilizer that can feed for plants for about 3 months. This potting soil is great even if you are novice and professional gardeners.

  • How to Make a Space Bucket for Weed with $100

    If you have thought about growing weed but are worried that you can’t afford it then why not take a look at this latest trend – the DIY space bucket. A space bucket is incredibly easy to make and can be constructed using materials that can be readily got hold of. Plus, in comparison to a grow room or grow tent, a space bucket requires a lot less power to light up the space meaning your electricity bills won’t be as high. If this all sounds good to you then read on to find out how to make your very own space bucket.

    How to Make a Space Bucket for Weed with 0
    How to Make a Space Bucket for Weed with $100

    How does a Space Bucket work?

    While you can’t expect huge yields from a space bucket you can be confident that you can grow yourself some healthy marijuana plants for a very low cost and effort. So, what is a space bucket and how does it actually work?
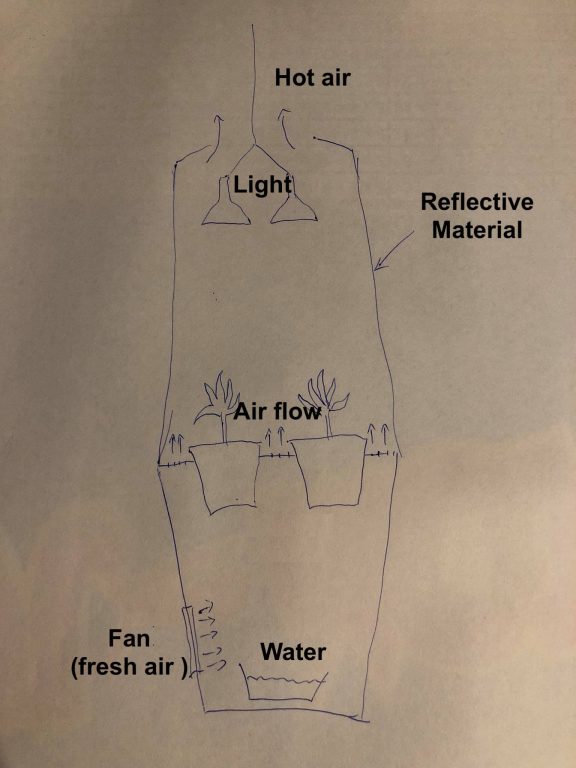
    A space bucket is a simple container with a light fitted to the top. The design has been developed to create the optimum environment for growing weed in the cheapest possible way. It is a great choice if your budget is low and you don’t have a lot of space available for growing.

    Materials you need: Grow Bucket Kit

    To get your hydroponic space bucket up and running the kit list is pretty simple. You can get most products at your local hardware store or online. In addition to these items below, you will need some wire, glue and masking tape (items that you’re likely to have lying around the house anyway!).

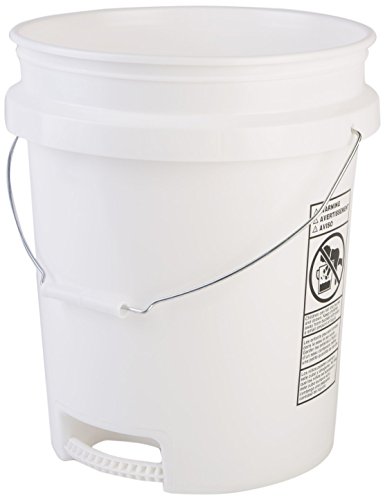
    Buckets 4 x 20L

    To get started you will need 4 x 20L buckets – check out these super strong and durable buckets from Hudson Exchange. However, you don’t need to go all out in terms of bucket quality – if you are on a real budget you can grab whatever you can find at the hardware store (some you can even get for under $5 per bucket).

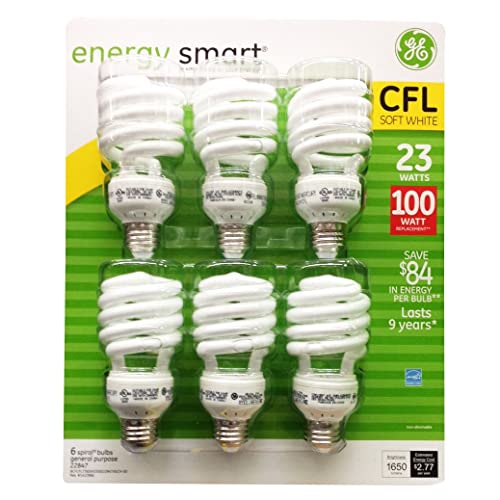
    Light Bulbs – 23Wx 6

    For a 20L bucket, you will need around 6 23w CFL light bulbs – these should give the brightness you need in the space without causing too much heat (which can be dangerous). These bulbs from Amazon are a good, durable choice but cheaper options should be available if you’re on a budget and you can also use as few as 4 bulbs. If you are on a higher budget you can also use space bucket LED lights or select grow bucket LED bulbs for your set up.
    You will also need some sockets to screw your bulbs into, you will need the same number of these as the number of bulbs you use. Check out these

    Side-Snap Socket Boxes from Westinghouse

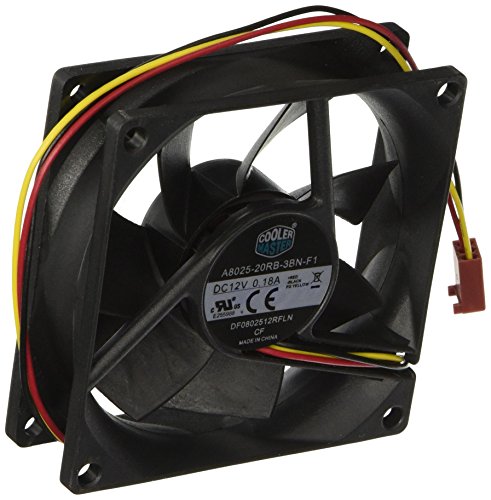
    PC Fans x 2

    Purchase at least 2 PC fans as you need to keep the area cool to avoid both your plants overheating and to keep your set up safe. These PC fans from Cooler Master are some of the cheapest and best around – producing strong air-flow for enhanced cooling performance. For under $7 per fan, you can’t go wrong.

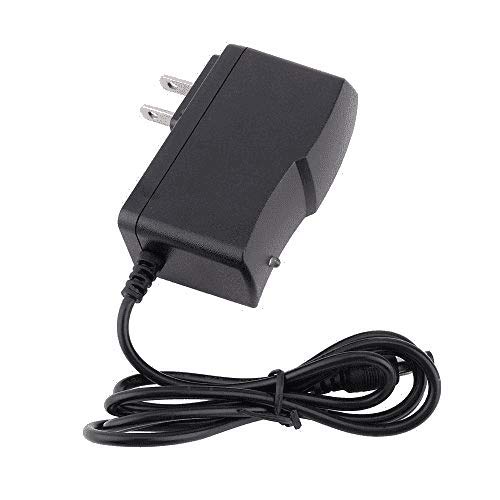
    12v Power Adapter Supply x 1

    You, of course, need a power source to get your space bucket up and running. This 12v Power Adapter from ZJchao is super cheap and does just the job that you need it to – powering up your bulbs. Not bad for under $5.

    Reflective Material

    For the inside of your buckets, you will need some sort of reflective material. This could be Mylar, which you can purchase from the link above or your local hardware store, or you could also use white paint. If you purchase white buckets themselves, you won’t need to purchase any additional reflective material.

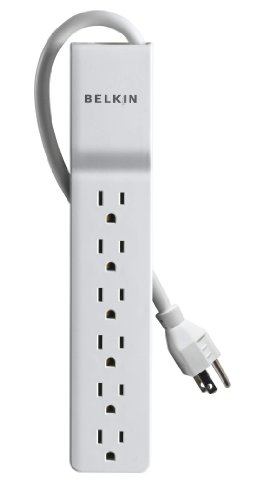
    Power Strip

    like this one here (make sure whatever you buy has surge protection).

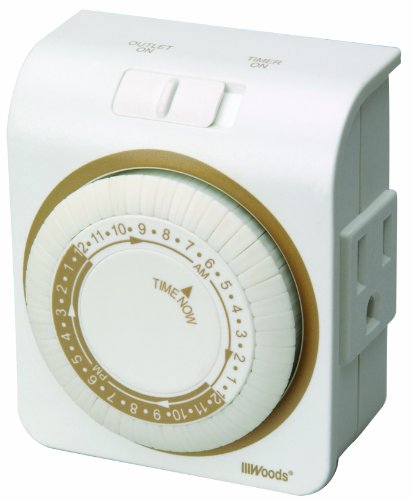
    24 Hour Timer

    So that you can be in full control of the light your plants receive and ensure the safety of your space bucket, you will need a 24-hour plug-in mechanical timer to set when your lights should be on or off. This will give you greater flexibility and ensure the light to dark ratio that your plants receive is perfect.

    How to Make a Space Bucket

    So you have everything you need to get started but before we go through our step-by-step guide on how to make your space bucket lets have a brief chat about safety first. Make sure you get yourself clued up on how to use electricity safely to keep your space bucket (and yourself) as safe as possible.

    Prepare your Bucket

    1. Create Holes for Drainage

    Select the bucket that will be your main container and, using a screwdriver, create some holes in the bottom of the bucket. These should be evenly distributed – starting with a circle of around 8 holes near the center of the bucket and then a wider circle of the same amount of holes around the edge of the bottom of the bucket.

    2. Add Reflective Material

    Attach your Mylar (if using) to the inside of your bucket or paint the inside using your white paint if you’ve gone for this option.

    3. Light-proof your bucket

    Being able to control the light your plants receive is essential for healthy plants. If your buckets are black this step isn’t as essential, however, if your buckets are white or of a lighter color you will need to light-proof them. You can do this by painting your bucket black or stick layers of black tape to cover the entire outside of the bucket. This simple step will make all the difference to your plants.

    Attach your Fans

    The reason you have the PC fans is to keep your plants at the right temperature – so one fan is there to extract the hot air, and the other to draw in cool air. For this reason, one fan needs to be pointing inwards towards your plants, and one pointing towards the outside of your space bucket.

    1. Cut your fan holes

    Cut two holes on the sides of your bucket – they need to be on opposite sides. For your exhaust fan (the one pointing outwards and extracting the hot air) make sure this is near to the top as this will be removing the heat generated by your lights.
    The size of your holes will depend on the size of your fans, but you want to make sure that they fit snugly and are not loose.

    2. Connect the power supply

    Now you have the fans fitted to your bucket you can connect your power source to them (the 12v Power Adapter Supply). You can use wire nuts to connect the fans to the power supply.

    Create Spacers

    As the height of one bucket is too small – this is where you bring your other 4 buckets in. Cut the bottom off the rest of your buckets so that they can stack on top of your original bucket. They need to fit perfectly so that no light escapes from them. Ensure that each bucket has the same reflective and light-proof material that you have used for your original bucket. With this sort of set up, you can easily adjust the height of your hydroponic grow bucket.

    Attach your Lights

    1. Cut your bulb holes

    Select a lid and cut holes the correct shape to fit the socket boxes for the bulbs. You then need to wire your bulbs in parallel with the cable and plug. If you have never done this before it is a good idea to get yourself clued up on how to do this.

    2. Attach a container to the lid

    Once you have successfully completed your wiring it is a good idea to attach a lid over the wiring to keep it safe. Make sure that you

    don’t

    select a conductive material for this purpose.

    Attach your Power Strip

    All of your devices are almost ready to be connected and for this you need your power strip. You can now attach this to the side of your bucket – the best way to do this is using glue to make sure it is super secure. With the power strip in place, you can now plug in your lights, the 12V power supply for your PC fans and can connect your 24h timer.

    Final Checks…

    You’re almost there, it’s time for some final checks. At this stage your main bucket and spacers should all be connected – ensure all of your space bucket is thoroughly light proofed and cover any gaps with your black tape. Also, ensure that you have also ensured all of the insides of your buckets have your choice of reflective material applied.
    Now set your 24-hour timer to the hours of light and darkness you want your plants to have, plant your marijuana plants in the main bucket and put the switch on – you are now the proud creator of a  Space Bucket! Sit back and enjoy watching your space bucket grow.

    How to get rid of the smell of weed – Space Bucket Carbon Filter

    Marijuana plants can give out a pretty potent odor so you might want to consider getting a carbon filter for your space bucket. A carbon filter can be attached to your exhaust fan and will be powered by your 12V power adapter supply. For stealth growing and a smell-free living environment. Investing in a carbon filter is the next step in space bucket development.

    Finding the Best Strain for Space Bucket Grows

    Always remember that when it comes to growing weed there’s no better way to learn than getting first-hand experience. This guide gives you the resources to build your first space bucket, but once you’ve got it all pieced together don’t worry if you still feel a little bit lost, but just remember with every grow attempt you’ll get better. With every grow cycle, your knowledge will be enhanced helping you become an expert cannabis grower in no time.
    In this section, we will point you to some top tips for growing cannabis in space buckets before highlighting some of our favorite weed strains for growth in space buckets.

    Top Tips for Growing Cannabis in Space Buckets

    1. Flower your plants sooner rather than later

    As a general rule, it’s usually better to move your plant to the flowering stage early than late. This will be advised on your seed packet but is usually after no more than a month. Whilst you can keep the vegetation stage going longer this is likely to make your plant grow much taller when you do move to the flowering stage, but you will want to train your plant to grow as short as possible to get the best yields.

    2. Try a variety of plants

    Just because our favorite strain for space buckets is Bubba Kush, doesn’t mean it will be yours and will grow best in your exact setup. By growing different plants you’ll get a better understanding of the needs of different strains and which ones like your exact setup the best. Fortunately, most strains welcome the tender care space buckets offer

    3. Get to know your strain

    Despite tip 2, for the best yields, it is also important to get to know what your plant likes and how it will grow in a variety of situations. Yields are variable and hard to predict due to differences in growers, genetics, vegetation time, nutrient use, and soil. By improving your experience and deep knowledge of a particular strain you will improve your understanding that could help you turn yield from a typical harvest into an abundant dream harvest.

    4. Don’t water your plant too often

    Cannabis plants love to be grown in a well-drained medium so you should always be careful about how much water you are putting in. Use the dryness of the soil and the weight of your pot to decide when to water your plant rather than sticking to a rigid schedule if you can. Once every 3 or 4 days is good enough when you have proper drainage.

    5. With nutrients, it’s better to use too little rather than too much

    When you’re using fertilizers it’s important to remember that giving too little is always better than giving too much as too much will burn your plant. It can also drop the pH level and cause your plant to have issues with osmosis. Too many nutrients are also harder to resolve as they can be pretty immobile once in soil.

    Best Strain for Space Bucket

    #1 Crop King’s Bubba Kush Feminized Cannabis Seeds

    https://www.cropkingseeds.com/products-page/strains/bubba-kush/
    These excellent seeds are a great choice for space bucket growth as they grow really stocky plants with bulky buds. They are derived from Bubble Gum and Original Kush and also have Afghani roots which produces a relaxing high thanks to a decent production of THC and CBD. You’ll also love the sweet hashish, chocolate and coffee flavors you get as you feel overcome with relaxation once you get to your final product.
    As this strain grows nice and stocky it’s a good choice in a space bucket, but its bushy nature also means you’ll see decent yields from each plant. The sticky and dense buds are also a sight to behold and will leave you salivating as you watch it grow. Fortunately, with just 9 weeks flowering time, you won’t have to wait long to test it out. You can also grow this plant relatively easily without the need for masses of first-hand experience.
    #Space_Bucket_Cannabis #Space_Bucket #Bubba_kush #THC #Feminized_Seeds

    #2 For Beginners: Auto Lemon Haze Feminized

    https://www.marijuana-seeds.nl/auto-lemon-haze-feminized
    If being required to bring a few gardening skills to the table puts you off Bubba Kush, then why not go for this great auto-flowering option? This lemony skunk also has a really uplifting high that comes on quickly and stays with you for hours. Although this does get quite big, you are rewarded with super yields from these seeds, especially for an auto-flowering strain.
    The best thing about these seeds for the novice grower is obviously that they are auto-flowering. This takes a lot of the stress out of growing and having to decide when is the best time for you to tell your plant that it is ready to flower as it will happen naturally when it is ready. You also need less light with this strain to save you money on your energy bills. This is a reliable product with consistent yields that is great to get you started growing in your space bucket.
    #Space_Bucket_Weed #Space_Bucket #Lemon_Haze #Auto_Flowering_Cannabis #Yields

    #3 For Experts: Afghan Hash Plant Regular Seeds

    https://www.seedsupreme.com/cannabis-seeds/landrace-strains/afghan-hash-plant-regular-seeds.html
    If you’ve been growing for a while and want to put your space bucket growing skills to the test then why not check out the benefits of buying regular seeds that allow you to start moving into breeding your own strains? These great seeds produce nice and short plants with heavy yields in just 50-60 days of growth. Made from seeds collected from the 1970s this is definitely a strain for those that like to reminisce about the good old days.
    These seeds are photoperiod, so you’ll have to choose the best time to move them to the flowering stage and also get to grips with spotting a female and male cannabis plant. It’s important to be able to spot the male plants as soon as possible and have the space to grow them away from your females with these seeds as they are not auto-feminized. For expert growers, this is a great choice.
    #Space_Bucket #Breeding_Cannabis #Cannabis #Afghan #Yields

    #4 Best Small Strain: Crop King’s Northern Lights Auto Flowering

    https://www.cropkingseeds.com/products-page/strains/northern-lights/
    If the reason you have gone for the space bucket growing method is because you are lacking in growing space, then these seeds a great option. These plants grow super compact but are still not shy in terms of their bud production, which grow nice and densely. You’ll also be pleasantly surprised by the rapid 8-week growing time and the resultant weed that gives you a mellow and stoney high from a decent production of 15% THC.
    A long-time favorite, this strain is something most people have heard of for a reason. Now available in this quick auto-flowering variety, it is a no-brainer to give this one a whirl if you are a beginner grower with just a small space to give your first grow a try. You will find it produces a strong aroma, but this will be a smell you will love and will prepare you for the strong stoning you’ll get when your plant is ready for harvest.
    #Space_Bucket #Northern­ights #Cannabis #Stoned #Auto_Flowering

    #5 Best Strain for Quick Space Bucket

    (Scammer) truenorthseedbank.com/cinderella-99-fast-canuk-seeds-elite-strain
    When starting out in the space bucket growing world it is likely that you are looking for an easy grower when it comes to marijuana plants. This Cinderella strain has been created using a combination of two original phenotypes that have fast flowering properties – the Grapefruit and Auto-Pineapple – so will do just the job.
    Once you have the Cinderella safely in your space bucket it will take just 42 days to flower – which is around 2 weeks faster than normal cannabis plants. In terms of flavour, you can expect mild citrus notes and sweet undercurrents, as well as a high potency. A perfect crop for indoor growing and a suitable seed for beginners – get this planted in your space bucket and enjoy the results.
    #Space_Bucket #Cannabis #Seeds #Cinderella #Fast_Flowering #Yields

    Conclusion

    Growing your own weed has never been easier thanks to the invention of the Space Bucket. For between $100-$200 you can set yourself up in the growing world and start your own small scale home cultivation for your own use. Most of the items you need you can purchase online or from your local stores and you can easily make the grow box yourself following our simple steps.
    In terms of selecting the right strain for your Space Bucket, there are numerous seeds you can choose from. Whether you are a beginner or an expert wanting to give a new growing technique a try there are strains to suit all capabilities and tastes.
    The indoor space bucket is a great option for those wanting to grow their own but have limited space and a limited budget.

  • 10 Best Potting Soil for Weed 2023: Is Fox Farm good for weed?

    Before you dive into growing cannabis, you need to learn about a lot of the stuff surrounding it. When grown indoors, growers have complete control over the environment and you can save money producing high-quality cannabis. Many cannabis enthusiasts claim that they didn’t appreciate the plants until they grew them themselves.

    While the benefits of growing indoors are numerous, there are potential problems that can cost or harm your plants if you’re not paying careful attention. Choosing potting soil is one of those things. The best potting soil is the first and decisive step to the success of your crop.

    Luckily we have prepared a list of the best potting soil for weed, along with some information that may be useful to growers.

    Why is the Farming Environment Important?

    The plant is a reflection of where it is grown and cannabis is no exception. The farming environment is the basis for everything that you do.

    Cannabis exposed to a good environment determines the overall health of the plant, its ability to resist pests and infections, the production of nutrients, and the cultivation of cannabinoid compounds.

    The availability of nutrients and bacteria in the roots while the plant is growing is what essentially proves the plant’s effects, the expression of the chemical terpene, and the medicinal and nutritional properties of the plant.

    To create a truly amazing end product, you’ll have to make sure that your cannabis plant has everything it needs to perform its botanical functions.

    What are the Pros & Cons of Potting Soil?

    #1 Nature friendly

    Cannabis can be grown outdoors in fertile soil in an environment that mimics its natural ecosystem. However, the legal status of cannabis as well as space constraints make this quite difficult in most areas.

    While growing in pots can limit the biodiversity of the soil, in general growing in fertile potting soil will help you increase a wide range of beneficial bacteria and fungi.

    Combined with some high-quality or homemade fertilizers, growers can create an increasingly diverse environment for your marijuana plants, compared to a controlled hydroponic environment.

    #2 High content of nutrients and terpenes

    Many growers believe that marijuana grown on soil tastes better. Why? That is, there is a combination of chemicals secreted by the roots of the plant and the metabolic processes of microorganisms in the soil.

    When the soil has access to more healthy bacteria, fungi, and oxygen, compounds like iron and magnesium, essential oils and essential fatty acids can be produced. They are then available to the plant through the interaction between the plant and soil microorganisms.

    Exposure to good bacteria and fungi in diverse and abundant quantities means a greater likelihood of positive interactions for healthy plants. The healthier the plant, the more opportunities it has to produce a variety of terpenes and nutrients.

    This is good news for those who are interested in using all parts of the cannabis plant, or want to gain as many medical benefits as possible.

    It is estimated that we do not know 90% of the chemicals that plants produce. Marijuana is perhaps one of the cultivars that has been studied for its psychostimulant THC that can maintain diversity. The best potting soil gives us a greater opportunity to reap the benefits of plant compounds.

    #3 Organic

    Cultivation will benefit Mother Earth, and marijuana cultivation is also included. This is especially true if you are a home grower who has chosen to grow cannabis in your garden. Taking good care of the soil and keeping the plants healthy will help regenerate the topsoil over time.

    #4 Agricultural activities cost us half of our class

    surface soils over the past 150 years. Barren topsoil means that our medicinal plants (like Cannabis) are less productive, more susceptible to disease, and increase the risk of pests and diseases.

    This is a basic principle of organic farming. Let the soil and plants do the work for you, and limit additives.

    Even if you are growing plants in containers, once you have perfected your soil you always mix the soil with fertilizer or add it to your vegetable garden.

    Most marijuana plants can be used in these ways, but you can also add unused samples or main stems to your compost. What are the benefits of good compost? The topsoil is more fertile.

    #5 Uncertain

    Because you buy and add everything to a hydroponic system, you know exactly what is going into your plants. This is not necessarily the case with soil.

    When you buy a potting soil or something from your local grower store, you will often be able to read a little bit of information about the product on the packaging.

    However, in case you are using land from a local farm or some other source. You probably won’t be able to tell exactly what you’re getting. Because there are thousands of different bacteria and fungi, you must make sure you are choosing a quality product before you plant seedlings.

    The last thing you need to know is that some improperly disposed compost will contaminate your entire crop. Growers will want to do a little research in advance to make sure that what you are doing is actually going to be in the best interest of your plants.

    #6 Low yields risk

    If you’re not growing in a crate or in raised beds, you shouldn’t have any trouble getting a high yield from the crop. Although, it’s not as easy as when you grow in a soilless system.

    However, if you want to go the most sustainable route and plant directly into the ground (with some good compost or extra topsoil), it will take some time before you get the results you want.

    There are very few places in the world today where topsoil is fertile enough to support a large cannabis harvest. As an example, let’s imagine a typical backyard. Did you have dandelion? Wild daisies? Thistle flower? These flowers grow in disturbed soil.

    For cannabis to grow well, it needs to have the right ratio of fungi for the bacteria to be in the perfect soil. However, if you continue to grow marijuana and other companion plants in that soil over time, you will be able to increase the fertility of the soil and eventually the plant will produce a high yielding crop.

    Although this takes some time. This may be a better option for those interested in organic farming and permaculture or growing for fun, rather than for those who want to produce a quick, lush, usable crop.

    #7 Take time

    Growing indoors can speed up this process a bit. However, if you want your buds to do well outdoors you will have to wait for the plants to do this.

    In both hydroponics and indoor soils, you can promote flowering plants as they reach hardy maturity. This gives you more control over harvest time. Growers can harvest the expected yield at intervals relatively often.

    If growers are growing outdoors, you can expect a crop in about 3-4 months. But, in the end, nature will take whatever it wants.

    When that happens, each grower develops a method that works best for them. There are many tried and tested methods that have become quite popular among cannabis growers. But there’s also a lot to learn from new insights into how plants grow and interact with soil in natural environments.

    How to Quickly Cultivate Weed with Potting Soil?

    Cannabis plants in the wild usually grow in places where the soil composition is rich in nitrogen, they love nitrogen during the growing stage, and have a great need for Phosphorus and Potassium during the blooming stage, they also have needs for micronutrients such as Ca, Mg, Cu, Fe, Zn, throughout their life cycle.

    The life cycle of the cannabis plant can basically be divided into two major stages, the growing phase and the blooming stage. The difference between these two stages is clear: Cannabis plants have less need for nitrogen than before, and they have a greater need for phosphorus and potassium.

    For growers who have more or less knowledge, fertilizing plants is quite simple. Growers just need to buy a reputable product and fertilize according to the manufacturer’s recommended dose at each stage, an example of the company’s fertilizer dosage advice.

    For growers who have experience in using organic fertilizers (nutrients from natural organic sources such as algae, animal bones, animal manure), the care of plants is not a big problem.

    In the wild if attentive growers will find many sources of nutrients that the cannabis plant loves, you just need to experiment, over time, experience from practice. It will give you the insights to make the best blends.

    There are so many different types of nutrition on the market today that it can be overwhelming to know which one to use and what the results will be.

    On the market today you can find many manufacturers of cannabis nutrients and each brand has many different products. One of the most effective ways to grow cannabis plants effectively is to stay in touch with your nutritionist.

    Ask the person whenever you feel nervous about how to use it. After a successful crop, you will have experience in the use of nutrients.

    Which Soil Should be Used for Weed?

    Soil is the most traditional medium for growing cannabis indoors, as well as the most forgiving, making it a good choice for first-time growers.

    Any high-quality potting soil will work, as long as it doesn’t contain artificial extended-release fertilizers, which are not suitable for growing cannabis well.

    A very good option for beginners is organically fertilized soil. This soil can grow cannabis plants from start to finish without adding nutrients, if used properly.

    This can be done by combining casting worms, bat guano and other ingredients with good soil and letting it sit for a few weeks, or it can be purchased in advance from a number of different suppliers.

    As with all organic growth, this method relies on a healthy population of mycorrhizae and soil bacteria to facilitate the conversion of organic matter into usable plant nutrients.

    Alternately, you can use the regular soil mix and then replenish your plants with liquid nutrients when the soil is depleted.

    Composting can be done year-round, as the breakdown of dead plants gives off heat. It’s best to make plenty of compost for the whole year, whether piled up in the backyard, or in special bins that you can buy at a local home and garden supply store.

    Feel free to use the space in your yard, and no one will doubt it. Composting takes about 2-5 months. Some special crates can even alter your soil, speeding up the process.

    Make sure the soil you choose for your cannabis plant is highly draining but still has the ability to hold water. You also need to consider the pH, nutrients, and texture of the substrate.

    Coco Coir is currently a popular choice and is sold as a large bag or as a lump. Many cannabis growers prefer to mix Coco Coir and regular potting soil to create a better base.

    It is helpful to purchase a pH test kit to make sure your plants are growing normally by assessing the correct pH. It is important to be aware of the nutrients you put into the soil as they are also involved in the pH balance.

    The common cannabis plant prefers a slightly acidic environment at the roots. A slightly acidic soil environment is what the cannabis plant needs to thrive in its natural environment.

    With the right pH in the roots, it helps the plant to access and absorb nutrients as best as possible.

    If the pH is too high or too low, the plant is prone to nutritional deficiencies, improper nutrient absorption, even if you provide adequate nutrients for the plant.

    Nutrients take many different forms (chemically) depending on the pH of the surrounding environment. Some forms are more readily absorbed by the roots than others.

    When the pH is too high or too low, the cannabis plant will begin to show signs of a nutrient deficiency, even if that nutrient is available in the environment around the plant’s roots.

    By maintaining the pH level, you will help the marijuana plant access and absorb all the nutrients it needs throughout its entire life cycle.

    While pH is important for all plant growth, it is even more important for cannabis growers to use nutrients and fertilizers to fertilize the plants.

    The standard pH level for cannabis plants to grow in potting soil is 6.0 to 7.0.

    Top 7 Best Potting Soil for Weed Review 2023

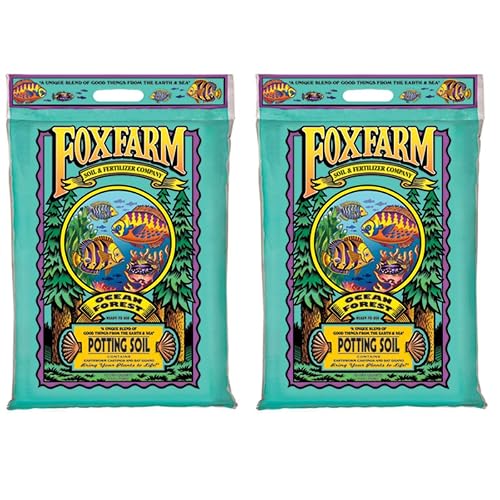
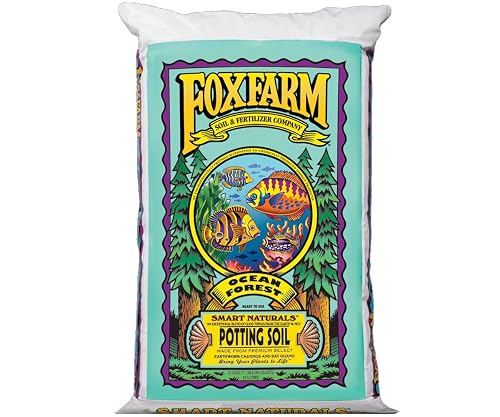
    #1 Foxfarm FX14053 Ocean Forest Plant Garden – Editor’s Choice

    If you are looking for a potting soil that contains everything for your weeds to thrive, this is the soil for you. This potting soil has a positive effect on root formation, which improves the overall health of the plant and improves its ability to absorb nutrients. Extremely suitable for cultivating marijuana.

    This potting soil is packed with ingredients including premium bird droppings, fish meal, crab meal, and earthworm meal, as well as a generous amount of forest humus and peat moss.

    This soil has everything plants like to have in their nutrient medium. This formula also eliminates the need for nitrogen addition and is adjusted to the ideal pH level of 6.3 to 6.8.

    This product from Fox Farm is full of nutrients and this is also the main advantage. In addition, this potting soil can inhibit the growth of mold and fungi, has a great texture, and it drains well even without the addition of perlite.

    #2 Real Growers Recharge – Best for Organic Growth

    If you’re looking for a great way to get the most out of your plants, why not look at some of what nature has to offer? That method is organic growing and this product will be very useful with this method.

    This little bag is full of nutrients that will help your plants form mycorrhizae. It is a combination, a symbiosis built from fungi and plant roots with unexpected effects on yield.

    This development improves nutrient absorption and protects the marijuana plant from many unwanted threats.

    In addition to the natural benefits that this product brings, it has many other advantages. First, it’s designed for use with houseplants, especially cannabis. Next it improves the speed and health of growing plants.

    Finally, it is completely organic, and contains microorganisms suitable for use with fertilizers. However, growers will have to use this product weekly so the color will fade quickly. It’s quite expensive, and the fine powder is easy to waste if you’re not careful.

    #3 Dr. Pye’s Scanmask 10 Million Live Beneficial Nematodes – Best for Pest Control

    With the naked eye, we will never be able to detect organisms and pests in the soil. That’s why there are so many potting soils available today that control these microscopic pests.
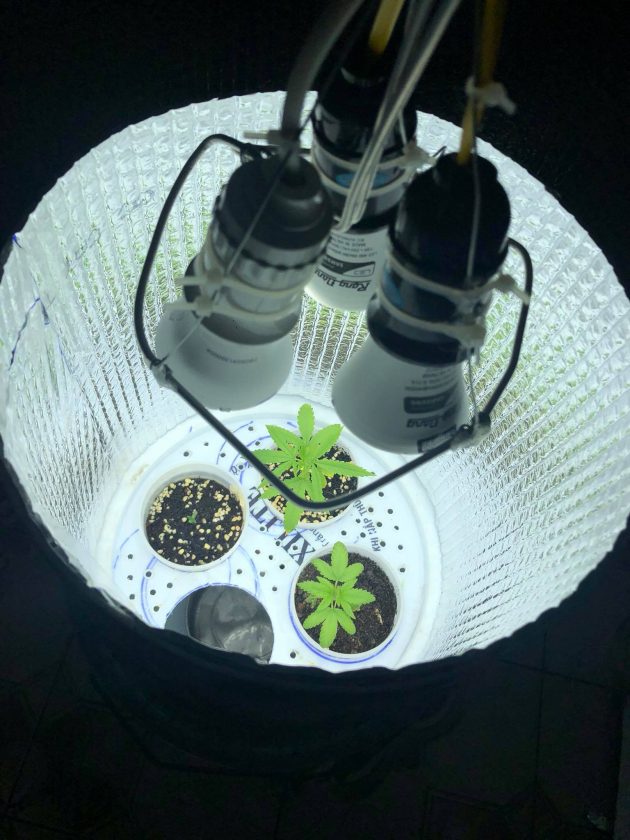
    As a cannabis grower, if you’ve never heard of nematodes, it’s time to get acquainted with them. Nematodes are microscopic worms that will target pests that frequently appear in your soil such as thrips, fungus gnats, and other unwanted insects (when they are in their immature stages). They can cause root rot and make marijuana plants unhealthy.

    This product is a super cheap organic way to get rid of pests and you can get 10 million of them from Bug Sales for just a few bucks.

    The nematodes will arrive on your doorstep fully alive and then all you need to do is release them on your soil. With this 10 million package, it can cover about 600 – 1000 square meters of land, larger and smaller packages are available to fit your growing needs.

    #4 FoxFarm Ocean Forest FX14000 Organic Potting Soil – Best for Newbie Growers

    When looking for the best potting soil for your weed plants, you need to make sure it has a good texture, can hold water well, and also has good drainage. And again the product from Fox Farm will not let you down.

    This amazing organic soil from Fox Farm ticks all the boxes in this regard. Its formula contains a wonderful blend of bird droppings, and micronutrients that will welcome your plants into their pots. With the perfect pH for the cannabis plant, this is a good choice for beginners.
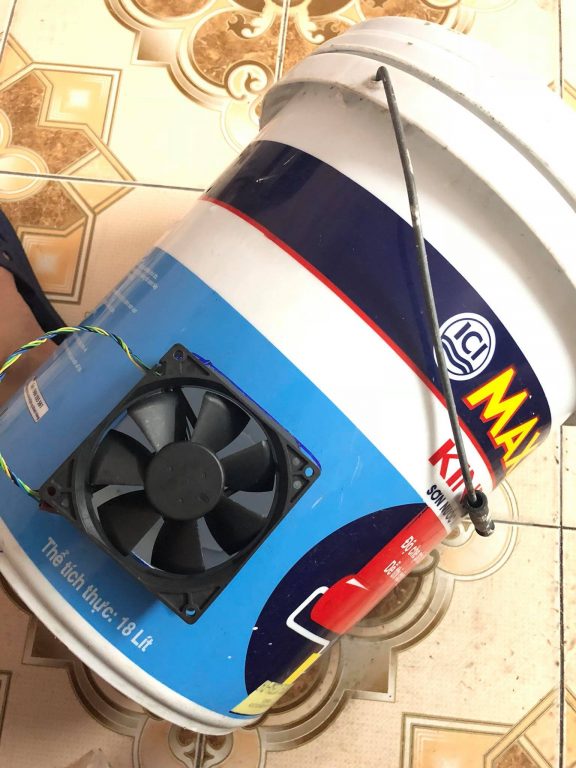
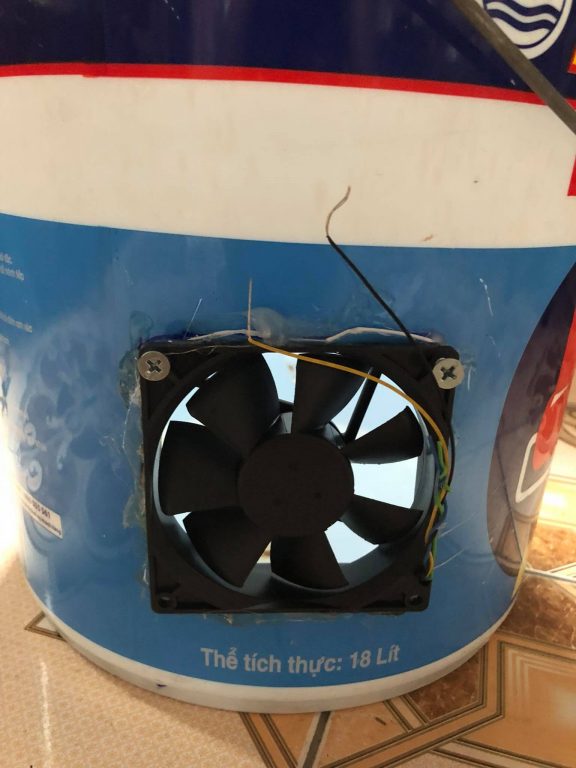
    This product has the main advantage of helping to encourage root growth. It’s organic, filled with rotted moss that keeps your roots aerated and helps absorb nutrients.
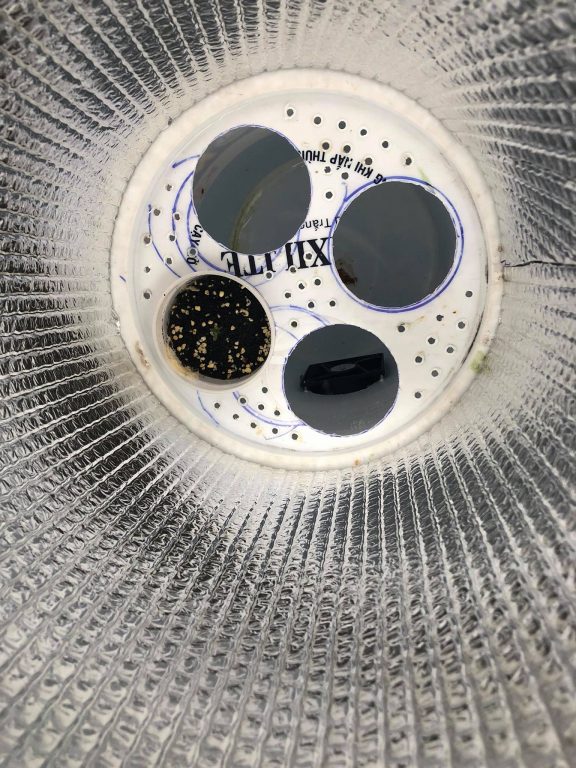
    This large bag is long lasting, and growers do not need any additional nutrients during the first few weeks of the growing period.

    However, this mix can be a bit too warm for auto flowering strains.

    #5 Unco Industries Wiggle Worm Soil Builder – Best Earthworm Castings for Soil

    Earthworms are leftovers from food eaten by worms and contain a lot of nutrients that your cannabis plants will enjoy, and this will help them thrive – some people are even starting to call the powder. Wormwood is a ‘superfood’ for the cannabis plant.

    And this is a popular and natural way to give your soil and plants some additional nutrients and minerals is to use vermicompost on your soil.

    Unco Industries is known for delivering some of the best organic fertilizers on the market, and with this worm casting bag, you’ll be enjoying this non-toxic fertilizer for a while.

    With just a small amount sprinkled on the soil, you will start to notice the effects and what’s more, it’s odorless so it can also be used indoors. Get your hands on this bag and join the earthworm fan club right now.

    #6 The Good Earth Organics, Zen Blend Premium Potting Soil – Best for the Money

    While soil is often an ideal home for some nematodes that are considered parasitic, they can cause major harm that cannabis growers are likely to face. Then this organic soil will contain friendly symbiotic nematodes

    Whether it’s fungal rodents, termites, beetles or leaf diggers, having these tiny creatures in your soil in large numbers is a great defense. This helps prevent the use of pesticides that may be technically safe.

    The main advantage of these tiny creatures is that they are organic and harmless to pets and humans. They can handle spaces up to 6,000 square feet making them well suited for large growing areas.

    In addition, this organic soil is easy to apply with just a little water. However, this organic soil is easily damaged by intense UV rays. And importantly, organic soils often come with a high price tag. This product is organic soil comes with the most reasonable price.

    #7 Organic Plant Magic Compressed Organic Potting Soil – Best for All Containers

    This potting soil can be used if you are growing your cannabis organically and it will not harm the environment or the pets that may be frequented in the growing area. It’s also super effective at targeting insects you don’t want near your crops and is especially great at stopping moths from damaging your crops.

    A formula containing every essential nutrient plus trace minerals, this super-concentrated super soil feeds your plants for months and makes them 3x larger.

    The non-toxic ingredients of this potting soil can keep moisture 3 times longer. It can easily bring water, air and nutrients to the roots continuously according to the needs of each growth stage. Perfect for all plants, containers and gardens.

  • Top 5 Best Hygrometer for Growing Weed ( 2023 Reviews)

    Best Hygrometer for Growing WeedWhen you are growing plants, whether it is indoor or outdoor, there are certain elements that will have a strong impact on its growth. Among others, humidity or moisture will be highly instrumental in its health. With this, you need to invest in a device that will help in monitoring the latter. That being said, you should have the best hygrometer on the market.
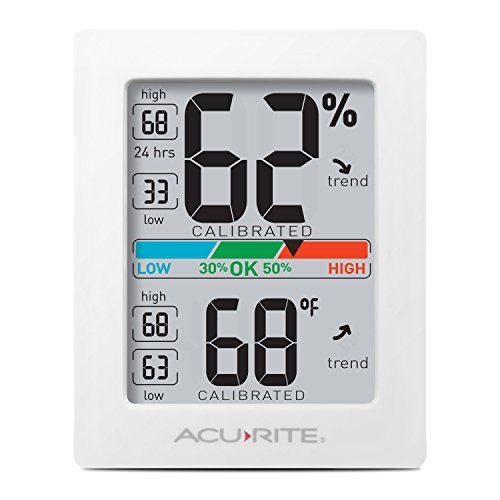
    Choosing a hygrometer is not an easy task, especially considering the abundance of the options that will confront you. To help you out, keep on reading the rest of this post and we’ll help you to come up with the right choice when it comes to which one should you buy. While hygrometers can be used for a variety of purposes, those that are mentioned in the rest of this post will be especially useful for indoor or outdoor cultivators.

    Best Indoor Humidity Monitor

    #1 AcuRite 01083 Pro Accuracy Indoor Temperature and Humidity Monitor Review

    If you are on the lookout for the best air hygrometer that is made specifically for indoor use, this is one option that should be on the top of the list. It is made not only to monitor humidity but also temperature, making sure that plants in a grow room will have the ideal environment for their healthy growth.
    Among others, it is known for its accuracy, which is one of the most important things for a hygrometer. It has high-level sensors and reads the humidity level in an indoor environment every 10 seconds. It measures 1 to 99% relative humidity. Aside from the numbers, there is a color-coded bar that makes it easy to monitor when the humidity is high, low, or just right.
    One thing to note, however, is that it does not come with a light, making it quite difficult to see the display at night.

    Q&A: Does it display historical data?

    It is a good thing that it is capable of displaying historical data. The screen shows the highest and lowest levels that have been recorded in the past 24 hours. They are conveniently seen on the left side of the screen.

    Q&A: Can the hygrometer be calibrated?

    Yes, there is an option for calibration. A detailed guide is included in the user manual. By calibrating the hygrometer, you will be able to have it adjusted based on personal preferences.

    Best Outdoor Humidity Monitor

    #2 Dr. Meter Hygrometer Review

    This will be an excellent choice if you are searching for the best soil hygrometer to monitor the moisture level for your plants. It has ten numbers that will make it easy for you to read to moisture level, 1 being the lowest and 10 being the highest. It is also color-coded.
    The simplicity of this device is one of its best assets, making it a user-friendly choice. There is no need for electricity or battery. All that you need to do is to plug the probe into the soil, wait for a few minutes, and look at the screen to read the humidity level. It is also compact and portable.
    The hygrometer comes with an 8-inch metal probe that can penetrate deeply into the soil for a more accurate reading.

    Q&A: What is the meaning of the colors in the scale?

    The colors indicate the humidity level that is recorded from where it is used. If the tip is in the red section, this means that the environment is dry. If it is in the blue section, this means that it is wet. If it is in the green section, it is in the middle of dry and wet.

    Q&A: How do you clean the tip?

    The best way to clean the tip is to wipe it using paper towels or a clean cloth. Submerge in water for the soil traces to soften. Do not submerge the entire unit in water. Regular cleaning helps to improve its accuracy.

    Best Digital Hygrometer

    #3 ThermoPro TP63 Wireless Digital Hygrometer Review

    This digital hygrometer can be used both indoors and outdoors. It has professional-grade and rechargeable sensors that are guaranteed to provide accurate readings with a refresh rate of up to 50 seconds. The humidity range that it can detect is from 1 to 99%.
    One of the best features of this hygrometer is its ability to track conditions in up to four separate locations at a distance of 200 feet or approximately 60 meters.
    Even for outdoor use, this can promise durability and reliability. One of the reasons for this is the cold-resistant lithium-ion battery and tough construction. The sensor comes with a weather-proof case. It is also a good thing that it comes with a backlit display, making it easy to see the screen even at night.
    The display shows the humidity and temperature in large figures, making them easy to see. You can also switch from Fahrenheit and Celsius to monitor temperature. Plus, there are trend arrows that will let you know the changes that have been recorded.
    The standard warranty that is offered by the manufacturer is one year. However, if you register the hygrometer online after it is purchased, you can enjoy the extended three-year warranty at no additional cost.

    Q&A: How do you turn it off?

    A lot of users are confused about turning it off as there is no physical button that can be seen in front of the unit. To turn it off, you have to manually take off the battery by unscrewing the back cover.

    Q&A: Is there a need to calibrate this hygrometer?

    Right out of the box, it is already pre-calibrated, which means that it is easy to use. Unfortunately, there will be no option to have it calibrated on your own.

    Best Analog Hygrometer

    #4 Cigar Oasis Analog Hygrometer Review

    While this is made by a company that is known for hygrometers in the cigar industry, it can be used beyond such. At first look, it seems like a compass, but it is actually a handy device that manually measures the relative humidity in the surroundings.
    This model is known as the most accurate analog hygrometer currently available on the market, so you can be confident about the functionality that it can deliver.
    It comes with a secure magnetic backing, which will make it easy to install in the desired location. More so, when it comes to its construction, it is made of an aluminum case, which is good as it is lightweight and has the excellent ability to resist corrosion. The glass face is also fog and scratch-resistant, providing an assurance of its long-term functionality.

    Q&A: How do you calibrate this hygrometer?

    Calibration is important to maintain the accuracy of the hygrometer. There are many methods to do this, but one of the best is to put it in a sealed bag with a little air. Put the bag on the top of a dish that contains water and Kosher salt. Let it sit for about eight hours. After this, the dial should be at 75%. Otherwise, use a screw to turn it to 75%.

    Q&A: Can it be used outdoors?

    Unfortunately, while it has a rugged construction, it is only for indoor use. Mist can easily get inside and can make the readings inaccurate.

    Best Hygrometer for Grow Tent

    #5 Habor Digital Hygrometer Review

    With dimensions of only 2.3×1.8 inches, this is an ideal choice for a grow tent since it is not going to consume too much space. Despite the sleek body, however, you can expect that the accuracy will not be compromised in any way.
    The hygrometer comes with 24 vents, which are all sensitive and can provide accurate readings that refresh every ten seconds. The humidity range that it can measure is from 20% to 95%.
    There is also a comfort level indicator which will automatically let you know when the temperature or the humidity is already at a level that is uncomfortable.
    With the large LCD display, you will not have difficulty in reading the temperature or humidity level that is shown on the screen. It is also backlit, which makes it easy to view whether it is day or night. Even from a distance, the screen is easy to see.
    The best thing is perhaps the fact that it comes with a lifetime warranty from the manufacturer, which means that your satisfaction is guaranteed.

    Q&A: How is this hygrometer mounted?

    This is another model that offers several options for mounting. It comes with a magnet at the back, so you can easily attach it to a metal surface. It can also stand in an upright position and you can hang it on the wall.

    Q&A: What battery does it use?

    The hygrometer runs using CR2 batteries. It is already included upon purchase. On average, new batteries will last for approximately six months.

    Types of Hygrometers

    While there are many factors that are important to consider in your search for the best humidity meter, one that should be emphasized is the type that will work best for your needs. That being said, here are the options that will confront you:

    Analog Hygrometers

    Also known as a mechanical hygrometer, this is a traditional choice for measuring humidity. It is like a compass. There is a dial that points out to the number with the corresponding humidity level. They need regular tune-up or calibration. Otherwise, they can be easily prone to inaccuracy, especially after long-term use.

    Digital Hygrometers

    This is the more modern counterpart of the analog hygrometer. They come with a screen that automatically displays the humidity readings, refreshing at about every ten seconds. Most of the premium options can also double as a thermometer. They use modern sensors, which is why they are hard to beat when it comes to their accuracy.
    The hygrometers can also be classified on the basis of their applications. Aside from the greenhouse, they can also be used for monitoring humidity at home to ensure everyone’s comfort and for cigar humidors.

    Choosing the Best Humidity Sensor

    To make it easier to narrow down the options for a top-rated hygrometer, here are some of the most important things that you have to take into account:

    Accuracy

    The first thing that you have to note is the accuracy of the sensor. It is important to choose one with accuracy 1 to 5%. This means that you can expect that the average readings will be right.

    Ease of Use

    The hygrometer also needs to be user-friendly. When it is taken out of the box, there should be no calibration required. Minimal effort should be needed on your end when it comes to care and maintenance. It should also have a large display that is easy to read whether it is day or night.

    Multi-Functionality

    A lot of the hygrometers that you can find on the market are designed not only for reading humidity levels but also for detecting temperature. For the best bang for the buck, pick a model that acts both as a thermometer and hygrometer.

    Power Source

    From the models that have been mentioned in this guide, they are powered by a battery. Take note of the battery that is used. Lithium-ion batteries are good since they will last for a long time.

    Data Logging

    This is an important feature if you would like to view the historical humidity data that the device was able to record. This can be useful in terms of checking the trends or changes in the environmental conditions.

    Calibration

    Not all hygrometers will offer the option to be calibrated by the user. Most of the digital options no longer need to be calibrated. Nonetheless, if you are using a model that requires calibration, make sure to adjust it from time to time to ensure that the readings will remain accurate.

    Mounting Options

    For versatility, you should pick one that offers several mounting options. Most of them will come with a magnet at the back. There are also many that can be mounted on the wall or simply be placed on the top of a stable base.

    Durability

    This is especially important if you are buying a hygrometer that will be used for outdoor applications. It should be made of premium materials that could withstand the test of time. Inferior construction can allow mist to easily infiltrate and can make the readings unreliable.

    Wrap Up

    To ensure the best humidity and ideal environment for growing your plants, whether it is an indoor or outdoor environment, the right hygrometer will be able to extend a helping hand. The products that have been mentioned above can be a big help when it comes to making sure that the moisture level is just right based on the needs of the plant at a specific stage of growth.

  • DIY Grow Tent – How to build your own Grow Box

    When growing weed yourself you get one of the seed banks that ship to usa, canada and make sure that you create the optimum conditions for your plants to thrive. Many growers do this by creating their own DIY grow tent or grow box, while this might sound complicated it really is something you can do with a little bit of thought and effort no matter what your living quarters are like. In this article, we explore how you can build your own grow tent or grow box in just a few simple steps.

    Key requirements of a grow tent

    For marijuana to grow successfully indoors it needs to be within a controlled environment and good seeds – that is so that it receives the perfect conditions it needs. These are the conditions that you need to control:

    #1 Light

    The grow tent needs to be 100% lightproof as you want to be able to control the light received by your plants. Marijuana plants need 12 hours of darkness and 12 hours of light so a lightproof space is essential.
    To create the perfect lightproof space for your plants you will need:
    – LED grow light: for creating the correct light setting for your plants.
    – Mylar: this magic material is a highly reflective film which helps to spread the benefits of your LED grow light inside the tent and also blocks out any external light from getting inside the tent.

    #2 Airtight

    An airtight tent or box is essential both to be able to control the environment and temperature of the plants, but also to keep the smell of the plants contained. It can be pretty potent when growing weed so keeping that stench contained is essential. Making the space airtight will also help to keep out pests that might pray on your plants.
    To create the perfect airtight space for your plants you will need:
    – Solid material for the frame: usually PVC pipes are a good sturdy choice.
    – Mylar: again, using Mylar will help to create a strong and robust grow tent.
    – Duct tape: to help everything get secured into place and ensure any gaps are filled.

    #3 Temperature

    In order to succeed cannabis plants need to be in the correct climate. While we can’t all live in the optimum setting for growing weed this environment can be mimicked in the grow tent or box. Marijuana plants need to grow at a temperature of around 20 – 25 degrees Celsius when they are cuttings and seedlings, and around 28 degrees Celsius when the plants are older, not dipping to any lower than 18 degrees Celsius at night.
    To create and maintain the optimum temperature for your plants you will need:
    – Ventilator: investing in a good ventilator will help to keep your plants at the correct temperature as you can set the desired level and it will maintain this temperature throughout.

    #4 Moisture

    Any grower will tell you that getting the correct humidity in your grow tent is essential for the success of your plants. Cannabis plants need different levels of humidity during specific growth periods so you might want to think about investing in an air humidifier – depending on the size of the grow tent you are planning on making.
    To create the correct level of humidity for your plants you will need:
    – Temperature/humidity sensor: you can keep an eye on the humidity in your grow tent by investing in a temperature and humidity sensor – this will let you know if you need to take steps to alter the humidity levels if they are too high or low.
    – Air humidifier: with an air humidifier you can set the level of moisture required in the grow tent and then let the machine do the work. A great way of ensuring your plants are in the optimum environment for whatever growth stage they are at.

    Image Product Link Price
    NAVAdeal Silver Reflective Mylar Film- 82 x 47 Inch Set of 2- Garden Greenhouse Covering Foil Sheets, Highly Reflective, Effectively Increase Plants Growth, 100% Environmentally Safe from $
    VIVOSUN 4 Inch Prefilter for 4inch Carbon Filter from $
    E26 Socket,Ceramic Standard Medimun Screw Socket E26 E27 Bulb Lamp Holder,E26 Light Socket with Wire Lead for Halogen Incandescent LED Light Bulb (4-Pack) from $
    Philips T2 Spiral CFL Light Bulb: 6500K, 100-Watt, Daylight, E26 Medium Screw Base, 4 Pack from $
    iPower GLDUCT4X8C 4 inch 8 feet Non-Insulated Flex Air Aluminum Foil Ducting Dryer Vent Hose for HVAC Ventilation with 2 Clamps from $
    Hydrofarm Active Aqua Air Pump, 1 Outlet, 2W, 3.2 L/min $$
    iPower 4 Inch 8 Feet Non-Insulated Flex Air Aluminum Ducting Dryer Vent Hose for HVAC Ventilation, 2 Pack, 4 Clamps included $$
    Simple Deluxe HIWKLTCLAMPLIGHTSX2 2-Pack Clamp Lamp Light with 5.5 Inch Aluminum Reflector up to 60 Watt E26 (no Bulb Included) 6 Feet 18/2 SPT-2 Cord UL Listed $$
    Sylvania CFL 2700K 100W Replacement Bulbs (Pack of 6, Model X28161LV) $$
    KINGSO E26 E27 Light Sockets, 6 Pack Edison Retro Lamp Holder for DIY Projects 200℃ Heat Resistant No Fire Hazard, E26 E27 Medium Screw Light Holder $$
    VIVOSUN Digital Indoor Thermometer & Hygrometer with Humidity Guage (2 Pack), Accurate Temperature Humidity Monitor Meter for Home, Office, Greenhouse, Indoor Garden (Button Battery Included) $$
    Simple Deluxe HIWKLTCLAMPLIGHTMX2 2-Pack Clamp Lamp Light with 8.5 Inch Aluminum Reflector up to 150 Watt E26/E27 Socket (no Bulb Included) 6 Feet 18/2 SPT-2 Cord, 150W, Silver $$
    50W Led Grow Light Bulb, Led Plant Bulb Full Spectrum Grow Lights for Indoor Plants Vegetables and Seedlings, LED Plant Light Bulb for Hydroponics Indoor Garden Greenhouse and Organic Soil (E26 78LED $$
    LORELL 6inch Clip-On Fan,2-Speed,5inch Cord,8inchx6inchx9-1/2inch,White $$
    VIVOSUN Clamp Lamp Light with Detachable 8.5 Inch Aluminum Reflector up to 150 Watt E26 Socket (No Bulb Included), 6 Feet Cord, UL Listed, Pack of 2 $$
    Sylvania 13W CFL T2 Spiral Light Bulb, 60W Equivalent, 850 Lumens, 2700K Soft White, Non-Dimmable (8-Pack) $$$
    iPower GLFANXBOOSTER6-a 6 Inch 240 CFM Inline Duct Vent Blower Booster Fan for HVAC Exhaust and Intake 5.5inch Grounded Power Cord, Low Noise, 6inch, Silver $$$
    Philips 823031 CFL Light Bulb 13W T2 Twister Daylight 6500K, 60 Watt Equivalent; 8-Pack $$$
    Grow tent flexible trellis net 2 pack , one size fits all. $$$
    Outcrop Innovations 100w Indoor LED Grow Light Bulb for Growing Plants, Vegetables, and Flowers – 150 Individual LEDs Full Spectrum PAR with E27 Base for Hydroponics Greenhouses Indoor Gardening $$$
    SANSI 24W LED Plant Light Bulb Full Spectrum LED Grow Light Plant Lights for Indoor Plants, E26 Grow Light Bulb for Hydroponics Greenhouse Houseplants Vegetable Tobacco, Sunlight White UV IR $$$

    How to Build Your Own Grow Tent

    #1 Make the Frame

    Using your PVC piping construct your grow tent frame in the size that you need – bearing in mind that it needs to fit in your ventilator and be able to hold your LED light/s.
    Check out this YouTube video on constructing the perfect frame using PVC piping:

    #2 Construct the Tent

    Now you have the frame in place you can now use your Mylar to create the tent itself. This needs to be applied with the reflective white side on the inside so that it can keep the light in and block external light out. You can secure the Mylar to the frame using a good helping of duct tape. Make sure you leave just one opening to allow you to get in and out of the tent!
    Here are some top tips on securing the Mylar (or whatever material you choose to use) to the frame:

    #3 Set-up the ventilation system

    Whatever system you opt to go for when ventilating your tent you need to ensure that when you build your grow tent you allow for the system to feed in and out. For more tips on how to set up a ventilation system in your grow tent you can check out this article.

    #4 Set-up your LED lights

    So that your plants receive the necessary light, you can now attach your LED lights to the PVC piping. You can either do this by attaching it to the piping itself, or your LED light might have the capacity to hang from the PVC framework.

    How to Build a Grow Tent for under $2

    If you are on a budget check out this super easy and cheap way of making a grow tent for under $2!

    Conclusion

    Setting up your own grow tent couldn’t be easier, and with a few simple materials, you can create the optimum environment for your marijuana plants. It’s a great way to start in the world of indoor growing and also won’t break the bank as most of the materials can be bought from your local hardware store. Good luck!

    Homemade grow tent in Toilet


    Homemade grow box ideas

    #1 Homemade grow box ideas by Caster Caravel

    #2 Homemade grow box ideas

    #3 Homemade grow box ideas

    #4 Homemade grow box ideas

    #5 Homemade grow box ideas

    #6 Homemade grow box ideas

  • Fimming vs Topping: Which is Better?

    Fimming and topping cannabis plants are both cutting methods used by cannabis growers to improve the shape of the plant (so they can better access light), induce the growth of more colas (flowering sites) and, ultimately, harvest bigger yields. But which is the best method for training your plants? Here we will go over the pros and cons of each technique to help you make your decision.

    Topping is better for:

    • Beginners
    • Controlling the shape of your plant
    • Prettier plants

    Fimming is better for:

    • Small-scale growers
    • Producing more colas
    • Causing less stress to your plants

    What is ‘Fimming’ and ‘Topping’?

    Both of these techniques are essentially methods of pruning your cannabis plants in order to get bushier plants and better results come harvest time. Topping and fimming are known as ‘high-stress training techniques’ (HST) and are often used in indoor growing as a means of helping plants make the most of the light source.
    ‘Topping’ refers to the technique of cutting off the top of the plant in between the nodes. On the other hand, ‘Fimming’ is the process of removing new growths but avoiding cutting between the nodes. While pretty similar, these techniques do produce slightly different effects and often growers have a preferred technique.

    What are the Pros and Cons of Topping?

    Topping is the recommended HST for those that are beginners to growing as it is very easy to undertake and will give you some great results. All you need to do is wait until your plant has grown a minimum of 3 nodes and then cut off the newest node – cutting just above where the leaves of the node underneath are. This will lead to 2 colas growing in the place of the 1 you cut off – giving you 2 for the price of 1!
    This is a quick and easy technique which will not only increase the number of colas you produce but also help your plant to grow bushier and healthier. Topping will also help to control the shape of your plants, making them less like a Christmas tree and more able to be exposed to more light – this is especially important if you are growing indoors to make the most of your grow lights.
    This is a pretty successful technique but the one con of topping is that it might take a bit of time to work up the courage to take a scissor to your plants –  but it will be worth it for those bigger yields.

    What are the Pros and Cons of Fimming?

    Fimming is pretty similar to topping but this technique will produce even more colas so is a good choice if you just have a couple of plants growing in order to achieve maximum productivity. It is also pretty easy and hard to get wrong so, while a technique favored by more advanced growers, you can still try it out as a beginner. Simply wait until you have at least 3 nodes on your plant and then pinch the leaves of the most recent node with your finger and thumb.
    After a few weeks of the fimming taking place, you will be blessed with at least 4 new colas and it will help your plant to grow bushier. However, fimming it isn’t as effective as topping at reducing the height of your plants and, as it isn’t as ‘stressful’ to plants as topping, it might not always achieve the desired effect.

    The Best Pruning Tools for Cannabis

    You don’t need much in terms of equipment for topping and fimming. For fimming, you simply need your fingertips but for topping it is a good idea to get a pair of good quality pruning tools so that you can be assured of a quick, clean snip to your precious plants. Here we review some of the best.

    #1 Best High Quality Pruning Shears: Professional Bypass Pruner & Garden Hand Tool

    These pruners from Zavaland are designed to ensure comfort and longevity. The steel blades are incredibly sharp and are able to maintain their sharpness so that you can use these for topping and both wet and dry trimming – so you’ve got all your pruning needs covered. They even come with some free gardening gloves included.
    If comfort is what you are looking for, or if you are a sufferer of arthritis or carpal tunnel syndrome then look no further than these pruners. They have been designed especially to deliver maximum comfort thanks to their ergonomic handles that fit perfectly in the palm of your hand. There is also a lock fitted so you can keep these out of harm’s way when you’re not using them. The only downside of this product is that they are a little pricey, but for that, you are getting an extremely high-quality product.
    #Topping #Cannabis #Pruning #Bud_pruner #Precision #Steel

    #2 Best Precision Pruners for Cannabis Plants: Felco F-310 Trimming Snips

    For the ultimate precision pruners, these state of the art Picking and Trimming Snips from Felco are the ones for you. Made of only the best materials you are sure to be using these snips for all your cannabis pruning needs for years to come. Fitted with stainless steel shears they have been carefully designed with smaller, more fragile plants in mind. Their fine cutting head is built for ultimate precision – giving you more confidence when topping your nodes.
    Your comfort has also been considered. These pruners are fitted with ergonomic handles so they fit perfectly in your hands, and there is also a soft spring action so the snips return to their original position once you’ve made the cut. As with all Felco products the parts are replaceable, so you don’t need to buy a whole new product when the time comes. A top quality pair of pruners that will look after your cannabis plants well.
    #Topping #Cannabis #Pruning #Bud_pruner #Precision #Steel

    #3 Best Value Pruning Scissors for Cannabis Plants: Tabor Tools K77

    This set of pruning shears from Tabor Tools is a great value option if you have a lower budget. Despite the low price, they are still made out of top quality materials – this pair has stainless steel blades but if you want to go even cheaper you can opt for carbon steel blades. The blades themselves are nice and long so great for hard to reach places and expert precision.
    These shears have been expertly designed for quick snips on small to medium-sized plants so are perfect for topping your cannabis plants. With comfortable handles and an automatic spring which re-opens the shears after each cut, you can use these shears for a long time without becoming fatigued. There is also a safety latch so you can close these shears when you’re not using them to avoid any accidents. This product has all the key features you need for successful cannabis pruning – so get your hands on a pair of these!
    #Cannabis_pruning #Quality_pruners #Bud_pruning #Topping #Stainless_steel

    #4 Best Smooth Cut Pruning Shears for Cannabis Plants: Gardenite Ultra Snip 6.7 Inch

    Specially designed for precision pruning of small plants, these pruning shears from Gardenite are ideal for all of your cannabis pruning needs. These would be a great choice for both wet and dry trimming and topping your plants. Their precision grade stainless steel blades will provide a smooth and quick cut – making cutting your precious plans as painless as possible.
    That’s not all, the chromed zinc handles are great at keeping your hand comfortable, and the carbon steel spring makes sure that the blades re-open after you make each cut so you don’t have to repeatedly do this, thereby reducing strain on your hand. There is also a safety lock to make sure these sharp shears don’t cause any unnecessary damage. A great pair of pruning shears for your plants.
    #Cannabis_pruning #Quality_pruners #Bud_pruning #Topping #Stainless_steel

    Conclusion

    Deciding between high-stress training techniques for your cannabis plants isn’t easy. Generally speaking, topping is the best technique if you are wanting to manipulate the shape of your plants so that they can absorb more light, and fimming is better for producing more colas and a quicker recovery time for your plants.
    The good news is that not a lot can go wrong with either topping or fimming so why not experiment and give them both a try to see what works best for you? Both are great for increasing yields so we recommend that you definitely try a high-stress training technique as part of your growing routine.

  • The 12 Best Propagation Kit for Growing Weed ( 2022Reviews)

    When it comes to the cultivation of marijuana, one of the most important is to have the best propagation kit. It exists in many forms and styles, but there is a common goal – to help you get started easily on the right foot. The propagation kit will ensure that it won’t take long before the seeds will sprout and will be instrumental in the overall health of your plant.
    It should be pointed out, however, that not all propagation kits can deliver the same outcomes. This post will help to narrow down the options that are available, lessening the frustration of growing cannabis on your own. Whether you are a novice or an expert in weed cultivation, these kits will hold a lot of promise.

    Top 10 Propagation Kit for Growing Weed

    #1 (Editors’ Choice) Super Sprouter Deluxe

    For a complete starter kit for getting your seeds and cuttings going then look no further than this Deluxe Propagation Kit from Super Sprouter. Getting the environment just right for propagation can be really tricky, so investing in a set which can create the perfect conditions for you is a worthwhile purchase for any budding cannabis grower.
    This set is a little cheaper than the Premium Propagation Kit from Super Sprouter as it doesn’t include the heat mat, but it still gives you the dome with built-in light track channels, the grow light, tray, and instruction booklet to get you well on your way. It also has some vents so that you can control the humidity inside. From the moment you receive this product you can get to work and watch your seeds and cuttings come to life.
    #Propagation_kit #Seeds #Cuttings #Propagation #Germination_kit

    #2 (Best Hot House for Seedlings) Hydrofarm CK64060

    Cannabis seeds and cuttings need a very specific environment to get started in, with the right amount of heat, light, and humidity. These conditions can be difficult to control due to the nature of the weather and the changing environment that we live in. Fortunately, this problem is easily remedied thanks to such products as this Hot House from Hydrofarm.
    This simple set up can handle up to 72 seeds at the same time, and with its 7.5-inch dome, it can handle those seeds that get off to a good start and grow tall. There is a watertight base tray and an all-important heat mat which will keep your seedlings cozy and protected. The only con of this product is that it doesn’t include a grow light, but for the price, you can’t really complain.
    #Heat_mat #Hot_house #Propagation_kit #Seedlings #Germination_kit

    #3 (Best Basic Propagation Kit) EarlyGrow 70738

    If you don’t want any artificial methods interfering with your propagation, but you want to have a protected environment for your seeds or cuttings then this domed propagator from Early Grow is a cheap and efficient choice. It measures 15 x 9 x 7 inches and includes a bottom tray and domed lid with two vents in it so that you can control the humidity.
    The pros of this product are numerous, it can be used both indoor and outdoor, it will protect your precious seedlings from insects and protect them from the weather. It is also incredibly durable and the big size of the dome means that any flourishing seedlings won’t be restricted. Once the lid is on it can be a little tricky to remove so make sure you take extra care when opening.
    #Propagator_kit #Seedlings #Protection #Cuttings #Germination

    #4 (Best Germination Trays) KORAM 10-Pack Seed

    If you’re looking to get started with growing your own cannabis, then one of the easiest ways to give them the best start is in a seed starter tray. These pots from Koram have a water reservoir that ensures you can maintain even moisture to your seed and plant. They are also designed to improve humidity levels and maintain appropriate and consistent soil temperatures. The flexible containers also make it easy to transfer your plant when the time comes to move it into a bigger home.
    There are many pros to this simple but excellent seed tray, particularly; the excellent drainage which encourages rapid growth; the easy transferability once developed; the excellent humidity lid that also maintains consistent temperatures; and the cheapness, all-in-all you get 10 complete 6-cell trays. One con is that they are a little easy to break at times when transferring your plants, but with 10 to play with, plenty will be reusable.
    #Seedling_Tray #Germination #Seedlings #Clones #Cannabis_Seeds

    #5 (Best Rooter Tray) General Hydroponics Rapid Rooter

    If you’re after a seedling tray that comes complete with soil and nutrients to give your cannabis seeds the best start in life, then this great rapid rooter tray from General Hydroponics will be right up your street. Each tray cell is made from plant-based polymers and comes packed full of organic composted material. There are also doused in micro-nutrients that your seedlings will love and are designed to keep your seedlings moist, temperate and oxygenated.
    The major benefits of this product are: that you get everything in one pack to get your seeds started; the nutrients encourage rapid and healthy growth; the pot design provides the perfect climate for strong growth, and; you have over 50 tray cells to play with. On the other hand, as this tray is all in one, it can make it slightly more tricky to manoeuvrer your plants out of the tray once they are ready and it is is more costly than just getting the trays.
    #Rooter_Tray #Seedling_Tray #Seedlings #Clones #Nutrients

    #6 (Best Starter Trays) 9GreenBox – Seedling Starter Trays

    If you have a huge grow space and have a mega growing project lined up, then this multi-pack of 24 trays with 144 cells will be a great cheap option for you to get all seeds planted at once. The included planted labels can help you keep track of which variety you’ve started off in each tray too! These excellent cells are designed to transmit room temperature evenly through the soil, whilst the drain holes at the bottom of each cell ensure your roots will remain oxygenated.
    The major pros of these trays are that; the cells are pliable making it easy to wiggle out seedlings without damaging their roots; they are cheap but plentiful; they are specially designed for optimum temperature for seedlings and provide excellent drainage, and; are surprisingly sturdy. On the other hand, they are not quite as well designed as the Koram starter trays on this list and can be a little wobbly.
    #Starter_Trays #Seedlings #Clones #Germination #Cannabis_Seeds

    #7 (Best Propagation Station) SeedFactor Germination Station Heat Mat

    This propagation station exists in the form of a heat mat. With the heat that the mat generates, this can ensure the ideal temperature that can trigger the growth of the plant, which will be anywhere from 70 to 85 degrees Fahrenheit.
    The mat comes with a waterproof construction, which is why there is no need to worry that it will get wet. You can water the plant without being concerned that the water will infiltrate and damage the mat. Aside from being fully-waterproof, the cover also comes with a multi-layer construction, making it possible to withstand the test of time.
    Depending on how many plants you have, there are four sizes that are available. The smallest has an area of 3.5×21 inches while the largest is 48×20 inches.
    To add, the mat meets the MET standards, providing an assurance of its safety. It is fire-proof and waterproof. It is also energy-efficient.

    #8 (Best Propagation Kit with Light) Super Sprouter Premium

    This propagation kit might be small, but do not underestimate its ability to help your seeds germinate. It comes with a vented dome to accommodate the growth of the plant and to provide air circulation.
    One of the highlights of this propagation kit is the presence of a T5 light. The latter mimics the natural heat of the sun, which is important to trigger photosynthetic activity. The light output is not too extreme, making sure that the plants will not end up being burnt.
    If you are a newbie, there is also no need for you to be worried. It comes with the Art of Propagation booklet, which will provide you with insights on everything that you have to know to start on the right foot.
    Meanwhile, similar to the other options that are mentioned in this post, it also comes with a heated mat to regulate the temperature for the right internal environment to trigger the germination of seeds.

    #9 (Best Germination Kit with Light) Yield Lab Plastic

    This is another top option when searching for the best seed starter kit with grow light. To be specific, the kit is inclusive of 24-LED all-blue light. The light has a broad spectrum of 430 to 460nm, which is specifically designed to trigger the vegetative growth of the plant. Aside from the light, it also has a propagation tray, humidity dome, heat mat, and a thermostat controller.
    It is also a good thing that it comes with a clear plastic dome. The latter will make it easy to monitor the growth of the plants in the absence of having to lift the cover, making it easy to maintain the ideal environment for the growth of the plant. The dome comes with two vents on the top, which will come handy if there is a need for ventilation.

    #10 (Best Cloning Propagation Kit) PowerGrow Systems Deluxe

    If you are on the lookout for the best cloning kits hydroponics, this is one of the best choices worth considering. The system is complete with almost anything that you will need to get started. Among others, one of the highlights of this product is the 3.5-gallon bucket with a cover and 21 cloning sites. The cloning sites are made of reusable neoprene foam collars where the cuttings will be placed.
    The kit is also inclusive of five spray nozzles with 360-degree coverage, making sure that it will be able to provide the water that the plant needs.
    More so, it comes with a heavy-duty pump that is capable of pumping up to 160 gallons per hour. There is also an upgraded suction to improve its reliability.
    To complete the cloning kit, you will also receive a small jar of cloning gel and detailed instructions on how you can proceed.

    #11 (Best Propagation Dome Tray) Vivosun Germination Kit

    Anyone who has been growing weed for a long time now would surely recognize this brand as it is one of the most trusted on the market. This high-dome propagator comes with a single vent on the top. You have the option to open or close the vent depending on the condition that is ideal for that plant in the tray.
    The digital thermostat is another thing that gives it an advantage over many others you can find in the competitive landscape. The thermostat comes with a display that makes it easy to monitor the temperature. There are also strategically positioned buttons that will allow you to effortlessly set the temperature based on the requirements of the plant. It maintains the ideal temperature range, which is from 68 to 108 degrees Fahrenheit.
    Meanwhile, with the included heat mat, you can be confident that the plants will receive the right level of heat, even when it is indoors and cannot be reached by the sun.

    #12 (Best Small Propagation Kit) SunBlaster Mini Greenhouse Kit

    When it comes to starting out having a little bit of extra help to grow seeds or cuttings is a very wise decision to give your cannabis plants the best start in life. You can do this by investing in a propagation kit which is a bit like a mini greenhouse for your marijuana plants. This premium kit from SunBlaster ticks all of the boxes and comes with everything you need to get started.
    Included in this kit is the dome to keep your plants cozy, a fluorescent grow light, a tray and a detailed instruction booklet on the art of propagation. With this set up you can create the perfect environment for your seeds to flourish and let the propagation kit do the hard work. The only con of this product is the size, as it is on the small size, it is best for use on smaller projects.
    #Propagation_kit #Seeds #Cuttings #Propagation #Germination_kit

    How to Make your Own Humidity Dome

    When it comes to a propagation kit, especially one that comes with a dome, one of the most important is to have the right level of humidity, making sure that the environment is ideal for the growth of the plant. With this, if you are interested in a humidity dome DIY, here are the simple steps that you have to follow:

    1. The first thing that you need is to have two identical Tupperware. Put the cover of the first Tupperware and place the other one on the top with the open part being at the bottom.
    2. Use a glue gun to seal the Tupperware on the top to the lid. Make sure that the glue does not touch the bottom Tupperware.
    3. Remove the Tupperware on the top. At this point, the lid should already be glued into it. Cut the edge of the lid to remove the inner part.
    4. For the other Tupperware, tape the edges. Spray it with a black paint and take off the tape.
    5. Mist the bottom and put the plants inside. Put the other Tupperware on the top, which will now act as a dome. Open it every now and then depending on the ventilation that is needed to maintain the right level of humidity.

    Tips and Tricks for Successful Propagation

    Especially for beginners, a lot can be intimidated by the use of a propagation kit. While the manufacturer may provide detailed instructions, this is not enough. With this, here are some hacks and tips that many of you will find useful.
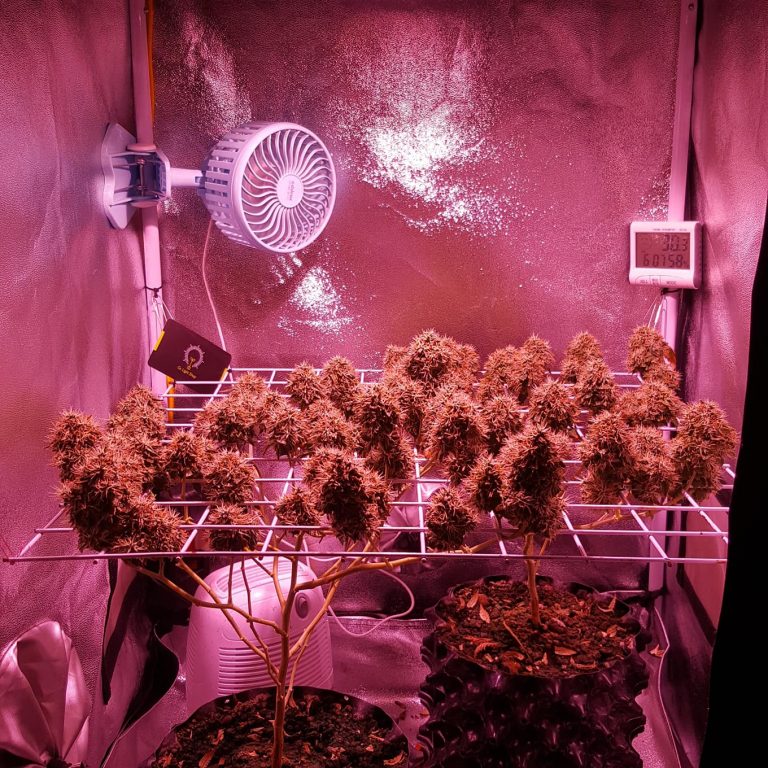
    • Take note that there are generally two ways by which you might want to propagate marijuana – clones or seeds. Seeds will take quite some time because you have to start from scratch. Clones, on the other hand, can be quicker, but this is a meticulous process that requires your attention for success.
    • You also need to know the time for seed germination. More often than not, in the case of seeds, within 36 to 96 hours, the root tip will pop out. The root hairs will be visible within two weeks and will grow within 21 to 30 days.
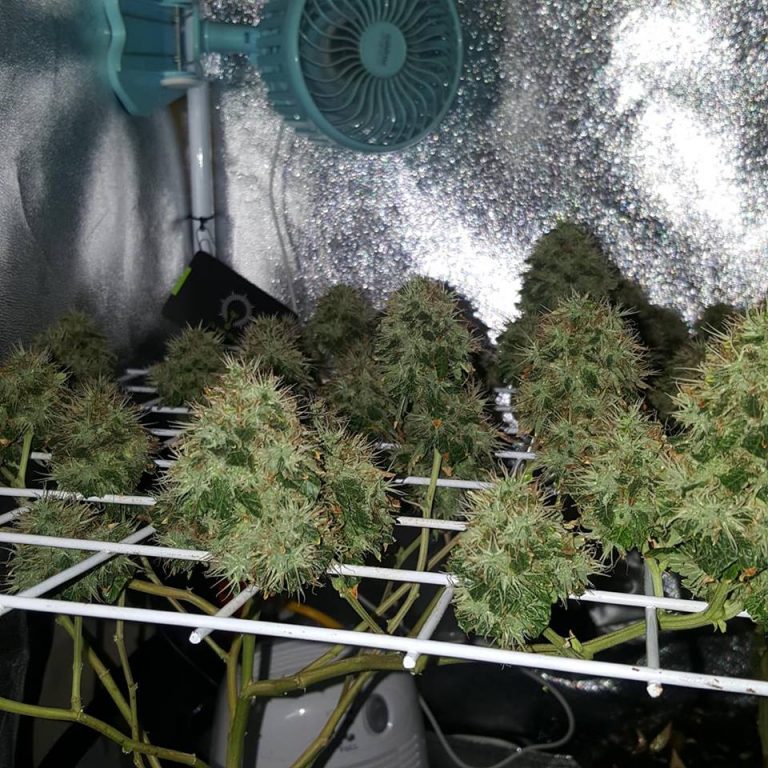
    • To prompt the seeds to germinate, one of the most important things that you have to do is to soak it in water. The penetration of moisture will help in activating the dominant hormones. This also softens the seed coat and makes it easier for the root hairs to grow.
    • The right temperature will also be crucial in propagation. This is the reason why propagation kits include a heat mat. Generally speaking, weed will grow best when the temperature range is from 70 to 90 degrees Fahrenheit. If the temperature is too low, the germination can be delayed. If it is too high, on the other hand, seed chemistry can be affected and the quality of the marijuana will most likely be compromised.
    • Pay attention to the health of the mother plant. If you start with an unhealthy seed or clone, expect that the outcomes will be equally frustrating. Buy seeds only from trusted sellers.
    • Especially for cloning, make sure that you use only sterile equipment. Using dirty scissors can cause pathogens to transfer to the healthy plant and will make it suffer.

    Wrap Up

    Indeed, the best plant propagation kits will be important for any weed cultivator. It helps to make the process of growing marijuana a lot easier, increasing the likelihood that the seeds will germinate successfully. Keep an eye on the products that have been mentioned above and it will be easier to succeed in propagation!

  • Grow shops near me – What to ask at a grow shop?

    As barriers to buying weed are rapidly being removed, now is one of the best times in history to get yourself down your local grow shop. Fortunately, with more and more states relaxing the purchase of cannabis for personal use, most US citizens will have a grow shop right on their doorstep. Check out our ‘grow shops near me’ tool to find your nearest and soon to be dearest shop for all your cannabis needs.
    To help you out, here are the best seed banks that work in any country.

    What is a grow shop?

    A grow shop simply refers to a retail store selling the equipment and supplies that make growing indoor and outdoor plants possible, whether that’s vegetables, herbs, or, as is more likely, ‘the’ herb! You’ll find all sorts of wonders here including LED lighting, hydroponic systems, grow tents, plant pots, nutrients, soil, propagation tools, and more. They are great places to get advice on how to get started with horticulture and hydroponic growing.
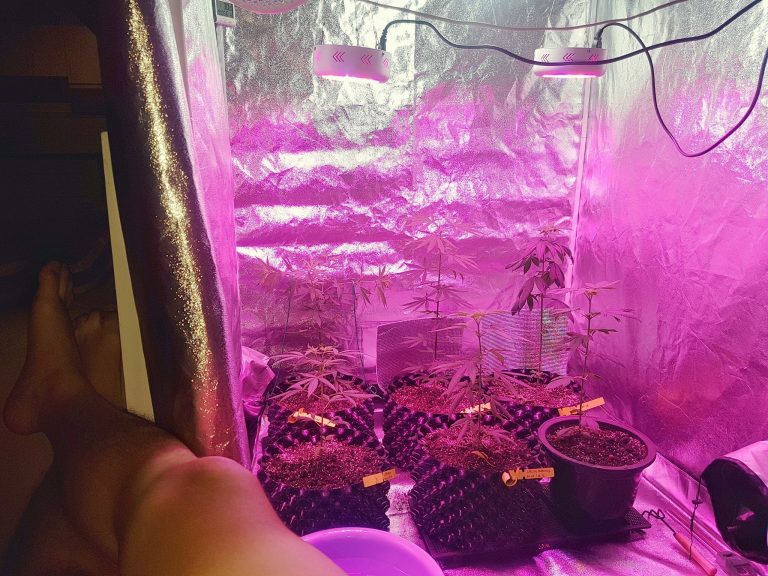
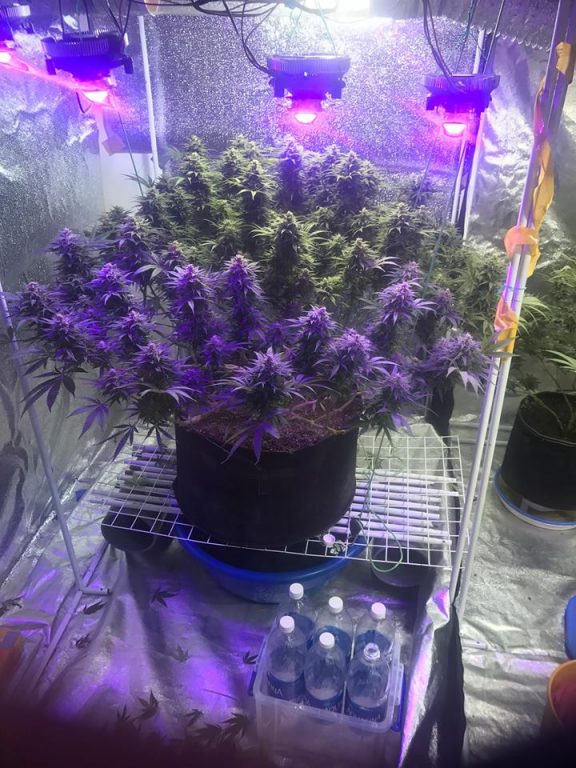
    What to ask at a grow shop?

    Grow shops are great places to get everything you need to start growing your own cannabis under one roof. However, it’s easy to walk into a place and not have the right questions to hand. Here are 5 top tips for the sorts of questions you should ask to make sure you leave with a great set-up that is perfect for the weed you love to grow.

    #1 What growing medium should I use for an indoor grow?

    Ultimately, the answer to this question comes down to personal choice but talking to someone face-to-face who has a passion one way or another can be both helpful and inspiring. Growing in soil requires less nutrient support and adds to the flavor of your weed. Hydroponic systems are more scalable and give you greater control over the final product. Pick the one that suits your needs and budget the best after a helpful chinwag!

    #2 What lighting system will I need?

    This is a key question for indoor growers! Light determines your plants’ grow cycles and their overall health and eventual yields so you want to get this choice right. The most common lighting types are LED, Fluorescent, metal halide and high-pressure sodium grow lights. They each have different benefits that a worth asking about. It may even be worth having a mixture.

    #3 Will I need a water treatment system?

    Finding information online is a great place to start but for real local knowledge going instore is your best bet. Here you’ll be able to get details on the local water quality and find out if investing in a water treatment system is necessary. It’s better to know this before getting halfway through a grow phase and seeing your plants’ growth turn to dust.

    #4 What ventilation system will I need?

    If you’re growing indoors ventilation is going to be a key consideration. When plants grow naturally they grow in a gentle breeze and warm and humid climates. Fortunately, there is plenty of kit that can help you recreate these conditions indoors and improve your yields. The perfect temperature to aim for is between 75 and 85 degrees Fahrenheit.

    #5 What is the best marijuana strain for indoor growth?

    To answer this you also need to ask what result you are looking for. Are you growing for medical use or is it recreational? Do you want a body stoning or a mental high? How quickly do you want to harvest? How big is your grow space? Once you’ve asked these you’ll probably find you want:

    1. A Sativa strain if you have a tall grow space, in a hot climate and want an upbeat high,
    2. An Indica strain if you want short plants capable of dealing with the cold with dense buds and a heavy stone, and
    3. Auto-flowering of either strain type if you want the quickest and easiest growth and the smallest plants.

    Best products to look out for 2022

    If you don’t fancy heading to the store or want an idea of some of the best products to grow cannabis with, here’s a few of our favorites that can also be found online for the more discrete buyer.

    #1 Best Soil to grow Cannabis Indoors: FoxFarm’s FX14053

    FoxFarm has been making high-quality soil with cannabis growers in mind for nearly 30 years. All their products are greenhouse tested ensuring they are top quality and consistently perform in the same way. This batch is made with everything you need to get started in one bag and full of nutrients and minerals from the broken down guano, earthworm castings and fish and crab meal inside. This soil also helps to keep unwanted insects at bay, is great value, and is designed for plants grown in containers.
    #Soil #Cannabis #Indoor_Growing #Yields #Nutrients

    #2 Best Coco Coir for Hydroponic Setups: Triumph Plant Coco Coir Bricks

    If you’re looking for a scalable growing operation or simply want extra control over how your plants grow, then hydroponic systems are the way to go. This is some of the best quality coco-coir out there on the market and is easy to hydrate and manipulate into any setup. The great thing about coco coir is that it is truly environmentally friendly and 100% recyclable. These bricks are also odorless and will provide potted plants with great drainage and water retention all in one go.
    #Coco_Coir #Marijuana #Hydroponics #Yields #Cannabis_Indoors

    #3 Best LED Lights for Cannabis: MAXSISUN Timer Control 300W LED Grow Light

    LED lights are a great choice for someone on a budget and are nice and easy to set up. This one is literally plug in and play and even comes with a handy remote control and built-in timer control system. One of the best things about this light is how cool it runs, making it easier to keep your grow space at an ideal temperature. The built-in reflector also helps to increase light penetration during the flowering stage to improve yields. The 2-year warranty isn’t half bad either!
    # LED #LED_Lights #Yields #Weed_Lights #Timer

    #4 Best Lights for Cannabis Clones: T5 Grow Light (4ft 4lamps) DL844s

    If you’re an experienced grower and have started cloning some of your tastiest and biggest yielding plants, then you might be interested in investing in a grow light that clones love. This fluorescent grow light is cheap, uses very little electricity, and is designed not to burn tender clones even when placed close to them. However, this should not be used for the vegetative and flowering stages as it will lead to smaller yields. Switch to High Intensity Diode lighting at the vegetative growth stage for the best results.
    #Flourescent_Lights #CFL_Bulbs #Purple_White_Spectrum =Seedlings #Clones

    #5 Best Lights for Bigger Buds: Hydroplanet™ Grow Light Fixture HPS 150W

    High-quality HPS and Metal Halide grow lights can see your yields increase up to 4 times in comparison to fluorescent lights so are well worth checking out. This light is great value, easy to set up (it is plug and play) and comes with a built-in reflective aluminum hood to uniformly distribute light and to let it penetrate hard to reach areas. As with all HPS lights you will need to have a good ventilation system and an exhaust fan installed to make sure not to burn your plants.

    Best Ventilation System for Growing Cannabis Indoors:

    The key ingredients of a cannabis ventilation system are an intake fan and an exhaust fan. The reason for this is because it helps keep insects at bay whilst also maintaining the sort of humid climate your plants will thrive in.

    #1 Intake fan: TerraBloom’s 4″ Silent Inline Duct Booster Fan

    This fan runs nice and quietly and ensures you can exchange the air in your grow space every 1-2 minutes. This will enable you to maintain optimal humidity levels and the right temperature. This is particularly good to use in a grow tent. Once this is installed and running correctly you’ll notice your grow tent walls sucking inward. Install it in the bottom corner of your grow tent for the best results.

    #2 Exhaust Fan: TerraBloom’s 6″ Inline Fan – 240 CFM

    Your exhaust fan should ideally be connected to an external vent or window and should be the right size for your grow space. This fan comes in a variety of sizes and can also be used as an intake fan. It removes odor from your grow space without pumping it all back out the other side helping to make your setup nice and stealthy.
    #Intake_Fan #Exhaust+__Fan #Ventilation #Cannabis #Yields

    #3 Best Water Treatment System for Growing Cannabis Indoors: APEC Top Tier 5-Stage

    Whilst cannabis can grow in unfiltered water, it’s a good idea to filter the water you feed your plants, especially in a hydroponic setup. There is a large body of evidence showing that chlorine, chloramine, and fluoride, all found in tap water, have a negative effect on cannabis growth, particularly during the vegetative and flowering stages. This reverse osmosis filter is not cheap but will ensure you provide your plants with the purest quality water to keep them healthy.
    #Water_Filter #Hydro_Filter #Hydroponics #Yields#Healthy_Cannabis

    Conclusion

    With the law increasingly on the side of cannabis growers, whether that is for medical use or just for the sheer pleasure of the smoke, now is as good a time as any to get yourself into your nearest grow shop and start growing your favorite cannabis strains.